Note: In an attempt to be OSCP friendly, NONE of my write ups will utilize Metasploit. Zero. Zip. Tell your friends.
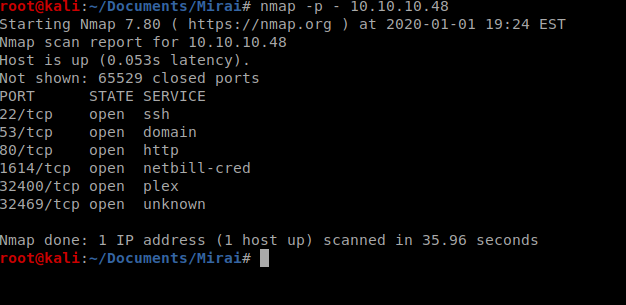
We’ll start with a scan of all open ports with the following command: nmap -p – 10.10.10.48
Next, we’ll enumerate versions and see if there’s any safe scripts available for those enumerated service versions: nmap -sC -sV -p 22,53,80,1614,32400,32469 10.10.10.48
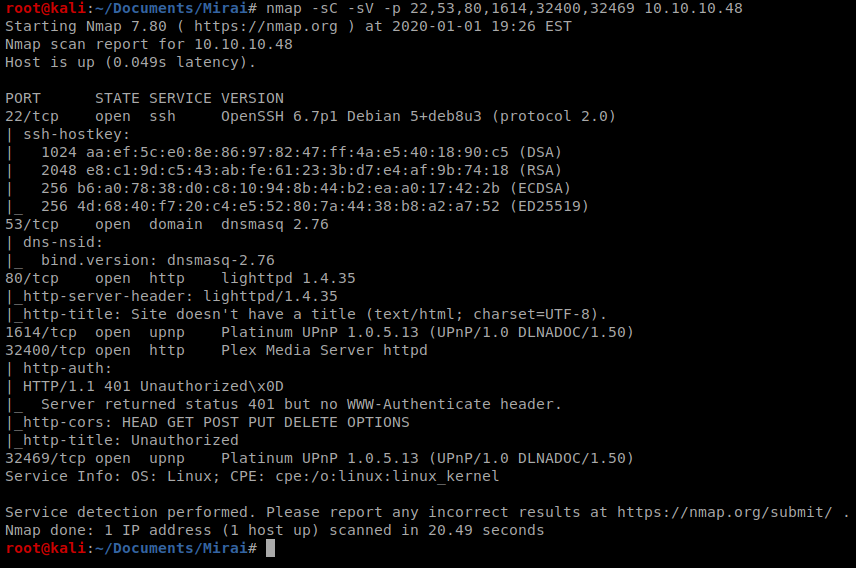
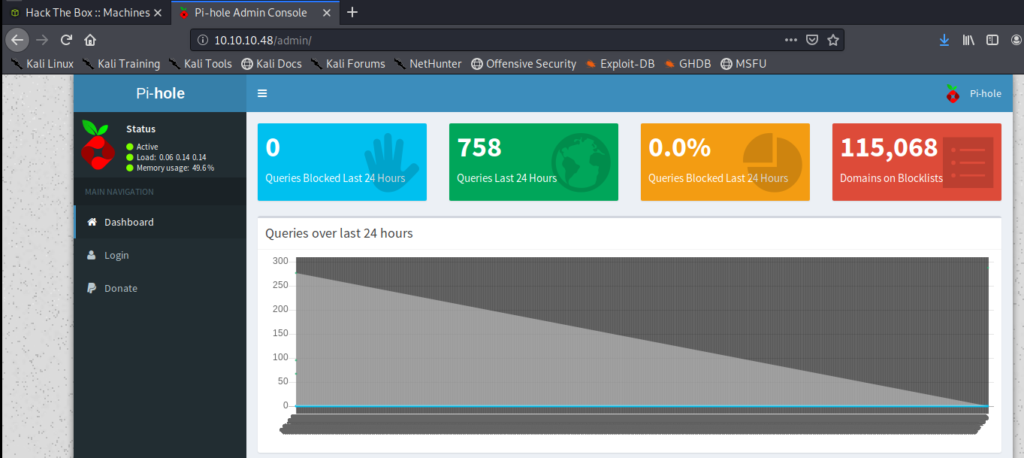
We’ll keep this information handy, but for now the most interesting thing for me is port 80, and the other HTTP stuff running on port 32400, so let’s open up our browser and navigate to the website.
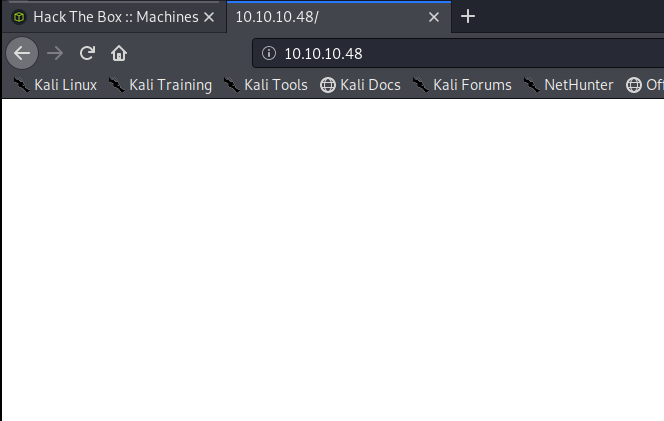
So a page comes up, but there’s nothing on it. So let’s enumerate that with gobuster
Enumerating HTTP
We’ll start with a basic enumeration using gobuster: gobuster dir -u http://10.10.10.48 -w /usr/share/wordlists/dirbuster/directory-list-2.3-medium.txt
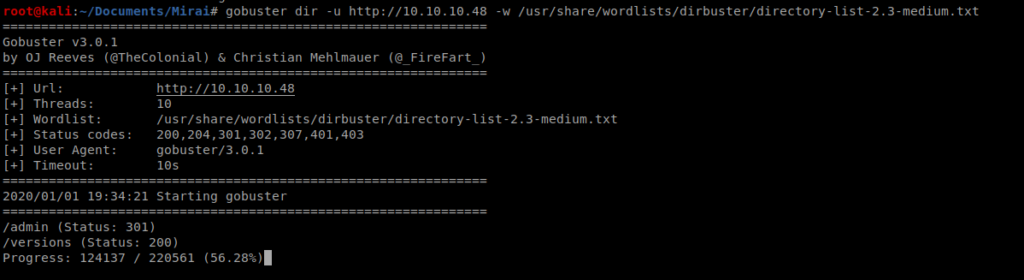
The scan will take a while to go, but within a few moments we see that the /admin directory is available, so let’s navigate there while the scan completes.
Looks like we’re at a page for Pi-hole
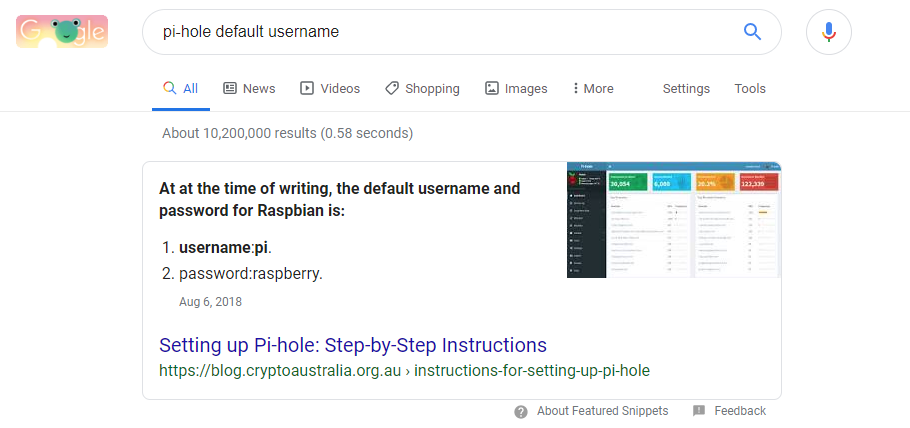
Having no idea what Pi-hole is I Googled the default username and password for Pi-hole and came right up with this:
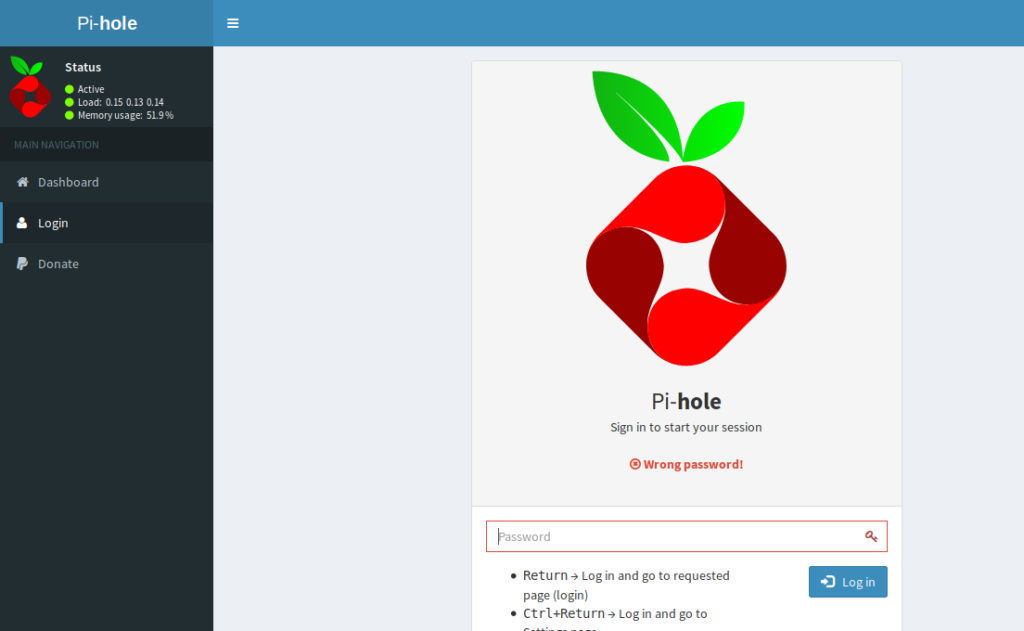
Clicking on the Login button from the Pi-hole page, when I enter raspberry as the password I get a failed login attempt.
Let’s try another way to see if our credentials work, Medusa.
Medusa
Medusa is a tool that can be used to brute-force logins. But we don’t want to brute force anything (yet) we just want to see if the credentials we have work. My instance of Kali didn’t have it, so I had to install it with sudo apt-get install medusa
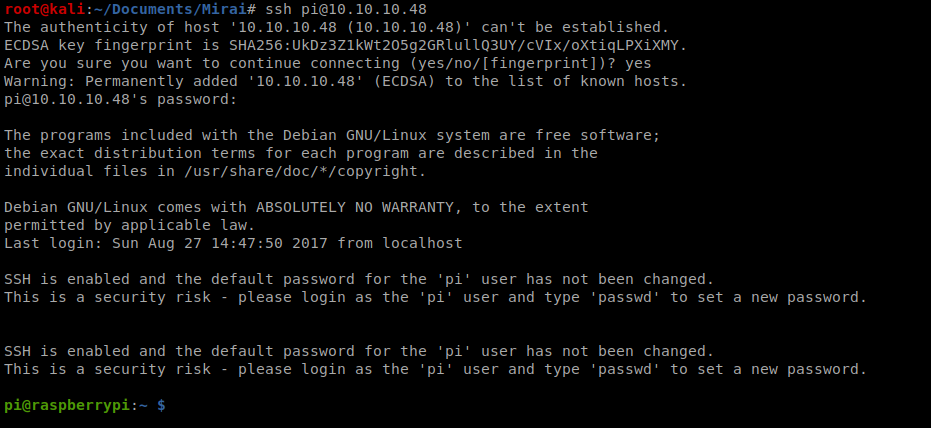
You can type medusa to see how to specify the options, and in this instance we’ll need -h for hostname, -u for username, -p for password, and -M ssh to specify the SSH module we’ll try to log in with. Thus, our command looks like this: medusa -h 10.10.10.48 -u pi -p raspberry -M ssh

Looks like we’re good to go, so let’s ssh into the box and log in: ssh pi@10.10.10.48
So, let’s start by seeing who we’re logged in as, and if we can do sudo with anything.

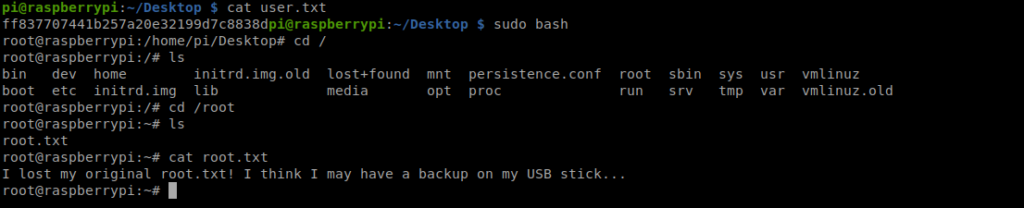
Cool! Let’s navigate to the desktop and see if we can get the user flag:

Getting Root
We can type sudo bash to get root access and then move to the /root directory and look for the root flag.
So, now we need to look for a USB drive location. Let’s start by moving to /mnt, and then /media
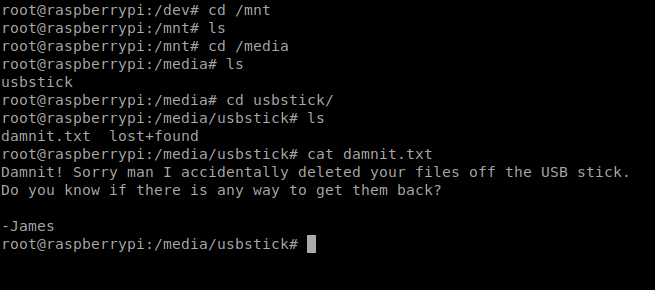
Well, roger that. Let’s move to /dev and look at the sbd file.

From here, you can either use strings or cat to look at the sbd file and get the root flag.
naturally like your web-site however you have to test the spelling on quite a few of your posts. A number of them are rife with spelling issues and I find it very bothersome to inform the truth however I will surely come again again.
My partner and I absolutely love your blog and find almost all of your post’s to be just what I’m looking for. Do you offer guest writers to write content for you? I wouldn’t mind producing a post or elaborating on a number of the subjects you write in relation to here. Again, awesome web site!
46sp8m
lqfg38
Great line up. We will be linking to this great article on our site. Keep up the good writing.
Hiya, I’m really glad I’ve found this info. Nowadays bloggers publish just about gossips and internet and this is actually annoying. A good website with interesting content, this is what I need. Thank you for keeping this site, I will be visiting it. Do you do newsletters? Cant find it.
I have recently started a blog, the information you offer on this site has helped me tremendously. Thank you for all of your time & work. “It is a great thing to know our vices.” by Cicero.
A lot of thanks for all your valuable effort on this blog. My mother takes pleasure in setting aside time for internet research and it’s really easy to understand why. Most people hear all regarding the powerful medium you produce precious things on the blog and as well improve contribution from visitors on this area so our favorite girl is without a doubt starting to learn so much. Enjoy the rest of the new year. You’re the one doing a stunning job.
There are actually numerous particulars like that to take into consideration. That could be a nice level to bring up. I offer the ideas above as general inspiration however clearly there are questions just like the one you carry up the place the most important thing will probably be working in honest good faith. I don?t know if greatest practices have emerged around issues like that, however I am certain that your job is clearly recognized as a fair game. Each boys and girls really feel the impression of only a moment’s pleasure, for the rest of their lives.
Very nice info and straight to the point. I am not sure if this is in fact the best place to ask but do you people have any thoughts on where to hire some professional writers? Thx 🙂
Some truly marvelous work on behalf of the owner of this internet site, absolutely great content material.
Este site é realmente fantástico. Sempre que acesso eu encontro coisas diferentes Você também pode acessar o nosso site e descobrir mais detalhes! Conteúdo exclusivo. Venha descobrir mais agora! 🙂
I really appreciate this post. I have been looking everywhere for this! Thank goodness I found it on Bing. You have made my day! Thank you again!
I am always thought about this, appreciate it for putting up.
Hello There. I found your weblog the use of msn. This is a very well written article. I’ll be sure to bookmark it and come back to read extra of your useful info. Thank you for the post. I’ll certainly comeback.
This is a very good tips especially to those new to blogosphere, brief and accurate information… Thanks for sharing this one. A must read article.
Have you ever considered writing an ebook or guest authoring on other sites? I have a blog based on the same topics you discuss and would love to have you share some stories/information. I know my visitors would appreciate your work. If you’re even remotely interested, feel free to send me an e-mail.
82adyd
Nice blog here! Also your web site rather a lot up fast! What host are you using? Can I get your associate link in your host? I wish my website loaded up as quickly as yours lol
Hmm it looks like your website ate my first comment (it was extremely long) so I guess I’ll just sum it up what I wrote and say, I’m thoroughly enjoying your blog. I as well am an aspiring blog blogger but I’m still new to the whole thing. Do you have any recommendations for novice blog writers? I’d certainly appreciate it.
I think this internet site holds some rattling fantastic information for everyone : D.
What i do not realize is in reality how you are no longer really a lot more neatly-preferred than you may be right now. You are so intelligent. You know therefore significantly in the case of this subject, produced me individually believe it from a lot of varied angles. Its like women and men don’t seem to be interested until it¦s something to accomplish with Girl gaga! Your own stuffs great. Always maintain it up!
I’ve been absent for a while, but now I remember why I used to love this web site. Thanks , I will try and check back more often. How frequently you update your website?
Thanks for sharing excellent informations. Your web site is so cool. I’m impressed by the details that you?¦ve on this blog. It reveals how nicely you perceive this subject. Bookmarked this web page, will come back for extra articles. You, my friend, ROCK! I found just the information I already searched all over the place and simply could not come across. What a perfect website.
I like this internet site because so much utile material on here : D.
Wow! Thank you! I constantly wanted to write on my blog something like that. Can I take a portion of your post to my site?
After all, what a great site and informative posts, I will upload inbound link – bookmark this web site? Regards, Reader.
Hi , I do believe this is an excellent blog. I stumbled upon it on Yahoo , i will come back once again. Money and freedom is the best way to change, may you be rich and help other people.
I like this web blog its a master peace ! Glad I found this on google .
I love the efforts you have put in this, appreciate it for all the great blog posts.
Thanks for another magnificent article. Where else could anybody get that kind of information in such an ideal way of writing? I’ve a presentation next week, and I’m on the look for such information.
Hello. excellent job. I did not imagine this. This is a fantastic story. Thanks!
Wow! Thank you! I constantly wanted to write on my website something like that. Can I take a part of your post to my website?
So finden Sie in Sekundenschnelle das passende Spiel und
ersparen sich die lästige Suche nach attraktiven Optionen. Genaue Informationen zu den detaillierten Bonusbedingungen finden Sie auf unserer Website.
Das Paket, welches einen maximalen Bonus von 1.500 € + 150 Freispiele verteilt auf drei Einzahlung aktivieren kann, steht allen neu registrierten Nutzern zur Verfügung.
Im Anschluss können Sie bei Ihrer ersten Einzahlung vom
Willkommensbonus im Vegas Casino profitieren.
Neukunden erhalten 50 No Deposit Freispiele
für den Spielautomaten Dead or Alive 2. Zusätzlich zu den Slots und Jackpot-Spielen bietet Vulkan Vegas Casino auch eine Auswahl an Tischspielen. Vulkan Vegas Casino bietet eine große Auswahl an Casinospielen, darunter auch Starburst.
Jetzt können Nutzer von mobilen Geräten wie Samsung, Huawei, Xiaomi, LG, Sony, Motorola etc.
die Spiele des Vulkan Vegas Casinos online spielen. Für Spieler, die gerne unterwegs spielen, bietet das Casino eine beeindruckende mobile Plattform Vulkan Vega bietet eine aufregende Mischung aus traditionellen und modernen Casinospielen, die sowohl Neulinge als auch erfahrene Spieler ansprechen. Ja, Vulkan Vegas
bietet einen Bonus ohne Einzahlung in Höhe von 50 Freispielen für ausgewählte
Spielautomaten.
My brother recommended I might like this website. He was totally right. This post truly made my day. You cann’t imagine just how much time I had spent for this info! Thanks!
The next time I read a blog, I hope that it doesnt disappoint me as much as this one. I mean, I know it was my choice to read, but I actually thought youd have something interesting to say. All I hear is a bunch of whining about something that you could fix if you werent too busy looking for attention.
You have brought up a very great details, appreciate it for the post.
With havin so much content do you ever run into any issues of plagorism or copyright infringement? My site has a lot of unique content I’ve either written myself or outsourced but it looks like a lot of it is popping it up all over the web without my authorization. Do you know any techniques to help protect against content from being stolen? I’d definitely appreciate it.
anabolic steroids addictive
References:
sundaynews.info
shokawah casino
References:
lebkon.com
kewadin casino sault ste marie
References:
https://nkyeremunews.com
References:
Hollywood casinos
References:
https://winterfriend.com//?bmode=view&idx=150217906
**nervecalm**
NerveCalm is a high-quality nutritional supplement crafted to promote nerve wellness, ease chronic discomfort, and boost everyday vitality.
This article feels both relevant and considered, which is a combination I always appreciate. Thankful you wrote it, and thankful you shared it here.
ラブドール リアル 顧客産業施設ラブドール写真モンロー[別の頭] -158cm | 5’2 “-Kカップ-6YEDOLLS
References:
Steroid cycle for sale
References:
https://stackoverflow.qastan.be/?qa=user/nephewdanger1
References:
Binions casino
References:
https://thefreeadforum.top/index.php?page=user&action=pub_profile&id=923998
I love your blog.. very nice colors & theme. Did you create this website yourself? Plz reply back as I’m looking to create my own blog and would like to know wheere u got this from. thanks
References:
Quebec montreal
References:
https://stackoverflow.qastan.be/?qa=user/egyptqueen3
References:
Lucky nugget mobile casino
References:
https://controlc.com/8358780a
References:
Dbol hair loss
References:
https://video.silverwolfstudios.com/@finleyv1201680?page=about
References:
Dianabol for beginners
References:
https://gitea.primecontrols-dev.com/daniellaknorr0/daniella2016/wiki/Anavar-vs-Dianabol%3A-Which-is-Better%3F
sqyjvk
References:
Crazy mass supplements reviews
References:
http://117.72.61.28:5418/mauralucia808
References:
Anavar steroids for sale
References:
http://git.modelhub.org.cn:980/mathewwoolls12
Greetings! I know this is kind of off topic but
I was wondering if you knew where I could find a captcha plugin for my comment form?
I’m using the same blog platform as yours and I’m having
problems finding one? Thanks a lot!
References:
https://moxymuse.com/members/collarjar0/activity/119431/
Your style is really unique in comparison to other people I’ve read stuff from.
Thanks for posting when you’ve got the opportunity, Guess I’ll
just book mark this web site.
References:
https://king-bookmark.stream/story.php?title=instant-casino-test-2026-spiele-boni-zahlungsmethoden
References:
Instant Casino Spiele
References:
https://lindhardt-frazier-3.technetbloggers.de/beste-online-spielothek-75-freispiele-ab-1-einzahlung-100-legal-1774630518
References:
Instant Casino Treueprogramm
References:
http://volleypedia-org.50and3.com/index.php?qa=user&qa_1=johnstamp47
References:
Instant Casino Bonus ohne Einzahlung
References:
https://platform.joinus4health.eu/forums/users/sisterpillow0/
References:
Gewinne bei Instant Casino auszahlen
References:
http://semdinlitesisat.eskisehirgocukduzeltme.com/user/egyptpush4/
References:
River rock casino vancouver
References:
https://linkvault.win/story.php?title=play-top-titles-2025
References:
Belterra casino
References:
https://www.tvbattle.com/index.php?page=user&action=pub_profile&id=289062
References:
Black jack gum
References:
https://peatix.com/user/29285683/view
References:
Best muscle building steroids
References:
https://dreevoo.com/profile.php?pid=1010693
References:
Anabolic steroid abuse side effects
References:
http://okprint.kz/user/cancerquiver8/
References:
Legal steroid like supplements
References:
https://daley-gustafsson-3.blogbright.net/win-max-legal-winstrol-alternative
References:
Testosterone anabolic steroid
References:
http://pasarinko.zeroweb.kr/bbs/board.php?bo_table=notice&wr_id=9795257
do steroids increase testosterone levels
References:
http://madk-auto.ru/user/carppatio5/
bodybuilding steroids for sale
References:
https://zenwriting.net/singernapkin8/best-mens-testosterone-boosters
best mass building cycle
References:
https://noticias-sociales.top/item/602739
I got good info from your blog
legal consequences of steroids
References:
https://rfserial.online/user/dimedaniel8/
References:
Online Casino Echtgeld 10 Euro
References:
https://mozillabd.science/wiki/Beste_OnlineSpielothek_125_Freispiele_ab_1_Einzahlung_100_legal
References:
Seven cedars casino
References:
https://baby-newlife.ru/user/profile/524698
References:
Best online casino sites
References:
https://zumpadpro.zum.de/b3NuClwhRIa9BDjqmCS6GA/
References:
Trenbolone where to buy
References:
https://pads.zapf.in/s/_O7bzE0TzO
References:
Buy steroid
References:
https://md.chaosdorf.de/s/6FISwEeB9b
References:
Online Casino Echtgeld Book of Dead
References:
https://pad.stuve.uni-ulm.de/s/ndj4XLdTj
References:
Osage casino skiatook
References:
https://to-portal.com/atmlink47
gu4x75
Super-Duper blog! I am loving it!! Will be back later to read some more. I am bookmarking your feeds also.
What i do not realize is in reality how you are now not actually much more neatly-preferred than you might be right now. You’re so intelligent. You already know therefore significantly in relation to this topic, made me individually believe it from numerous various angles. Its like women and men are not fascinated unless it is one thing to accomplish with Woman gaga! Your individual stuffs great. All the time handle it up!
763m4k
References:
Jackson rancheria casino http://nenadmihajlovic.net/forum/index.php?topic=1584072.0
References:
Tahoe casinos https://gitlab.iplusus.com/bufordstump34
References:
Hollywood casino west virginia https://unitedmusicstreaming.com/luannbraley04
09oqd5
sau147
References:
Online casino deutschland https://valkenburg-casino.online-spielhallen.de/
References:
Ac online casino https://giaovienvietnam.vn/employer/fast-payments
References:
7bit casino registrieren https://betmatch-casino.online-spielhallen.de/
References:
Blackjack online deutschland https://casino-10-euro-bonus-ohne-einzahlung.online-spielhallen.de/
References:
Cashman Casino Bonus Code https://bonus-bet-casino.online-spielhallen.de/